


SUUNTOブログ

Four ways to follow your recovery with Suunto
Recovery is a crucial component of training that allows the body to repair and adapt to the stress of exercise. During recovery, the body replenishes energy stores, repairs damaged muscle tissue and strengthens muscles and connective tissue to better handle future physical demands. Without adequate recovery, the body may become overtrained, leading to fatigue, decreased performance, and increased risk of injury.
Suunto GPS watches and Suunto app’s Training Zone collect and help you analyze your recovery based on indicators like heart rate variability, sleep, training stress balance and subjective feeling after workouts.
Monitor recovery with heart rate variability
Heart Rate Variability (HRV) measures the variation in time between consecutive heartbeats, providing valuable insights into the balance of the autonomic nervous system and overall health. HRV is not just about heart rate but the fluctuations in the intervals between beats.
A higher HRV generally indicates a more adaptable autonomic nervous system, reflecting the body's ability to handle stress effectively. Various factors, including intense training, mental stress, or illness, can influence HRV readings. Suunto Race, Suunto Vertical, and Suunto 9 Peak Pro offer HRV tracking during sleep, providing a reliable and easy way to gather comparable data.
Interpreting HRV data is highly individual, and higher values usually signify better autonomic balance within an individual's normal range. Suunto defines an individual's normal range over 60 days, comparing the rolling seven-day average with that baseline.
Consistently low HRV values may indicate a compromised recovery state due to factors like chronic stress, inadequate sleep, overtraining, or underlying health issues. After intense efforts or races, it's normal for HRV to temporarily drop below the normal range. Abnormally high HRV, indicated by a yellow or red warning in the app, may suggest excessive recovery (parasympathetic nervous system activity), often in response to accumulated stress.
Learn more about HRV tracking with Suunto
Understand how much sleep you are getting
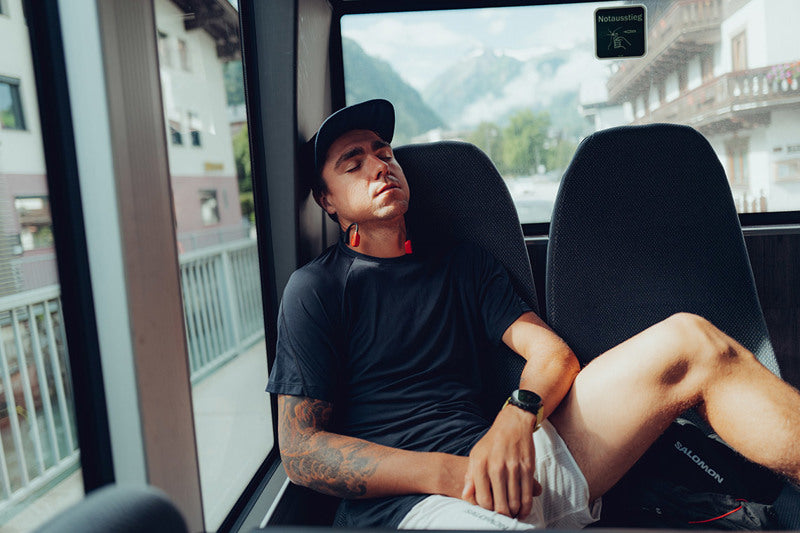
Sleep plays a crucial role in recovery by allowing the body to repair and regenerate tissues that have been damaged during exercise. During sleep, the body releases growth hormone, which helps build and repair muscles, and the immune system releases cytokines, which fight off inflammation and infection. Additionally, sleep helps regulate hormones that affect appetite and metabolism, which can impact weight management and overall health.
Lack of sleep can lead to decreased performance, increased risk of injury, and other negative health consequences. To optimize recovery, athletes should aim for at least 7-9 hours of quality sleep per night and establish a regular sleep routine that includes a consistent bedtime and wake-up time.
To track sleep, you need to enable sleep tracking in the watch settings and wear the watch during sleep. In the settings, you also define your bedtime. Your watch uses that period to determine when you are sleeping (during your bedtime) and reports all sleep as one session. If you get up for a drink of water during the night, for example, your watch still counts any sleep after that as the same session.
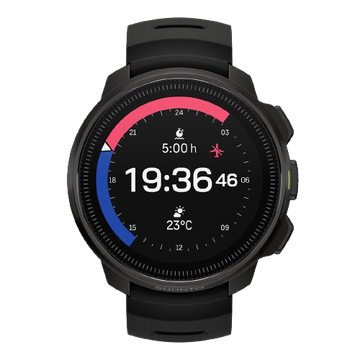
When you wake up, you are greeted with a summary of your sleep. The summary includes, for example, your average and minimum heart rate, and the total duration of your sleep, as well as the estimated time you were awake and the time you were in deep sleep.
In addition to the sleep summary, you can follow your overall sleep trend with the sleep widget on your Suunto Vertical, Suunto Race and Suunto 9 Peak Pro. When you sync your watch with the Suunto app, you will see more sleep data and trends.
Read about six ways to improve your sleep
Know the balance between your long and short-term training load
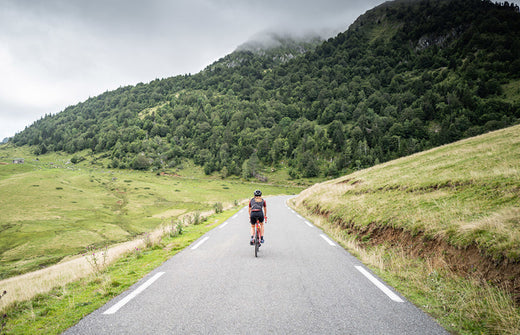
Training stress score (TSS) is a metric that quantifies the stress training puts on your body. Over time, this load adds up. This is illustrated by Acute Training Load (ACL), the weighted seven-day average of your TSS, and Chronic Training Load (CTL), the weighted 42-day average of your TSS. CTL is also called ‘fitness’ as it indicates how much – or how hard – you’ve been training.
When you compare these two cumulative training stress metrics, you get Training stress balance (TSB). If your acute load is smaller than the chronic load, your Training stress balance is positive: your training recently has been lighter than over the past several weeks.
A positive TSB indicates that you are adequately recovered and may be ready to increase your training load, while a negative TSB suggests that you may need more rest or recovery time before increasing your workload. By using TSB as a guide, you can optimize your training and reduce the risk of injury or burnout.
Learn more about Training stress score
Trust your subjective feelings as well
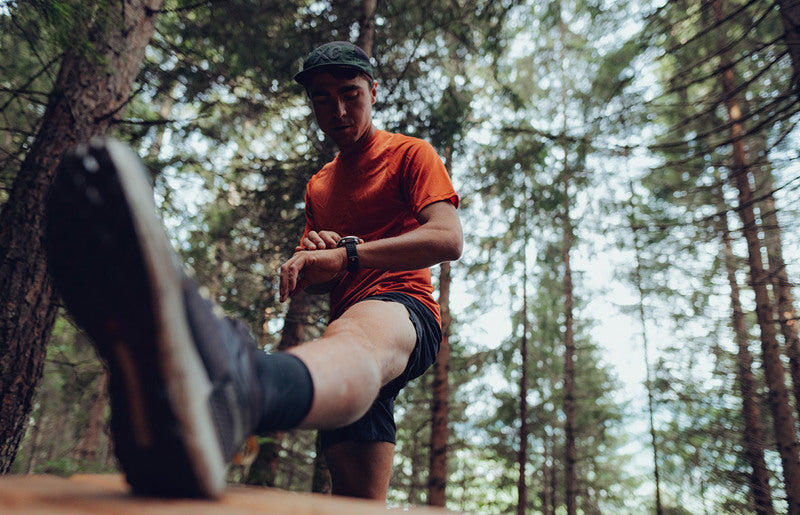
Monitoring feelings after an activity can provide valuable insight into your overall recovery status. If your feelings after exercise start to trend downward, something is not right. You may be pushing too hard, not recovering well enough or might be getting sick. Consider taking a break or doing something different for a change
You can add your feeling on your watch when saving an activity. You can then view the feeling trend in the Suunto app’s Training zone. The app shows your subjective, after-workout feeling for both the current week and the previous six weeks.
Learn who is having the most fun exercising (based on data)
Read more
Follow your progress with Suunto
Understand and manage your training load with Suunto
Manage your training with Suunto app's Training Zone


Suunto 9 Peak Pro keeps evolving
Follow the latest updates and developments of your Suunto 9 Peak Pro GPS watch and enjoy it to its full potential.
On this page you can see in a timeline view how your Suunto 9 Peak Pro has evolved since it was launched in October 2022.
To always have the latest watch software, we recommend you enable automatic, over the air software updates in the watch settings. Also, make sure you are using the latest version of Suunto app for iOS or for Android.
You can find dozens of SuuntoPlus sports apps in Suunto mobile app’s SuuntoPlus Store and the ever-growing list of Suunto compatible partner services is here.
March 2024
The new Vertical Week sports app was published to SuuntoPlus Store. The SuuntoPlus Vertical Week sports app can be used to track the total elevation gain of multiple workouts during the week. Learn more about Suunto World Vertical Week 2024.
Pace your mountain races with SuuntoPlus Vertical Race sports app. The Vertical Race sports app is designed to be used on vertical races. Set you race distance, vertical meters and goal time and follow the pace data live on your Suunto.
Follow and improve your running technique with Stryd SuuntoPlus sports app. The Stryd sensor provides data such as ground contact time, vertical oscillation, leg stiffness and impact loading rate. Read more about improving your running technique with Suunto and Stryd here
For ultrarunners, there is now an Ultrarun& walk SuuntoPlus sports app that will track how much one runs, walks, or stays still on the race. The app helps you to pace & analyse long efforts. This sports app has been built by trailrunner Alessio Sclocco who is also part of Suunto fieldtest community.
A software update for Suunto Vertical, Suunto Race and Suunto 9 Peak Pro was released. The update delivered three new watch faces, better support for emojis in mobile notifications and a pause reminder.
The update also provided navigation enhancements with improved high contrast map style for use with always on display and a new ruler tool to measure distances on map to nearby locations.
Suunto app was updated with performance improvements to data sync between watch and Suunto app and a user interface change to how workout summary values are shown in the app.
New Suunto connected partner services include Base de Vitesse aimed for surfers and sailors, Be Number one sport for competing in your sports, MoveEffect aimed for corporate health and Mia Health to engage in your fitness journey.
You can find the latest list of partners from here
February 2024
New Winter maps map layer with downhill and cross-country skiing tracks came available in Suunto app to help you find the best places to ski.
Waypoint import was improved for GPX route import with better waypoint compatibility with route planning services.
Training Zone Summary now shows swim pace, average power and normalised power.
Performance improvements to data sync between watch and Suunto app
Suuntoplus Power Zones and Pace Zones sports apps were published for runners and riders. Now you can follow the cumulative time in each zone and see which zone you currently are working out.
Suunto is now compatible Xioami MiFitness. Xiaomi users can now connect their devices with Suunto via Mifitness app. This gives the possibility to use Suunto app tools as well as get conntected with Suunto ecosystem. Read more here.
January 2024
Race with the new SuuntoPlus Race Pacer sport app. Set your target distance and time with even or negative splits.
Now you can follow your Runna training plans in your Suunto watch
FIT-UP app is now suunto compatible, designed for fitness, nutrition and mindfulness
Suunto app calendar view now includes date numbers, offering a clearer overview of your training schedule.
New interactivity in Suunto app route planning: touch the altitude profile chart to see corresponding locations on the map.
Sleep analysis in Suunto app has been upgraded to support multiple naps within a single day, giving you a more comprehensive understanding of your rest patterns.
Switching between the data table and graph in Suunto app’s Training Zone Summary is now more intuitive and user-friendly.
Suunto app now remembers your last used settings for feed filtering (All/Me/Following) and your preferred Training Zone tab and graph types, making your experience more personalized and efficient.
In the Training Zone Summary, selecting categories like All running sports, All cycling sports, and All swimming sports is now simpler. You can choose these categories without having to select each sport individually.
We've fixed formatting issues in SuuntoPlus data, ensuring more accurate and readable information.
We have also made several other bug fixes and performance improvements to ensure a smoother and more reliable experience.
December 2023
Better Training analysis
Suunto app’s Lap Table now features color-coded columns. Variations from the median lap values are highlighted in shades of red and blue. This color-coding makes it easier to spot laps where your performance was significantly higher or lower than median.
We’ve introduced zone graphs for Pace and Power in the workout analysis. These graphs are complemented by a distribution view of pace and power zones, providing a more intuitive understanding of your workout intensities.
With Training Zone Summary you can now visualize your selected data through a graph. Summary also includes filters for both automatically and manually tagged workouts. For added convenience in filtering, options such as “All running” or “All cycling” are available, enabling you to select all activities under these categories effortlessly.
Plan your adventures with Suunto App
Suunto App Route planning has received new features: the ability to reverse planned routes and the addition of “Back to Start” and “Backtrack” options, enhancing your planning capabilities.
User experience enhanced.
New defaults Sport apps preinstalled to sport modes. When you, as an example, start your tennis workout, it already has tennis sport app, and weight training has Gym Timer.
Suunto App has now streamlined the recovery features by combining the Recovery and Sleep tabs into a single, unified Recovery tab, simplifying access to your recovery and sleep data
Celebrate the end of the year with your achievements with Annual report in Suunto app and share the updated yearly summary also in story format (9:16).
Get more out of your sports with new partners
RaceID miles partner app gets Suunto compatible
Runology running technique video analysis gets Suunto compatible
Runredeem is now Suunto compatible with their loyalty program customers
Surlo app for sailing and other water sports gets Suunto connected
Get more out of your Indoor cycling training with Suunto compatible ICTtrainer
Ride with BMC companion app which is now Suunto compatible
November 2023
Training, recovery and progress come to your watch, including Heart Rate Variability (HRV)
Follow training load and volume with training widgets in your watch.
Follow recovery status from training with TSB and feeling in your watch.
Measure Heart rate variability (HRV) to optimize your recovery.
Follow your progress with chronic training load (CTL) widget.
Get Suunto Coach comments in training widgets.
Exercise with new rope skipping activity type.
Read more:How to use HRV to optimize your recovery How to follow your progress with Suunto Training with TSS Follow Training load Must-read articles that guide you into Suunto’s world of training
The watch now fits better to your daily life
New UI structure with mini widgets
Customization of the widgets using Suunto app: Select the widgets you want to have on your watch and change the order they are shown.
Improved the watch user interface speed
‘Find my phone’ feature on your watch
Do not disturb mode
New media controls
Multiple alarms
New connections
KML file import in Suunto app
Suunto Vitality compatibility now includes AIA Malaysia
October 2023
Better Training analysis
Follow the training impacts of workouts in Suunto app
SuuntoPlus Vertical race segment guide available in SuuntoPlus Store for Malaysian Suunto fans.
Enhanced user experience
The Suunto App home screen can now be filtered with all, me or following.
New, colourful Suunto accessory straps
September 2023
New tools to understand you training impact and intensity
Training summary: A tool to analyse & find your key workouts in Suunto app. Go to Training Zone tab and check the Summary.
Movement: Track your movements with wrist acceleration to follow the overall workout intensity. Gets you the insights of rapid efforts.
Heart rate zones: Follow the cumulative time spent on different heart rate zones on one screen. Great to keep the intensity on target.
Fused zones: Shows which intensity zone you are currently in, looking at different intensity metrics and based on that evaluating the best matching as a result.
Peak Pace: Track the peak pace efforts on your run.
Peak power: Track the hard sprints and efforts on your wrist.
Plan better
Interval planner: Use the Interval planner in Suunto app now with all activity types.
Prepare for optimal race
Race nutrition: Plan your race nutrition and get reminders right on your Suunto.
Race companion: A simple, customizable tool that shows you the key information during a race.
Backyard ultra: Race companion for Backyard Ultra racers. Follow each 6.7km loop and keep track of the laps – and when to go next!
Get most out of your sport
Gym Timer: Follow the recovery time between the sets. Adjust as needed and then go again.
Score – Golf: Count each strike and measure the distance of the drives with the Golf Score sport app.
Score – Tennis: Keep count of the game score on your wrist.
Score – Soccer: Keep up with the game score and get alerted with the half time.
Score – Badminton: Keep up with the badminton game score.
Score counter: Counter for any game. Play with 1–4 players and keep the results on your wrist.
Learn more: Discover dozens of SuuntoPlus sport apps for your Suunto
July 2023
New sensor compatibility
Train.red: Connect your Suunto with a Train.red sensor to follow your muscle oxygen levels. The data will also be available in after analysis.
June 2023
Strava updates
In addition to syncing your activities to Strava and using Strava routes with your Suunto watch, you can now also race Strava Live Segments with your Suunto. Learn how to chase Strava segments with your Suunto
Get more out of your sports
Voice guidance gives you stats while running
Surfer: Count each wave surfed automatically. Each wave is also stored as laps in your surf session.
Running economy: Follow the running economy with heartrate vs. pace. Running economy is illustrated with a beats/km value.
Shoe Tester: Follow test protocol to test different shoes to see which are the fastest for you.
Disc Golf: Keep track of each disc golf throw and see the distance thrown.
Get ready for the outdoors
Weather forecast sports app: Keep the forecasted weather on our wrist while doing the long ride or hike.
ICE: Store your emergency information on your wrist. If you don’t move the watch, it will start an alert to draw attention to the info.
Relief Maps: Gets Suunto connected with 3d maps and live data sharing for outdoor enthusiast.
Join challenges with Uprace App
Race in Virtual Races Tackitup app
Suunto Weekend Adventure collections published in Komoot
SuuntoPlus experience gets better
Use two sport apps simultaneously during an activity.
Add up to 100 sports ready to go in your watch.
The sport modes now remember the previously used sport apps.
Sport apps can be selected also during an activity, not only before the start.
Sport apps can have settings that can be modified in Suunto app.
New tools for daily life
Flashlight function to help in the darkness.
Weather forecast widget gives you the forecasted weather.
May 2023
Train, recover and progress with Suunto app’s Training Zone
Training overview with weekly training load, volume and intensity distribution
Training impacts for cardio & muscle with training model
Recovery with Training stress balance, feeling and sleep stats
Progress with Chronic training load (CTL)
Read more: Manage your training with Suunto app’s Training zone
Get feedback from Suunto coach in Suunto App
New AI-based Suunto Coach in Suunto app. Learn more about the coach.
April 2023
Connect with new partner services
ALPI Training: Endurance sports application offering individualized training programs based on AI
Adae: A French workout community
SaanSook: A health application, that will assist you in living a holistically healthy life by tracking your eating, exercising, sleeping, and relaxing activities.
Sunday Fitness: The ultimate social fitness network for finding local exercise buddies.
MyCols: A free app with all the information of your favourite cycle climbs, hills, or cols worldwide. Discover new climbs around you and start collecting them to earn jerseys.
February 2023
New training tools to push you!
New SuuntoPlus sport apps to help you get most out of your next workout:
Hill repeats: Get live results from each hill repeat with manually controlled efforts.
Manual intervals: The manual interval sport app gives you a simple tool to follow your interval session on the fly.
Intervals for ride: Control your intervals with cycling power. See each the results of each rep during recovery and keep track of your rep volume.
Bleep test: Bleep test – or Beep test – is the most common fitness test used in the world especially popular in team sports to test your current fitness.
Swim timer: Swim timer is designed to provide swimmers with a better understanding of their interval sessions showing interval counts, rest time etc.
Race season is coming! Get most out of your race with these new sport apps for your Suunto watch:
Half Marathon: Half marathon estimator gives you an estimated finishing time based on your current pace, duration done and remaining distance.
Marathon: Marathon estimator gives you an estimated finishing time based on your current pace, duration done and remaining distance.
Ultra-race Time: When preparing for a long ultra race, it is motivating to see how this pace equals to the potential race time.
Duathlon: Duathlon sport app is designed to automatically switch between run and ride views in hectic race scenarios to give you the right data.
SwimRun: The swim run sport app gives you key stats for your swimrun race with automatic transitions from run to swim and back as many times as needed.
Sail Race: Enables you to synchronize your start time to the official start time of the race to get a countdown on your watch.
Enjoy the outdoors! These SuuntoPlus sport apps help you to get most out of your outdoor experience.
Sun: Provides you with information about the sunrise, sunset as well as time for dusk and dawn.
Moon: Provides you with information about the moon phases.
Co2e: Every step counts. Now you can follow how much Co2 you are saving by traveling by bike or on foot.
Last km: In trail running, the pace can change drastically between uphills and downhills in, the last KM/mile app give you the live rolling kilometer/mile pace to follow.
Big numbers: Shows you the key activity data using a larger font to make it more visible.


Suunto Vertical keeps evolving
Follow the latest updates and developments of your Suunto Vertical GPS watch and enjoy it to its full potential.
On this page you can see in a timeline view how your Suunto Vertical has evolved since it was launched in June 2023.
To always have the latest watch software, we recommend you enable automatic, over the air software updates in the watch settings. Also, make sure you are using the latest version of Suunto app for iOS or for Android.
You can find dozens of SuuntoPlus sports apps in Suunto mobile app’s SuuntoPlus Store and the ever-growing list of Suunto compatible partner services is here.
March 2024
The new Vertical Week sports app was published to SuuntoPlus Store. The SuuntoPlus Vertical Week sports app can be used to track the total elevation gain of multiple workouts during the week. Learn more about Suunto World Vertical Week 2024.
Pace your mountain races with SuuntoPlus Vertical Race sports app. The Vertical Race sports app is designed to be used on vertical races. Set you race distance, vertical meters and goal time and follow the pace data live on your Suunto.
Follow and improve your running technique with Stryd SuuntoPlus sports app. The Stryd sensor provides data such as ground contact time, vertical oscillation, leg stiffness and impact loading rate. Read more about improving your running technique with Suunto and Stryd here
For ultrarunners, there is now an Ultrarun& walk SuuntoPlus sports app that will track how much one runs, walks, or stays still on the race. The app helps you to pace & analyse long efforts. This sports app has been built by trailrunner Alessio Sclocco who is also part of Suunto fieldtest community.
A software update for Suunto Vertical, Suunto Race and Suunto 9 Peak Pro was released. The update delivered three new watch faces, better support for emojis in mobile notifications and a pause reminder.
The update also provided navigation enhancements with improved high contrast map style for use with always on display and a new ruler tool to measure distances on map to nearby locations.
Suunto app was updated with performance improvements to data sync between watch and Suunto app and a user interface change to how workout summary values are shown in the app.
New Suunto connected partner services include Base de Vitesse aimed for surfers and sailors, Be Number one sport for competing in your sports, MoveEffect aimed for corporate health and Mia Health to engage in your fitness journey.
You can find the latest list of partners from here
February 2024
New Winter maps map layer with downhill and cross-country skiing tracks came available in Suunto app to help you find the best places to ski.
Waypoint import was improved for GPX route import with better waypoint compatibility with route planning services.
Training Zone Summary now shows swim pace, average power and normalised power.
Performance improvements to data sync between watch and Suunto app
Suuntoplus Power Zones and Pace Zones sports apps were published for runners and riders. Now you can follow the cumulative time in each zone and see which zone you currently are working out.
Suunto is now compatible Xioami MiFitness. Xiaomi users can now connect their devices with Suunto via Mifitness app. This gives the possibility to use Suunto app tools as well as get conntected with Suunto ecosystem. Read more here.
January 2024
Race with the new SuuntoPlus Race Pacer sports app. Set your target distance and time with even or negative splits.
Now you can follow your Runna training plans in your Suunto watch
FIT-UP app is now suunto compatible, designed for fitness, nutrition and mindfulness
Suunto app calendar view now includes date numbers, offering a clearer overview of your training schedule.
New interactivity in Suunto app route planning: touch the altitude profile chart to see corresponding locations on the map.
Sleep analysis in Suunto app has been upgraded to support multiple naps within a single day, giving you a more comprehensive understanding of your rest patterns.
Switching between the data table and graph in Suunto app’s Training Zone Summary is now more intuitive and user-friendly.
Suunto app now remembers your last used settings for feed filtering (All/Me/Following) and your preferred Training Zone tab and graph types, making your experience more personalized and efficient.
In the Training Zone Summary, selecting categories like All running sports, All cycling sports, and All swimming sports is now simpler. You can choose these categories without having to select each sport individually.
We've fixed formatting issues in SuuntoPlus data, ensuring more accurate and readable information.
We have also made several other bug fixes and performance improvements to ensure a smoother and more reliable experience.
December 2023
Better Training analysis
Suunto app’s Lap Table now features color-coded columns. Variations from the median lap values are highlighted in shades of red and blue. This color-coding makes it easier to spot laps where your performance was significantly higher or lower than median.
We’ve introduced zone graphs for Pace and Power in the workout analysis. These graphs are complemented by a distribution view of pace and power zones, providing a more intuitive understanding of your workout intensities.
With Training Zone Summary you can now visualize your selected data through a graph. Summary also includes filters for both automatically and manually tagged workouts. For added convenience in filtering, options such as “All running” or “All cycling” are available, enabling you to select all activities under these categories effortlessly.
Plan your adventures with Suunto App
Suunto App Route planning has received new features: the ability to reverse planned routes and the addition of “Back to Start” and “Backtrack” options, enhancing your planning capabilities.
User experience enhanced.
New defaults Sport apps preinstalled to sport modes. When you, as an example, start your tennis workout, it already has tennis sport app, and weight training has Gym Timer.
Suunto App has now streamlined the recovery features by combining the Recovery and Sleep tabs into a single, unified Recovery tab, simplifying access to your recovery and sleep data
Celebrate the end of the year with your achievements with Annual report in Suunto app and share the updated yearly summary also in story format (9:16).
Get more out of your sports with new partners
RaceID miles partner app gets Suunto compatible
Runology running technique video analysis gets Suunto compatible
Runredeem is now Suunto compatible with their loyalty program customers
Surlo app for sailing and other water sports gets Suunto connected
Get more out of your Indoor cycling training with Suunto compatible ICTtrainer
Ride with BMC companion app which is now Suunto compatible
November 2023
Training, recovery and progress come to your watch, including Heart Rate Variability (HRV)
Follow training load and volume with training widgets in your watch.
Follow recovery status from training with TSB and feeling in your watch.
Measure Heart rate variability (HRV) to optimize your recovery.
Follow your progress with chronic training load (CTL) widget.
Get Suunto Coach comments in training widgets.
Exercise with new rope skipping activity type.
Read more:
How to use HRV to optimize your recoveryHow to follow your progress with Suunto Training with TSS Follow Training load Must-read articles that guide you into Suunto’s world of training
The watch now fits better to your daily life
New UI structure with mini widgets
Customization of the widgets using Suunto app: Select the widgets you want to have on your watch and change the order they are shown.
Improved the watch user interface speed
A higher zoom level on the maps
‘Find my phone’ feature on your watch
Do not disturb mode
New media controls
Multiple alarms
New connections
KML file import in Suunto app
Suunto Vitality compatibility now includes AIA Malaysia
October 2023
Better Training analysis
Follow the training impacts of workouts in Suunto app
SuuntoPlus Vertical race segment guide available in SuuntoPlus Store for Malaysian Suunto fans.
Enhanced user experience
The Suunto App home screen can now be filtered with all, me or following.
New, colourful Suunto accessory straps
September 2023
New tools to understand you training impact and intensity
Training summary: A tool to analyse & find your key workouts in Suunto app. Go to Training Zone tab and check the Summary.
Movement: Track your movements with wrist acceleration to follow the overall workout intensity. Gets you the insights of rapid efforts.
Heart rate zones: Follow the cumulative time spent on different heart rate zones on one screen. Great to keep the intensity on target.
Fused zones: Shows which intensity zone you are currently in, looking at different intensity metrics and based on that evaluating the best matching as a result.
Peak Pace: Track the peak pace efforts on your run.
Peak power: Track the hard sprints and efforts on your wrist.
Plan better
Interval planner: Use the Interval planner in Suunto app now with all activity types.
Prepare for optimal race
Race nutrition: Plan your race nutrition and get reminders right on your Suunto.
Race companion: A simple, customizable tool that shows you the key information during a race.
Backyard ultra: Race companion for Backyard Ultra racers. Follow each 6.7km loop and keep track of the laps – and when to go next!
Get most out of your sport
Gym Timer: Follow the recovery time between the sets. Adjust as needed and then go again.
Score – Golf: Count each strike and measure the distance of the drives with the Golf Score sport app.
Score – Tennis: Keep count of the game score on your wrist.
Score – Soccer: Keep up with the game score and get alerted with the half time.
Score – Badminton: Keep up with the badminton game score.
Score counter: Counter for any game. Play with 1–4 players and keep the results on your wrist.
Learn more: Discover dozens of SuuntoPlus sport apps for your Suunto
July 2023
New sensor compatibility
Train.red: Connect your Suunto with a Train.red sensor to follow your muscle oxygen levels. The data will also be available in after analysis.
June 2023
Strava updates
In addition to syncing your activities to Strava and using Strava routes with your Suunto watch, you can now also race Strava Live Segments with your Suunto. Learn how to chase Strava segments with your Suunto
Get more out of your sports
Surfer: Count each wave surfed automatically. Each wave is also stored as laps in your surf session.
Running economy: Follow the running economy with heartrate vs. pace. Running economy is illustrated with a beats/km value.
Shoe Tester: Follow test protocol to test different shoes to see which are the fastest for you.
Disc Golf: Keep track of each disc golf throw and see the distance thrown.
Get ready for the outdoors
Weather forecast sports app: Keep the forecasted weather on our wrist while doing the long ride or hike.
ICE: Store your emergency information on your wrist. If you don’t move the watch, it will start an alert to draw attention to the info.
Relief Maps: Gets Suunto connected with 3d maps and live data sharing for outdoor enthusiast.
Join challenges with Uprace App
Race in Virtual Races Tackitup app
Suunto Weekend Adventure collections published in Komoot

How to follow your progress with Suunto
Endurance training is a long-term endeavor, and progress may not always be linear or immediately noticeable.It requires patience, persistence, and a focus on gradual improvements over time. Tracking progress over longer periods and considering trends rather than short-term fluctuations is essential.
Athletes may have varying interpretations of their progress, and subjective feelings of fatigue, effort, and perceived improvements may not always align with objective measurements.
Athletes may experience periods of plateau where progress seems to stagnate despite consistent training efforts. This can occur due to the body's adaptation to training stimuli, requiring adjustments in training variables such as intensity, volume, and variety to continue progressing. Each athlete responds uniquely to training stimuli. Some individuals may experience rapid progress, while others may require longer periods to see noticeable improvements.
Factors such as genetics, age, training history, and recovery capacity contribute to this individual variability in progress. Endurance training progress can be affected by various external factors, including work, personal life, and environmental stressors.
Four ways to measure your progress
Without objective metrics and measurements, tracking your progress in endurance training can be challenging. It is important to incorporate tools and methods to obtain quantifiable data for evaluating progress accurately.
Here are four Suunto tools that help you objectively measure your progress.
Chronic Training Load (CTL)
Chronic Training Load serves as an indicator of an athlete's fitness level, representing the accumulated training load sustained over an extended duration. You will find your CTL graph in the Suunto app Training Zone’s Progress section. Each activity adds load to the overall and impacts the chronic load. (To get reliable data, make sure your individual intensity zones are set correctly in your Suunto. Learn more here.)
A consistent engagement in high-intensity or high-volume training leads to an increase in CTL, signifying an improvement in fitness. Conversely, reducing the training load or taking breaks from training results in a decrease in CTL, indicating a decline in fitness. It is important to note that CTL is not a direct measure of fitness.
The CTL is indicating the long-term training load, which has a high correlation with fitness gains.
Chronic Training Load Ramp Rate
The Chronic Training Load Ramp Rate measures the rate at which CTL increases over time. A higher ramp rate suggests rapid fitness gains due to an increasing training volume or intensity. You can find your current CTL ramp rate in the Suunto app Trainig Zone’s overview section as well as on your Suunto Race watch as a mini widget.
However, a high ramp rate also raises the risk of overtraining or burnout if not properly managed. The ramp rate is a good tool to follow when preparing for a race or an event, while gradually increasing weekly training volume and intensity.
Determining the ideal ramp rates for Chronic Training Load (CTL) can vary depending on several factors, including an individual's training history, fitness level, goals, and ability to recover. It is important to note that ramp rates should be personalized and gradually increased to avoid excessive stress and potential overtraining.
For beginners or athletes returning from a break or an injury, it is advisable to start with conservative ramp rates. Aim for a weekly increase in CTL between 2–5 units to allow the body to adapt gradually without overwhelming stress.
Athletes with moderate training experience and consistent training can aim for slightly higher ramp rates. A weekly increase of 5 units in CTL or 15–20 in a 6-week period may be appropriate to promote progressive adaptation and performance improvements while still allowing for adequate recovery.
Experienced and highly trained athletes may tolerate higher ramp rates due to their well-developed aerobic capacity and training background.
Remember, gradual and sustainable progress is key in training. It is generally safer to err on the side of caution and slightly underestimate ramp rates rather than risk excessive stress and potential setbacks. Regular monitoring, proper recovery, and paying attention to signs of overtraining are crucial to ensure a healthy and successful training progression.
Progress Follow-up with Testing
Fitness tests are employed to measure and evaluate an individual's physical abilities and characteristics. These tests assess overall physical fitness while identifying specific strengths and weaknesses.
Suunto offers various SuuntoPlus sport apps for testing purposes, such as the Functional Threshold Power Test, Anaerobic Running Test, Cooper Test, and the Beep Test. These assessments aid in monitoring progress and informing training adjustments based on objective performance metrics. (Learn more about testing your fitness with SuuntoPlus sport apps.)
Compare Similar Efforts
Comparing similar workouts allows for the evaluation of performance changes and an understanding of current fitness levels. By performing workouts of comparable duration and intensity every week, athletes can track changes in heart rate, pace, and power.
For instance, maintaining a steady heart rate during weekly long runs while observing a progressive increase in pace signifies improved aerobic fitness. Similarly, comparing the performance in threshold tempo runs or easy morning runs provides insights into an individual's anaerobic and aerobic conditioning, respectively. It is essential to consider heart rate and pace data alongside subjective fatigue sensations and overall workout and race performance.
You can use the new summary tool in Suunto app’s Training Zone to compare efforts. For example, if you have been doing weekly long runs, it is easy to find these in the summary tool. The you can evaluate if your pace has been getting more efficient with the same intensity/heartrate.
If you want to make it easy to find the workouts you wish to compare, you can also use tags in the Suunto app. Add a specific tag to your test workouts and you can easily find them all using the app’s search functionality.
Learn more
Manage your training with Suunto app’s Training zone
Understand and manage your training load with Suunto
How to use HRV to optimize your recovery
Get feedback from the Suunto coach

23 must-read articles that guide you into Suunto’s world of training
Train
Put in the hard work, understand your training load and the different stimuli you are putting on your body.
Figure out your training zones
Key components to improve your fitness are frequency, duration and intensity. Frequency and duration are easy to understand, but training intensity is a bit more tricky. How hard is hard? And why should I care? Read on to learn about intensity zones and about defining them. Read more
Manage your training with Suunto app’s Training zone
A progressive training load with adequate recovery and ways to follow progress will lead to a successful adventure or race. The new training toolset in Suunto app’s Training zone is vast. Read on and learn what’s available. We are sure you will find your new favorite dataset to analyze your training and follow your progress. Read more
Understand and manage your training load with Suunto
Suunto app’s long-term analysis view tracks your training load and helps you stay in balance – whether that means progress, maintaining your fitness or avoiding over-training. Here are four scenarios to help you understand the graphs. Read more
Training with TSS and hrTSS
What are TSS and hrTSS and how can these training metrics help? Read more
View TSS and other power-based cycling metrics in real-time
Normalized Power, Intensity Factor and Training Stress Score are key metrics for all cyclists who use power meters in their training. You can view these metrics in real-time on Suunto Vertical, Suunto Race, Suunto 9 and Suunto 5 watches. Read more
Know your power source: the body’s three energy systems
Understanding how your energy is produced can aid training and improve your quality of life. Suunto partner PerfectPace explains your main power sources. Read more
Unlock your interval training and watch your running improve
Follow Golden Trail World Series champion, Trail Running World Champion and running coach Stian Angermund’s advice and do interval training right to get results. Read more
3 interval sessions for trail runners
Trail running world champion Stian Angermund explains three interval training drills to help you increase your speed and power. Read more
Plan your interval workouts with Suunto app
Build a workout in Suunto app and let your watch guide you through your session! Read more
8 Essential running form drills
Improve your running technique with these essential running form drills – and follow them as a SuuntoPlus Guide on your watch! Read more
Intro to distance running technique
In this article we dig deep into the details of running technique with six key areas for you to focus on. Read on to learn more! Read more
Improve your running with high-intensity hill repeats
Hill repeats build your strength and improve your speed and coordination. This article presented by TrainingPeaks coach Steven Brandes highlights the importance of high-intensity hill repeats and how to do them successfully. Read more
Boost your hill training with SuuntoPlus Climb
Hill repeats are an essential part of an outdoor athlete’s workout repertoire. To make the hard work pay off, pacing is key. The new Climb SuuntoPlus™ feature does just that: it gives you real-time insights into your effort and motivates you to keep going. Read more
Using the Track to Learn How to Properly Pace Your Run
Using the track is a great way to improve your ability to pace yourself correctly. In this article presented by TrainingPeaks coach Todd Parker introduces a workout that helps you get in touch with the right pace for you. Read more
5 reasons why endurance athletes should do high-intensity strength training
Boost your vertical speed and avoid injury by lifting heavy weights.
To improve vertical speed and endurance, high-intensity resistance training should be an essential component of your training plan, says sports scientist, coach and athlete Susi Kraft. Read more
12 high-intensity strength training exercises for endurance athletes
Follow our training video and SuuntoPlus Guide to get stronger. In this article, sports scientist, coach and ski mountaineer Susi Kraft explains and demonstrates how to perform 12 strength-building exercises correctly and safely. Read more
Is the ultimate cross-training… breathing?
Sports coaches worldwide talk about 'good fundamentals’ – you’ve got to own the basics before you can even begin to achieve mastery in a discipline. But former pro freediver Mike Maric takes that deeper than most, by addressing one of the most basic functions of life: breathing. The medically educated forensic scientist from Italy has taken what he’s learned from free diving and applied it to a multitude of other sports – with stunning success. Read more
Control your core body temperature and get better performance results
Your core body temperature can massively impact your performance. That’s why athletes pour water over themselves during races. They’re trying to cool down because they know once their core body temperature reaches a certain level, they’ll lose power and their performance will deteriorate. Like heart rate and power, core body temperature is a crucial metric for elite and recreational athletes alike. Read more
Recover
There’s no one without the other: put in the hard work and rest to rise to the next level.
Four ways to follow your recovery with Suunto
Am I able to recover from my workouts? Is my mental recovery at the same level as physical? Do I ensure recovery with a good amount of sleep? Read on to learn how Suunto can help you in your recovery! Read more
How to use HRV to optimize your recovery
Heart rate variability (HRV) is a helpful metric for endurance athletes. Read on to learn why there’s a buzz around it and how to use Suunto to track heart rate variability. Read more
Learn how sleep can make you a better runner
Sleeping well should come naturally, right? Yet many of us feel tired most of the week. A sleep doctor gives six tips to help you improve your running and overall quality of life. Read more
4 tips to recover well for your best performance
One often ignored component to keep your training steady is ensuring you are getting enough recovery time. It can seem like taking a break from running will disrupt your momentum, but oftentimes it does the exact opposite – it freshens you up and reinvigorates you. Read more
Progress
Is your fitness having an upward trend? Understanding your progress is both motivating and helps you understand if your training has a positive impact.
How to follow your progress with Suunto
The essence of training is to improve physical performance. But how do you know if you are progressing? In this article, you will learn how Suunto can help you. Read more
Test your fitness with Suunto
Here are five SuuntoPlus sports apps that will help you find the right intensity zones for your training and track your progress. Read more

HRV を使用して回復を最適化する方法
心拍数変動 (HRV) は、エンデュランススポーツのアスリートにとって有益な指標です。Suunto が話題になっている理由と、心拍数変動を追跡するための Suunto の使い方についてお読みください。
まず、心拍数変動 (HRV) とは何かを理解しておきましょう。例として、心拍数が 1 分間に 60 回の場合、各インターバルは正確に 1 秒ではありません。拍と拍の間にわずかな差があります。HRV は、連続する心拍の間隔の時間の変化を測定した値です。
HRV の興味深い点は、自律神経系のバランスを示す指標として機能し、個人の全体的な健康状態やストレスレベルに関する貴重なインサイトを与えてくれることです。一般的に、変動が多いということは、副交感神経系が調整役としての役割を果たしていることを意味します。
激しいトレーニング、精神的ストレス、インフルエンザなどの病気の有無など、さまざまな要因が HRV の測定値に影響を及ぼす可能性があります。
Suunto Race、Suunto Race S、Suunto Vertical、Suunto Ocean、Suunto 9 Peak Pro GPS ウォッチは睡眠中の HRV を追跡できます。夜間の測定は、比較可能な HRV データを収集するための信頼性の高い簡単な方法です。連続 HRV モニタリングでは、HRV を定量化するための一般的な指標である RMSSD (Root Mean Square of Successive Differences) の平均値を算出することができます。
HRV データは、ウォッチのミニウィジェットや Suuntoアプリの Training Zone でいつでも確認できます。
回復状態は、 7 日間 の平均 HRV を 通常の範囲と比較して評価されます。
HRV データの解釈
心拍数変動には個人差があります。前述のとおり、HRV の値が高いほど自律神経のバランスは良好であることが一般的ですが、その評価は常に個人の正常範囲内で行う必要があります。
Suunto では、60 日間の正常範囲を定義し、その基準値と 7 日間の平均値を比較します。正常範囲を定義するためには、60 日間に最低 14 回の測定を行う必要があります。7 日間平均では、最低 3 回の測定が必要です。そのため、Suunto で初めて HRV を測定する場合、最初の晩でも HRV データが得られますが、データを収集すればするほど、データはより明確になります。
長期的な数値と短期的な傾向を比較することで、身体にかかる負荷やストレスを把握することができます。
HRV の値が常に正常範囲を下回っている場合は、回復状態が低下している証拠です。これは、慢性的なストレス、睡眠不足、オーバートレーニング、または基礎的な健康状態によって引き起こされる可能性があります。
非常にハードな努力やレースの後、HRV が 1 日か 2 日、正常範囲を下回るのは普通のことです。
HRV が 1 日または数日以内に異常に上昇した (一定の標準偏差を超える) 場合、アプリは黄色または赤色で、異常な量の回復 (副交感神経の活動) が起こっている可能性が高いことを示します。これは多くの場合、蓄積されたストレスに反応するものです。
Suunto アプリは、 HRV の回復状態をバー表示で視覚的に表し、 回復に関するインサイトを提供します。
Suunto による日常トレーニングでの HRV の使用方法
Suunto は、一晩中測定して HRV データを取得します。HRV 測定を行うには、睡眠中にウォッチを装着し、睡眠追跡機能が有効になっていることを確認する必要があります。
最新のデータを表示するには、ウォッチと Suuntoアプリを定期的に同期します。
HRV 測定値をトレーニング負荷と比較します。HRV 値とワークアウトの運動強度や量との間にパターンや関係があるかどうかを調べます。これは、身体がさまざまなトレーニング刺激にどのように反応するかを特定するのに役立ちます。
HRV 値と安静時心拍数を比較します。一般的に、安静時心拍数が低く、心拍数変動が大きいことは、十分な回復の良い指標となります。
HRV の測定値が基準値から低下したり、大きく逸脱したりした場合は、生理的ストレスのレベルが高いか、回復が不十分であることを示唆している可能性があります。十分な回復ができるように、ワークアウトの運動強度や量を減らすなど、トレーニング計画を変更することを検討してください。
HRV の値が休養の必要性を示している場合には、HRV を目安にして、定期的な回復日を設定したり、軽いトレーニングセッションを行ったりすることができます。
HRV には個人差があるため、自分自身のベースラインとトレーニングに対する反応を把握することが重要です。HRV と同時に、トレーニングストレスバランス、睡眠量、感想の変化など、回復状態に影響を与える他の要因にも注目することが重要です。
心拍数変動測定は、 Suunto Vertical、 Suunto Race 、 Suunto Race S、 Suunto Ocean 、Suunto 9 Peak Pro GPS ウォッチで利用できます。


