




SUUNTOブログ

心拍ゾーンの計算・設定方法|Suuntoウォッチで強度管理を始める基本
ランニングやサイクリングでトレーニングを続けていると、「今日はどれくらいの強度で走ればいいのか」「イージーランのつもりなのに、実は頑張りすぎていないか」と感じることがあります。
トレーニングを改善するための基本は、頻度、時間、そして強度です。走る回数や時間はわかりやすい一方で、強度は少し判断しにくいものです。
その強度を把握するために役立つのが、心拍ゾーンです。
心拍ゾーンを設定しておくと、楽に走る日、持久力を高める日、しっかり負荷をかける日を分けやすくなります。Suuntoウォッチでは、心拍数、ペース、パワーをもとにした強度ゾーンを使って、トレーニング中の強度を確認できます。
この記事では、心拍ゾーンの基本、計算方法、ゾーン1〜5の役割、Suuntoウォッチでの設定方法、慣れてきた人向けのフィールドテストについて解説します。
心拍ゾーンとは?
心拍ゾーンとは、運動中の心拍数を強度別に分けたものです。
一般的には、ゾーン1からゾーン5までの5段階で表します。数字が大きくなるほど運動強度は高くなり、長時間維持することが難しくなります。
Suuntoの元記事でも、強度が変わると身体への負荷や得られるトレーニング効果が変わるため、自分のゾーンを知ることが大切だと説明されています。
簡単にまとめると、次のようになります。
心拍ゾーン
強度の目安
主な目的
ゾーン1
とても楽
回復、ウォームアップ、クールダウン
ゾーン2
楽に続けられる
持久力の土台づくり、ロング走
ゾーン3
ややきつい
テンポ走、一定ペースの維持
ゾーン4
きつい
高強度インターバル、閾値付近の練習
ゾーン5
非常にきつい
VO2max、短時間の最大努力
心拍ゾーンを使う目的は、毎回きつく走ることではありません。
むしろ、楽に走るべき日は楽に、追い込む日はしっかり強度を上げるための目安として使います。
心拍ゾーンの基本的な意味や、ゾーン1〜5をどのようにトレーニングで使い分けるかを先に知りたい方は、こちらの記事も参考にしてみてください。
▶︎関連記事:「心拍ゾーンとは?トレーニング強度を使い分けて持久力を高める方法」
本記事では、心拍ゾーンの考え方をふまえたうえで、実際にどのように計算・設定し、Suuntoウォッチで使い始めるかを解説します。
心拍ゾーンを設定すると何ができる?
心拍ゾーンを設定すると、トレーニングの目的が明確になります。
たとえば、イージーランの日にゾーン3〜4まで上がっているなら、予定より強度が高くなっているかもしれません。反対に、高強度インターバルの日にゾーン4〜5へ入っていなければ、目的の刺激に届いていない可能性があります。
元記事では、ゾーンを理解していないと「楽な練習がきつくなり、きつい練習が十分にきつくならない」ことがあると説明されています。
心拍ゾーンを使うことで、次のような判断がしやすくなります。
今日は本当に低強度で走れているか
ロング走の強度が高くなりすぎていないか
テンポ走やインターバルで目的の強度に入っているか
疲れている日に無理をしていないか
トレーニング全体の強度が偏っていないか
心拍ゾーンの計算方法
心拍ゾーンの設定には、いくつかの方法があります。
最初から完璧に設定する必要はありません。まずは最大心拍数をもとにした設定から始め、トレーニングを続けながら自分に合うように調整していくのがおすすめです。
最大心拍数を使って計算する
最もシンプルなのは、最大心拍数をもとに心拍ゾーンを設定する方法です。
最大心拍数とは、運動中に到達しうる最も高い心拍数の目安です。Suunto Race 2のユーザーガイドでも、心拍ゾーンは最大心拍数に基づく割合として定義され、最大心拍数がわからない場合は「220−年齢」の式で推定されると説明されています。
たとえば、40歳の場合は、
220 − 40 = 180bpm
が推定最大心拍数の目安になります。
ただし、この計算式はあくまで一般的な目安です。最大心拍数には個人差があり、同じ年齢でも実際の最大心拍数が大きく異なることがあります。
Suuntoウォッチでは、最大心拍数を自分で設定できます。実際のトレーニングやレースで、推定値より高い心拍数を何度も記録している場合は、設定を見直すことで、より実感に近いゾーンに近づけられます。
心拍ゾーンを設定するうえで、最大心拍数と安静時心拍数は基本となる数値です。最大心拍数は強度ゾーンの基準になり、安静時心拍数は日々のコンディションや回復状態を知る手がかりにもなります。
それぞれの意味や測り方については、こちらの記事で詳しく紹介しています。
▶︎関連記事:「安静時心拍数と最大心拍数とは?測り方とトレーニングへの活用」
安静時心拍数を使う方法
最大心拍数だけでなく、安静時心拍数も考慮する方法があります。
安静時心拍数とは、リラックスしている状態での心拍数のことです。最大心拍数と安静時心拍数の差をもとに、心拍予備量を使ってゾーンを設定する方法もあります。
Suunto Runでは、最大心拍数を使うゾーン、心拍予備量を使うゾーン、乳酸閾値心拍数を使うゾーンを選択できます。心拍予備量を使う設定は、乳酸閾値心拍数はわからないけれど、安静時心拍数を把握している場合の選択肢として紹介されています。
初心者はまず最大心拍数を使った設定で十分です。慣れてきたら、自分の安静時心拍数や過去のデータを参考に、より合う設定へ調整していきましょう。
乳酸閾値心拍数を使う方法
より正確に心拍ゾーンを設定したい場合は、乳酸閾値心拍数を使う方法があります。
乳酸閾値とは、運動強度が高くなり、身体がその負荷を長時間維持しにくくなる境目のひとつです。元記事では、強度が上がると乳酸がたまりやすくなり、有酸素性閾値や無酸素性閾値をもとにゾーンを考える方法が紹介されています。
Suunto Runでは、乳酸閾値心拍数を知っている場合に、その値をもとに心拍ゾーンを設定できます。
ただし、乳酸閾値心拍数を正確に知るには、ラボテストやフィールドテストが必要です。一般ランナーの場合は、最初からここまで細かく設定する必要はありません。
5つの心拍ゾーンの目安
ここでは、ゾーン1〜5の役割をもう少し具体的に見ていきます。
ゾーン1|回復・ウォームアップ
ゾーン1は、とても楽に感じる強度です。
ウォームアップ、クールダウン、リカバリーランに使いやすいゾーンです。呼吸に余裕があり、会話も問題なく続けられる程度が目安です。
疲労が残っている日や、高強度トレーニングの翌日は、ゾーン1を中心に身体を動かすことで、無理なく回復を促しやすくなります。
ゾーン2|持久力の土台づくり
心拍ゾーン2は、楽に続けられる有酸素運動の強度です。
長時間のランニングやサイクリング、ロング走、ベーストレーニングに使いやすいゾーンです。呼吸は安定していて、会話もできる程度ですが、完全に何もしていないほど楽ではありません。
「ゾーン2トレーニング」は、持久力の土台をつくる目的でよく使われます。
大切なのは、ゾーン2の日に頑張りすぎないことです。気持ちよく走っているうちにゾーン3へ上がってしまうこともあるため、ウォッチで心拍ゾーンを確認しながら走ると、強度を保ちやすくなります。
ゾーン3|テンポ走・一定ペースの維持
ゾーン3は、ややきついけれど一定時間維持できる強度です。
テンポ走、マラソンペース走、一定のペースを保つ練習に使われます。
このゾーンには明確な役割がありますが、すべての練習がゾーン3に集まりすぎると、疲労が抜けにくくなることがあります。
目的を持って使うことが大切です。
ゾーン4|高強度インターバル・閾値付近
ゾーン4は、きつい強度です。
短めのインターバル、坂道での反復走、閾値付近のトレーニングなどで使われます。
身体への刺激は大きく、スピードや高い強度を維持する力を鍛えるのに役立ちます。一方で、頻度が多すぎると疲労がたまりやすくなります。
ゾーン4の日の前後には、低強度の日や休養日を入れると、トレーニング全体のバランスを取りやすくなります。
ゾーン5|VO2max・短時間の最大努力
ゾーン5は、非常に高い強度です。
VO2maxを刺激するインターバルや、短時間の最大努力に近いトレーニングで使われます。長時間は維持できません。
経験の浅いランナーが頻繁に行う必要はありません。身体が十分に回復している日、目的がはっきりしている練習で使うのが基本です。
Suuntoウォッチで心拍ゾーンを設定する方法
Suuntoウォッチでは、心拍ゾーンを設定し、トレーニング中の強度管理に活用できます。モデルによって操作方法は異なりますが、多くのスポーツウォッチでは「強度ゾーン」から心拍ゾーン、ペースゾーン、パワーゾーンを確認・設定できます。
心拍ゾーンは最大心拍数などをもとに設定され、ゾーン1からゾーン5までの5段階で運動強度を確認できます。
また、ランニングやサイクリングなど、アクティビティ別の心拍ゾーンを設定することもできます。
Suunto Runでは、最大心拍数、心拍予備量、乳酸閾値心拍数をもとにしたゾーンタイプを選択できます。
最初はデフォルト設定から始めても問題ありません。トレーニングを続ける中で、体感とゾーンが大きくずれる場合は、最大心拍数やゾーン設定を見直してみましょう。
ランニングとサイクリングで心拍ゾーンは変わる?
同じ人でも、競技によって心拍数の反応は変わります。
元記事では、使う筋肉量や運動の特性によって、ランニング、サイクリング、スイミング、クロスカントリースキーなどで心拍ゾーンが少し異なることがあると説明されています。
たとえば、ランニングでは心拍数が上がりやすい一方で、サイクリングでは同じ体感でも心拍数がやや低く出る人もいます。スイムでは、さらに違う反応になることがあります。
ランニングとサイクリングの両方を行う人は、スポーツ別に心拍ゾーンを設定すると、より目的に合った強度管理がしやすくなります。
Suuntoウォッチでは、対応モデルでランニングやサイクリングのスポーツ別心拍ゾーンを設定できます。
▶︎Suuntoのトレーニング向けGPSスポーツウォッチを見る
心拍ゾーンが合っていないと感じたら?
心拍ゾーンは便利ですが、最初から完全に自分に合うとは限りません。
次のような場合は、設定を見直すサインかもしれません。
イージーランなのにいつもゾーン4に入ってしまう
かなりきついのにゾーン2〜3にしかならない
実際の最大心拍数が設定値より明らかに高い
ランニングとサイクリングで体感とゾーンがずれる
トレーニングプランの強度と自分の体感が合わない
このようなときは、最大心拍数、安静時心拍数、競技別ゾーンの設定を見直してみましょう。
ただし、1回のトレーニングだけで判断する必要はありません。心拍数は、暑さ、疲労、睡眠、水分状態、ストレスなどの影響を受けます。
また、ウォッチの装着位置やフィット感、腕の動きなどによって、手首で測定する心拍数が体感とずれることもあります。心拍ゾーンが合っていないと感じる場合は、設定だけでなく、心拍計測の状態も確認してみましょう。
ランニングウォッチの心拍数が正確でないと感じる理由や、測定精度を高めるポイントはこちらで解説しています。
▶︎関連記事:「ランニングウォッチの心拍数が正確でないと感じる理由」
慣れてきたらフィールドテストも選択肢に
より正確に心拍ゾーンを設定したい場合は、フィールドテストを行う方法もあります。
フィールドテストの例
1. 十分にウォームアップする 2. 30分間、できるだけ一定のきついペースで走る 3. 開始10分後にラップボタンを押す 4. 残り20分の平均心拍数を確認する 5. その値を閾値心拍数の目安にする
このテストは高い強度で30分間走るため、ランニング経験があり、体調に不安がない人向けです。
初心者や体調に不安がある人は、無理に行う必要はありません。まずはウォッチの自動設定や最大心拍数の見直しから始めましょう。
心拍ゾーンは絶対ではなく、体感と合わせて見る
心拍ゾーンは、トレーニングを整理するための便利な目安です。
ただし、心拍数だけでその日の状態をすべて判断できるわけではありません。
同じペースでも、暑い日、寝不足の日、疲労が残っている日には心拍数が高く出ることがあります。反対に、短いインターバルでは強度が上がっていても、心拍数の反応が少し遅れて表示されることもあります。
心拍ゾーンに加えて、次の感覚も確認しましょう。
呼吸のしやすさ
脚の重さ
会話できる余裕
フォームの安定
疲労感
睡眠や回復状態
数字と体感を組み合わせることで、より自分に合った強度管理がしやすくなります。
心拍ゾーンはトレーニング中の強度を知るための便利な目安ですが、強度管理には回復状態も関わります。
たとえば、同じゾーン2のランニングでも、十分に回復している日と、疲労が残っている日では、身体への負担の感じ方が変わることがあります。HRVを継続して確認すると、睡眠中の身体の状態や回復傾向を把握する手がかりになります。
HRVと回復の関係については、こちらの記事で詳しく紹介しています。
▶︎関連記事:「HRVとは?心拍変動を理解してトレーニングの回復を最適化する方法」
まとめ:心拍ゾーンは、トレーニングを使い分けるための地図
心拍ゾーンは、トレーニングの強度を整理するための便利な目安です。
ゾーン1は回復、ゾーン2は持久力の土台づくり、ゾーン3はテンポ走、ゾーン4は高強度インターバル、ゾーン5はVO2maxや最大努力のトレーニングに活用できます。
最初は最大心拍数をもとにした設定から始めて問題ありません。
トレーニングを続ける中で、体感とゾーンが合わないと感じたら、最大心拍数や競技別ゾーンを見直しましょう。さらに慣れてきたら、フィールドテストや乳酸閾値心拍数を使った設定も選択肢になります。
Suuntoウォッチを使えば、心拍ゾーン、ペースゾーン、パワーゾーンを確認しながら、目的に合った強度でトレーニングできます。
楽に走る日を本当に楽に。
負荷をかける日は、必要な強度まで。
心拍ゾーンを活用して、トレーニングにメリハリをつけていきましょう。
心拍ゾーンを使って、目的のあるトレーニングへ
Suuntoウォッチでは、心拍ゾーン、ペースゾーン、パワーゾーンを使って、トレーニング中の強度を確認できます。
イージーラン、ロング走、テンポ走、インターバル。
その日の目的に合った強度を手元で確認しながら、よりスマートにトレーニングを続けましょう。
▶︎Suuntoのトレーニング向けGPSスポーツウォッチを見る
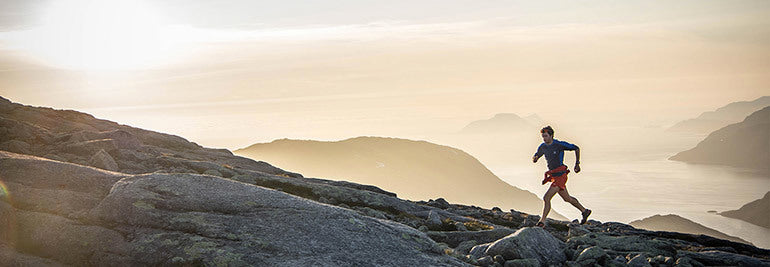

How do you train, Kilian Jornet?
Kilian Jornet has spent a lot of time in the mountains since he was a kid and has been training to improve since he was a teenager. All the hours, days and years of training have made him one of the best all mountain athletes ever. Whether running, skiing or climbing Kilian is breaking records, winning races and inspiring others.
Kilian, in the video you say: “If you don’t have pleasure when you train, you will never improve!” What makes training fun for you?
You don’t train to have fun but to improve, to reach goals or to adapt, but it is important to have pleasure doing the activity you do to spend this amount of time easily. I love to ski and run and to be in the mountains and I’m enjoying when I do that and it is part of my training.
How do you turn tough days into good ones?
Some days you just switch to work mode, listen to music in your headphones and watch the watch count the time and meters you need to do that day. Sometimes it’s more hard than fun but it is important to do. A good or bad day is not fun or not fun. Some training session can be hard and fun, fun but not hard, hard and not fun or not fun and not hard. Good or bad depends on what you have improved or learned, what have you experienced.
How has your training changed over the last 10 years?
Not much in big lines, I like the principles of training I do, like quantity over quality and specific training. They seem to work for me. I try to be open and look at new ways to train and test different things.
How is it possible to be fast from short races, like a vertical km, to super long ultras?
Train different situations, train some long days, some short. It does demand a lot of time (years) and time (hours a year) to do all different kind of training.
What are your strengths?
In physical capacities, recovery rate and VO2 max. Then psychologically I can enter a non-emotional state that helps me in stress situations. Now also my experience.
What would you still like to improve?
Many things. It’s important to work to improve both the weaknesses and the strengths.
What are you focusing on this year?
Mostly rehab and recovery from my shoulder surgery that I had in October. Then I’ll see how it goes. I had a ski fall some years ago and dislocated both of my shoulders. Since then I have dislocated them several times and knew I needed to get the operation done at some point.
I don’t really focus but try to be in good shape on average and adapt depending on the next goal that can be a long or short ski mountaineering or trail running race or mountaineering.
What motivates you to keep pushing your limits?
I just think it is great to know yourself.
Watch Kilian's video "How do I train (again and again)"
Kilian Jornet started training the day he was born. The mountains were his playground and without realizing it he created his own training philosophy that is based on repeating, trying and failing. Watch Kilian’s How do I train now!

When to use your watch to get you home? Whenever you need it
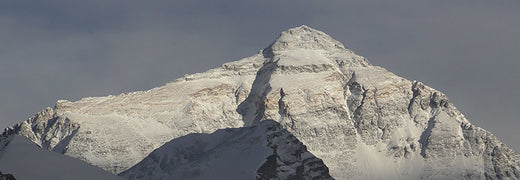
The entire mountaineering world knows Kilian Jornet had not one summit this year on Everest without oxygen, but two. The first of them was record-breaking – a mere 26 hours after leaving the Everest Base Camp at 5,100m. The second was ‘just for fun’ – he was there, he felt good, so, why not do it again?
A lot of things are different at 8,000 m and above. It’s politely referred to as ‘the death zone’ with good reason – people die there, simply because they are there. In the death zone, the human body simply can’t survive for long periods of time. An extended stay without supplementary oxygen will result in deterioration of bodily functions, loss of consciousness, and, ultimately, death.
Getting into it is not a decision to be taken lightly – and getting out of it is imperative. So when record-holding Kilian Jornet lost his way while descending from 8848 m on Everest, his next few decisions would be crucial – his life would literally depend on them.
“Going down from my second ascent on Everest I got lost. It was a heavy snowfall and in the middle of the night and around 8300 m and I was traversing on technical terrain. My brain wasn’t working really well, and I had no clue where I was. Visibility was poor – I could sometimes only see about five meters in front of me – sometimes just two.”
He had left the normal route around 8300 m – and in fact, he is not even sure why. “I have a sort of "black moment" where I can't remember anything. In that time I left the normal route, but I can't remember exactly when or why.” He was clearly suffering the effects of high altitude. And of course, it was snowing: a half a meter during the night, further increasing the difficulty of navigation.
Lucky for him, he had a tool, and the presence of mind to use it: his Suunto GPS watch, which had been recording his path since he left Advanced Base Camp at 6400 m 23 hours ago. Accessing the trackback feature, he realized that he’d made a 90º degree turn to the left, and continued to traverse for one kilometer off of the normal route, and leaving him in the middle of the North Face. It was clear: he had to move in the entirely opposite direction. He did so, until he got back to the normal ridge.
In the new era of fast, light alpinism, going solo has its benefits: you’re quicker, and often, quicker is safer. "I use it about a dozen times in a year,” says Jornet. “When it’s really bad weather or really foggy, if I’m going somewhere with a lot of ridges and cornices – often, it’s really about reducing risk as much as it is about finding the way home.” This brings us to a curious realization – it’s not a last-ditch, all-odds-are-against us survival tool – it’s something to keep you from getting into that situation entirely.
That said, Jornet recognizes clearly the severe potential consequences of his situation on Everest. Without Trackback, he likely would have hunkered down in the cold for four or five more hours until daylight – and the consequences of that could have been severe. “There’s no question for me,” he says. “This feature saves lives. For sure.”
Learn how to navigate with Suunto Spartan watches or how to use Trackback on Suunto Ambit watches.

Yes, you can use your Suunto in the mountains for ten straight days
It’s no secret that for years I have been addicted to recording my adventures. It started out in the pre-tech era with my first ski traverse in 2001. A 5-day loop through the mountains where we skinned and skied our way around the Hurley Horseshoe traverse. Afterwards, I remember taking a pencil and reliving our traverse by drawing in our up and downs, our summits and creek crossings.
The habit grew on me. It got to the point where I had maps tacked up on my walls with lines drawn all over them. My documentation led me to go to where there were no lines and I would explore all day and return to fill in the blanks.
When Suunto came out with the Ambit my addiction evolved. All of the sudden my pencil lines on flat maps became 3D lines laid over satellite images. I could go on a wild excursion, come home and place a line onto mountaintops and down steep ski descents. My adventures became more interactive and ‘lived’ online. Since then I have always imported all my lines, from Norway to Pakistan to remote Canadian mountaintops – and now I can see all my efforts overlaying the world. It’s truly amazing.
Since that first ski traverse in 2001, I have done 10 multi-day traverses – up to 21 days long – but my last was in 2009.
This year as we prepared for a 10-day trip I wondered: would I be able to use my watch to log every day? We hoped to be completely self-sufficient – every gram added to the 20+ kilos of weight on our backs. I would not bring anything extra. Which meant that I did not want to bring a solar charger or battery pack for my Suunto Spartan Ultra.
Of course, I wanted to have this entire expedition logged – but would the watch really last long enough? With a few tweaks to settings, I could theoretically give the watch enough battery for 65 hours of skinning and shredding. Well… maybe not shredding, since our bags did weight a lot.
We started the trip on April 16th and hitchhiked our way to the start. I woke up sick, with low energy, but the wheels were in motion and I felt like I could not let the team down.
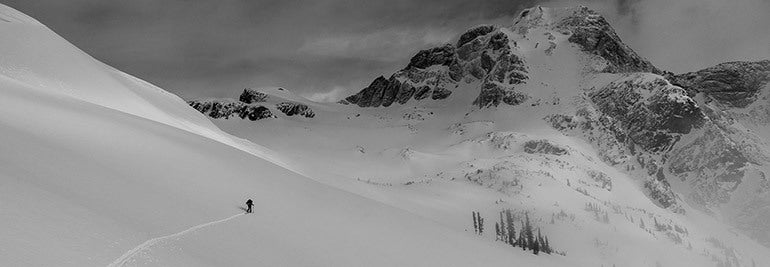
The Monashee traverse is a ski tour through the rugged Columbia mountains that sit to the west of Revelstoke. Once you get it, there are no ski lifts, no towns – just one cabin and a 100 km of skiing from South to North. It is not particularly remote, but it is challenging. With mountains peaking around 3000m, huge granite walls and heavily glaciated terrain, success was never guaranteed.
For the first four days the weather was stormy, and the avalanche hazard went really high. This was the most challenging terrain to negotiate but as luck would have it our bigger descents, and more committing ascents, had already slid – the only reason we were able to move through this complex terrain.
Ski traverses have a simplicity to them that is very rewarding. Each day the challenges are simple, eat, travel through complex unknown terrain, stay safe, eat, drop the big bags and ski a little, find a great place to camp, eat, sleep and repeat. Daily new views are seen and appreciated.
We fell into a routine and moved endlessly north. Most of our challenges were weather based and we persevered forwards. On the day of our lowest morale, we also experienced our best sunset and northern lights, which rejuvenated our excitement and desire to dig deep and push forward.
7 days in and my watch was still recording each day. But with 3 days to go and 30% battery power I wondered – would it last?
Finally, the weather got better and we managed a couple of great ski lines. Chris Rubens got a great line in the alpenglow on Mt Mulvahill.
10 days of touring finally had us boot packing up Mt Begbie, Revelstoke’s signature mountain. The watch was still going and we were all exhausted and excited to be finishing off with this summit.
All-in-all we ski toured 100km, including 10,000m of ups and downs, and over 68 hours of logged lines. The watch made it through. Was it all worth it? I think Chris’s last turns answer that question.
All images © Greg Hill and Chris Rubens

Can an e-Car support an epic ski adventure? 100%.
As a professional adventurer, I constantly search far and wide for new challenges and new spots to explore. My happiness, my inspiration… essentially everything that fulfills me comes from nature. But looking at how I access these adventures, it’s clear: I am killing the world as it stimulates me.
Not only was I well beyond the sustainable level, there was more that the test could not calculate. The heli-guiding, the snowmobile I used for access – these were not added to the thousands of kilometers driven in my F-350, or the multiple intercontinental flights. The truth was obvious: I needed to change my ways.
Immediately I decided to try something suggested by my brother Graham at his TED talk. I became a weekday vegetarian and got my family to join me. (It is amazing to think how much of an impact the global meat industry has!) A simple but very effective change. But for me, with my globe-trotting adventures, I really needed to look into my travel.
So I quit heli-ski guiding, sold my giant diesel truck, let my snowmobile rust and looked at different ways to get to the trailhead.
We are constantly reading about electric vehicles being the future – but I was skeptical. EVs have historically had a limited range – which makes them ideal commuter vehicles for urbanites – but useless for someone where I live.
Revelstoke is a small mountain town, deep in the Canadian mountains, 250–400km from major cities. With cold winters and deep snow there are many very valid reasons to be scared of converting to electric. The sacrifices I needed to make seem daunting – but perhaps they are not as big as they seem.
So we had to test it out. My friend Chris Rubens and I went on an electric adventure. Our goal: live our normal adventurous lifestyle while being more sustainable getting from spot to spot.
Chris and Greg on their electric volcano adventure.
I rented a Nissan Leaf from Ecomoto in Vancouver – a commuter vehicle with 100 miles of range. Far from ideal – but if we could drive down the West coast of the USA, climb and ski a bunch of volcanoes and make it back, we could prove to ourselves that electric access is the future.
So first, we met up and climbed and skied Mt Baker, then began our true road trip down south. An app called “Plug and Share” would guide us to all the level 3 chargers, which take around 40 minutes to fully charge the car. This trip was admittedly ideal, since the I-5 corridor that goes south down to Washington, Oregon and into California is littered with these chargers.
It’s not to say we didn’t face challenges. The trailhead for Mt Rainier is quite far inland and well away from any Level 3 chargers. But our app showed us a Level 2 charger that someone had set up at their house for their Tesla. We arrived at the park boundary and started charging at Phil’s personal plug. The percentage slowly moved upwards. We had to hastily leave with barely 70% as the park’s gates were closing. Committed, we drove upwards. As we climbed up to the trailhead our % dropped and dropped. 40%...35% and then finally at 31% we made it. We parked and decided to deal with it when we returned.
Greg charging down a sun-baked volcano.
A great couple of days had us on the 14,400-foot summit and then skiing down a heavily crevassed, but super awesome run. Arriving back at the car we wondered if our first mistake was going to haunt us. Luckily the Leaf has a ‘B” mode which allows the car to slow itself using the engine, putting electricity back into the motor. So as we drove down 5500 feet we brought our charge back up to 50%. A few hours at Phil’s charger and we were off. Yeehaw! Maybe this is going to work!
Mt Hood was our next objective – and there were Level 3 chargers right up to the trailhead. A great summit and silly ski had us driving south. Eventually the ease of charging had us pushing the battery percentage as low as we could go, extending each drive till the % disappeared and the ‘KMs left’ blinked out. We realized there was always extra battery left, and we pushed it many times. Never fully running out of gas – or rather, juice.
Charging, charging... to make it to yet another mountain.
We made it as far south as Mt Shasta in California, where there were less Level 3 chargers and we ended up charging up at RV campgrounds – Level 2 chargers that would take 3-5 hours to fully charge. A couple oddball Canadians, camped amongst the behemoth RVs.
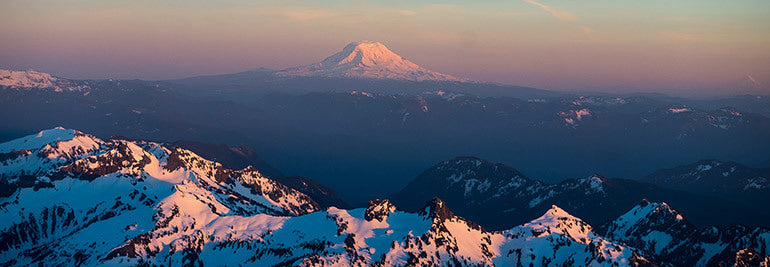
While we drove back north, hitting Mt Adams on the way we pondered our experiment. We ended up traveling almost 5000km, climbed and skied six volcanoes, went rock-climbing five times, had amazing adventures and camped in great places. Essentially: our normal lives, with one major difference. We used one liter of gas during the whole trip: for our cookstove.
Not being able to move quickly between objectives made us more relaxed. Forced stops every few hours had us re-thinking our Type A personalities. To me electric vehicles are the future, especially since climate change would affect our jobs so badly.
My lesson has been learned. Since returning from this trip I have bought an electric Chevrolet Bolt and have fully jumped into the electric vehicle movement. I have dreams of summiting 100 mountains and creating minimal emissions while doing so. It’s a challenge I am calling ‘electric adventures.’ I am 14 summits in, and I have run to some, climbed up others, and skied off those volcanoes. It is a great start and it feels so amazing to be part of the solution to our climate crisis. I will never be perfect – but I can search out ways to be better.
All images © Chris Rubens
Watch "Electric Adventures with Greg Hill and Chris Rubens"now
Press play and follow along on an Electric Adventure


