


登山ルートを計画するとき、地図上の距離だけで行程を決めるのは危険です。同じ10kmでも、標高差、登山道の状態、天候、荷物、メンバーの経験によって、必要な時間と体力は大きく変わります。
安全な計画では、目的地までの線を引くだけでなく、引き返す時刻、代替ルート、休憩、日没、通信状況なども事前に考えます。GPSウォッチやアプリは計画と現在地確認に役立ちますが、山のリスクをなくすものではありません。
この記事では、登山ルートを計画する際に確認したい7つのポイントと、作成したルートをSuuntoウォッチで活用する方法を解説します。
登山前にルート計画が必要な理由
山では、道迷い、転倒、体調不良、急な天候変化などが起こる可能性があります。準備が不十分なまま予定より行動が遅れると、日没や気温低下など別のリスクも重なります。
ルート計画の目的は、予定どおり山頂へ着くことだけではありません。自分たちが安全に行動できる範囲を知り、状況が変化したときに中止・短縮・撤退を判断できるようにすることです。
初めて地図を使って計画する場合は、まず歩いたことのある場所や、整備された低山などから練習すると、地図上の情報と実際の地形を結びつけやすくなります。
1. 目的地と登山の目的を明確にする
最初に「どこへ行くか」「何を楽しみたいか」「使える時間はどのくらいか」を決めます。山頂を目指すのか、景色や自然観察を楽しむのか、トレーニングとして歩くのかによって、適したルートは変わります。
目的地だけでなく、登山口、下山口、休憩候補、分岐、山小屋などの主要地点も確認します。周回ルートでは、途中から元の道へ戻りにくい場合があるため、往復ルートとの違いも検討しましょう。
2. メンバーに合う難易度を選ぶ
計画は、グループで最も経験や体力の少ないメンバーを基準にします。普段の運動量だけでなく、登山経験、岩場や急斜面への慣れ、荷物の重さ、高所や暑さ・寒さへの対応力も考慮してください。
コースの難易度表示は参考になりますが、天候や季節によって実際の難しさは変わります。初心者を含む場合は、予定より余裕のある距離と時間を選び、難しい区間を避けられるルートも確認しておきます。
3. 地形図でルートを確認する
観光案内図だけでなく、等高線や地形、登山道を確認できる地形図を使います。ルート全体を眺め、次の要素を確認しましょう。
- 尾根、谷、峠、山頂などの大きな地形
- 急な上り下りや長く続く斜面
- 分岐、登山道が不明瞭になりやすい場所
- 予定を短縮して下山できるエスケープルート
- 沢や川を渡る場所
- 崖、岩場、露出した尾根など注意が必要な場所
- 山小屋、避難場所、水場、トイレ
- 携帯電話がつながりにくい可能性のある場所
等高線の間隔が狭い場所は傾斜が急で、広い場所は比較的緩やかです。ただし、地図だけでは登山道の崩落や積雪、倒木など最新の状況までは分かりません。山小屋、自治体、管理者などが発信する現地情報も確認してください。
4. 距離・標高差・行動時間を見積もる
行動時間は距離だけで決まりません。累積上昇量、下りの長さ、路面、休憩、混雑、荷物、メンバーの歩行速度を含めて考えます。
地図やルート作成サービスに表示される所要時間は目安です。休憩、写真撮影、衣服の調整、分岐の確認などに使う時間を加え、初めてのルートではさらに余裕を持たせます。
次の時刻を事前に決めておくと、進行状況を判断しやすくなります。
- 出発予定時刻
- 主要な分岐・山頂への到着予定時刻
- 引き返す最終時刻
- 下山予定時刻
- 日没時刻
最も遅い人のペースを基準にし、日没直前ではなく、明るいうちに余裕を持って下山できる計画にします。ヘッドライトは予定にかかわらず携行しましょう。
5. 天候と季節のリスクを調べる
出発前には、山域の天気予報、気温、降水、風、雷の可能性を確認します。山頂や稜線は、登山口より気温が低く、風が強い場合があります。
前日が晴れていても、雨による増水やぬかるみ、積雪・凍結、残雪などが残ることがあります。夏は熱中症や雷、秋冬は日没の早さと低温、積雪期は雪崩など、季節特有のリスクも考慮してください。
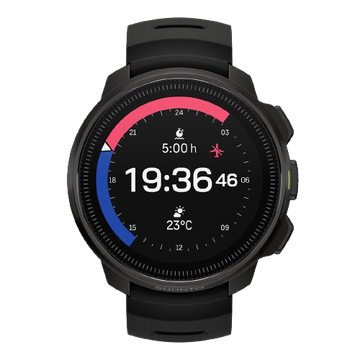
行動中は、対応するSuuntoウォッチのウェザーアラート(ストームアラーム)も、天候悪化に気づくための補助として活用できます。急な気圧低下を検知して通知されたら、空の暗さ、雲の発達、風、雷鳴など周囲の変化を確認し、稜線や山頂へ進む前に下山・撤退ルートを検討しましょう。ウェザーアラートは雷や雨を直接検知する機能ではなく、利用できる機能や設定はモデルによって異なります。出発前の公式な気象情報と現地の状況を優先してください。
▶︎雲の変化やウェザーアラートの見方は「登山で役立つ雲の種類|天気の変化と危険のサインを見分ける方法」で解説しています。
予報が悪い場合は、装備を増やして強行するのではなく、行き先や日程を変える、中止するという選択肢を持ちます。現地で予想より天候が悪化した場合も、早めに引き返してください。
6. 代替ルートと撤退基準を決める
計画したルートが通れない場合に備え、短縮して下山できるエスケープルート、同じ道を戻る地点、避難できる場所を確認します。あわせて、水場の位置や営業中の山小屋も地図上で確認しておきましょう。ただし、水場は渇水や凍結などで利用できない場合があるため、必要量の水は出発時に携行するのが基本です。分岐を通過する前に、その先へ進んでも安全に戻れる時間が残っているか判断します。
撤退基準は、山の中で迷いながら決めるのではなく、出発前に具体的にしておきます。
- 決めた時刻までに主要地点へ到着できない
- 雷、強風、大雨など天候が悪化した
- 登山道の崩落、増水、積雪などで通行が難しい
- メンバーに痛み、体調不良、強い疲労がある
- 現在地や進行方向に確信が持てない
山頂へ到着することより、全員が安全に下山することを優先します。
7. 計画を共有して登山届を提出する
登山前に、ルート、メンバー、装備、出発・下山予定時刻、緊急連絡先を全員で共有します。家族や知人など山行に参加しない人にも、計画と帰宅予定を伝えておきましょう。
山域に応じた方法で登山届・登山計画書を提出します。オンライン、登山口の提出箱、警察への提出など、地域によって方法が異なります。計画を変更した場合は、共有先にも変更内容を伝えてください。
登山届は救助を保証するものではありませんが、万一の際に予定ルートやメンバー情報を伝える重要な手がかりになります。
Suuntoで登山ルートを準備する
Suuntoアプリでは、ルートを計画し、対応するウォッチへ同期できます。事前に地図上で距離や標高プロファイルを確認し、主要な分岐や山小屋などを目印として設定しておくと、行程をイメージしやすくなります。
Suunto Vertical 2は、長時間の登山やアウトドア活動で、地図とルートナビゲーションを活用したい人の選択肢です。
Suunto Race 2は、大きなAMOLEDディスプレイで地図やトレーニングデータを確認し、登山から持久系スポーツまで幅広く取り組みたい人に適しています。
Suunto Race Sは、コンパクトなサイズで日帰り登山、トレイルランニング、日々のトレーニングを記録したい人の選択肢です。
対応機能はモデルやソフトウェアのバージョンによって異なります。出発前にルートが正しく同期されているか、地図を表示できるか、バッテリー残量が十分かを確認してください。
ウォッチやスマートフォンの故障、電池切れ、GPS受信不良に備え、必要に応じて紙の地図とコンパス、予備電源も用意します。
▶︎ルートの作成・同期手順は「GPXルートをSuuntoウォッチに入れる方法」をご覧ください。
▶︎登山中の使い方は「登山・トレイルでルートをナビゲーション|Suuntoクライムガイダンスの使い方」で解説しています。
▶︎道迷いへの備えは「登山・ハイキングの安全対策|迷ったときに取るべき行動と出発前の準備」も参考にしてください。
出発前チェックリスト
- 目的地、ルート、距離、累積標高差を確認した
- メンバーの経験と体力に合う難易度を選んだ
- 行動時間、休憩、引き返す時刻、日没を確認した
- 天気予報と最新の登山道情報を確認した
- エスケープルート、撤退地点、避難場所、水場を確認した
- 対応ウォッチのウェザーアラート設定を確認した
- 食料、水、防寒着、雨具、救急用品、ヘッドライトを準備した
- ウォッチとスマートフォンを充電し、ルートを同期した
- 登山届を提出し、家族などへ計画を共有した
よくある質問
登山ルートは距離だけで選んでもよいですか?
距離だけでは判断できません。累積標高差、傾斜、登山道の状態、技術的な難易度、天候、メンバーの体力なども確認してください。
ルートをウォッチへ入れれば紙の地図は不要ですか?
ウォッチは現在地確認やナビゲーションに役立ちますが、故障や電池切れの可能性があります。山域、ルート、経験に応じて紙の地図とコンパスも携行し、事前に使い方を練習してください。
予定より遅れていても山頂が近ければ進んでよいですか?
山頂までの距離だけでなく、その後の下山時間、天候、日没、メンバーの状態を考えます。事前に決めた引き返す時刻を守り、安全な下山を優先してください。
まとめ|安全に戻るところまでが登山計画
登山ルートの計画では、目的地までの距離だけでなく、標高差、地形、難易度、所要時間、天候、撤退方法を確認します。メンバーに合う余裕のある行程を選び、引き返す時刻と代替ルートも事前に決めておきましょう。
Suuntoアプリと対応ウォッチは、ルート作成、標高プロファイルの確認、登山中のナビゲーションに活用できます。ただし、デジタル機器だけに依存せず、装備、登山届、計画共有を含めて準備することが大切です。


