




SUUNTOブログ

The Old Bullet pushes beyond his comfort zone – and inspires others on the way
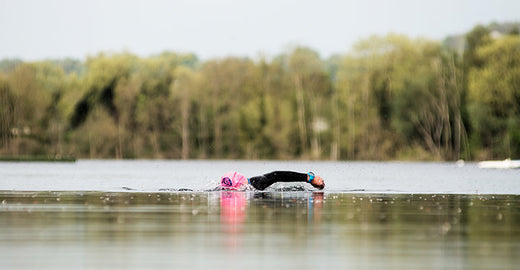
Suunto UK has partnered up with the Columbia Threadneedle World Triathlon Leeds in England. Amongst the 5,000 professionals and amateur triathletes competing, there is one that caught our eye – Jim McKellar – who just so happens to be the same age as us. Both Jim and Suunto turned 80 this year! We got in touch and found out a little more about what makes him tick.
As a veteran of 120 marathons and ultras alongside being a member of the Great Britain Age-Group Team at the ITU World Championships, Jim McKellar, or ‘Old Bullet’ as he is known by his running friends after his multiple exploits at the Comrades Marathon in South Africa, is no stranger to pushing the boundaries of our self-imposed limitations. But what makes his achievements particularly impressive is that he only took up running at 51 after being made redundant from his workplace of 25 years.
“I lost my pride and became a bit of a mess,” Jim tells us. “My doctor told me that if I carried on like I was, I’d be dead in five years. So I entered the London Marathon. That was back in 1992.” Twenty consecutive London marathons later, and it’s fair to say he'd got the bug.
You’re never too old to take up triathlon
But it wasn’t until the ripe old age of 74, shortly after completing his 120th marathon, which happened to be the 89 km long Comrades (for the third time), that he took up triathlon and in the following year entered the 2012 Windsor Triathlon, even though he didn’t know how to swim.
“Triathlon training is horrendous,” he laughs, “but I’m getting there”.
The following year, in 2013, he qualified for the ITU World Championship at Hyde Park and competed in the 75–79 age group, coming 3rd in the country and 10th in the world, one of his proudest achievements. He had hoped to return the following year, but it wasn’t meant to be.
Overcoming setbacks
Sadly, not long afterwards Jim suffered a major setback. Out cycling with his club, he was involved in a collision with a car, suffering injuries to his pelvis and a chipped bone in his right leg that required specialist treatment and skin grafts. For 18 months walking was hard enough, let alone running or cycling.
Now, most people under the circumstances might decide to call it quits, but not Jim. Indeed, if ever a man embodied the spirit of Suunto, a determination to win and to never give up, Jim is it.
“I need that challenge of getting up in the morning,” he continues. “My wife had myeloma cancer and for the past three years, I looked after her 24/7. We battled on. I’m battling on now – I will not give up.” Sadly, his wife passed away in March, making him even more resolved to compete in this year’s Columbia Threadneedle World Triathlon Leeds.
However, Leeds won’t be without its challenges if Jim is to achieve his goal of winning gold in his age group (M80-84) as a tribute to his late wife Lily – and in the process raise money for MacMillan. “My leg injuries have curtailed my training a little,” he says with a wry smile. “I’m not bothered about the swim or bike – I’m riding a hundred miles a week – and my swimming’s come on a treat, but I’ve had to adopt a let’s get round job in the run element.”
“Every morning I do exercises up lampposts to get rid of all the stiffness in my leg. But I’m up to six to eight miles of fast walking and jogging, which I’m pleased with considering three months ago I couldn’t go 100 yards.”
And so he should be pleased. Because as Jim points out, people don’t use their full potential and simply compete in their comfort zone. So perhaps we should follow his example, and learn to push ourselves beyond the norm. We never know, we might just surprise ourselves.
Images by James Carnegie
Read more triathlon stories:
10 Ambit3 hacks for triathletes
How to use the power of commitment
7 spring training camp tips for triathletes
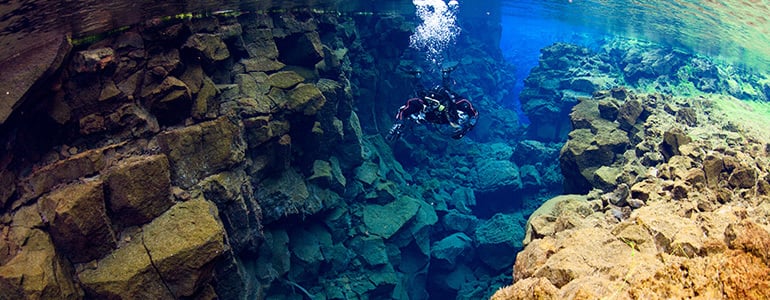

7 tips to help you make amazing diving videos
Jill exploring the Bell Island mine. © Cas Dobbin 2016
Today there are no barriers to entry for shooting underwater video. GoPro cameras have put awesome potential within easy reach both physically and financially. Even with this compact camera, 4K video can be shot, edited and uploaded to social media sites. However, with video capability in everyone’s hands, there are some key things you need to do to separate yourself from the pack.
First things first
General diving skills are critical with good buoyancy control being at the top of the list. Master this first!
Watch Jill's video of devil rays off the coast of Azores Islands.
The gear
Shooting underwater means you are filming through a filter. Colour and light are gradually absorbed the deeper you go. In many cases, visibility can be minimal. You need good quality, wide-angle video lights to help illuminate the scene and increase colour saturation. The closer you can get to your subject, the less filtering water between you and a great shot. Use a wide-angle lens for shooting or try macro work with a tripod – only if you can avoid damaging the environment.Watch Jill exploring Devil's Ear cave system, Ginnie Springs.
Shoot for easy editing
Don’t try to edit in the camera. That means you should shoot long sequences with a long “tail” after the action has passed. This gives you room to edit and use transitions.
Slowly, slowly!
Move very slowly and deliberately and consider holding long stationary shots to let the environment and marine life flow around you. Most beginners get overly enthusiastic and move the camera around too much. They are eager to film the next shot rather than patiently working on the current encounter. That type of footage is not just tough to edit but can give your viewers seasickness!Press play to see the shipwrecks of Bell Island.
Capture variety
When you shoot, try to capture a wide range of shot types. You need wide establishing shots that show context. You will want to capture things like jumping off the boat or preparing gear. You'll also need an endless supply of shots called cutaways. These short clips of a few seconds in length are the glue that holds longer shots together. When a diver is prepping gear we might see a cutaway of the pressure gauge needle popping up as the tank is turned on. We might see a quick okay signal close up on a hand. You can never have enough cutaway shots in the edit. You will use every single one you shoot.
Press play to watch Jill talk about her diving career.
Show the tranquillity
Remember, the beauty of the underwater world is best enjoyed drifting along rather than frenetically bouncing around from view to view. Let your shots breathe and allow your viewers to enjoy the same peace and tranquillity that you do on a swim along a perfect reef. The marine life will be more likely to cooperate and gracefully participate in your sequence too.
Keep it short
And finally, when you get into the postproduction phase, keep your edit short. Try to tell a story in less than three minutes. That is about the attention span of most viewers. Nobody wants to see the entire dive and the things you missed. If you only have 90 seconds of great footage, then keep your edit even tighter. You’ll get more hits and shares and enjoy watching your own masterpiece again and again.


ウルトラマラソンは特別な人だけの競技?初心者が知っておきたい4つの誤解
「ウルトラマラソンは、毎週何十時間も走れる特別な人の競技」「山の近くに住んでいなければ練習できない」。そんなイメージから、挑戦する前に諦めていませんか。
ウルトラマラソンは、一般にフルマラソンの42.195kmを超える距離を走る競技です。距離だけを見ると途方もなく感じますが、求められるのはスピードや才能だけではありません。トレーニングの継続、ペース配分、補給、装備、そして状況に対応する判断力が重要です。
本記事では、ウルトラランニングの指導で知られるジェイソン・クープの考え方をもとに、初心者が抱きやすい4つの誤解を解説します。
ウルトラマラソンでは、速さだけでなく長時間動き続けるための準備が重要です。
目次
ウルトラマラソンとは?
誤解1:膨大な練習時間が必要
誤解2:山で練習しなければならない
誤解3:特別な才能が必要
誤解4:制限時間内に完走できない
初挑戦に向けて準備したいこと
SUUNTOでウルトラの準備を可視化する
まとめ
ウルトラマラソンとは?ロードとトレイルの違い
ウルトラマラソンには、舗装路を走る大会と、山道や未舗装路を走るウルトラトレイルがあります。代表的な距離は50km、50マイル、100km、100マイルなどですが、時間制で走行距離を競う大会もあります。
同じ距離でも、累積標高、路面、気温、標高、エイド間隔によって難易度は大きく変わります。大会を選ぶときは距離だけで判断せず、コースプロフィール、関門時刻、必携装備、過去の完走率まで確認しましょう。
誤解1:ウルトラには膨大な練習時間が必要
原文でジェイソン・クープが最初に挙げたのは、「毎週18時間や24時間もトレーニングしなければならない」という思い込みです。長い距離への適応には一定の練習量が必要ですが、距離や時間を増やせば増やすほど、同じ割合で能力が伸びるわけではありません。
仕事や家庭と両立するランナーは、確保できる時間の中で練習の目的を明確にすることが大切です。
無理のない頻度で走る習慣を作る
会話できる程度の低強度ランで持久力の土台を作る
大会に近づいたら、長時間動く練習を段階的に取り入れる
疲労が大きいときは、距離を増やすより回復を優先する
長時間練習を一度こなすことより、継続できる負荷を積み重ねること。急激な走行距離の増加は、故障や疲労の蓄積につながります。現在の経験と体調から段階的に伸ばしましょう。
誤解2:山で練習しなければウルトラを走れない
山岳レースに出るなら、実際の登り下りや不整地に慣れる練習は有効です。しかし、日常的に山へ行けないからといって、挑戦できないわけではありません。クープは、まず心肺持久力という土台を高めることが重要だと説明しています。
山へ行ける日は実地練習に使い、平日は身近な環境で基礎を積み上げましょう。写真:Philipp Reiter
平地のランニングに加えて、坂道、階段、傾斜を付けたトレッドミル、筋力トレーニングを活用できます。下りでは筋肉に独特の負荷がかかるため、山岳レースを目指す場合は、本番までに安全な環境で下りの技術と脚の耐久性も確認してください。
重要なのは「山へ行った回数」ではなく、出場する大会の特性に対して足りない要素を把握し、身近な環境で代替しながら、実地練習の機会を計画することです。
誤解3:ウルトラを走るには特別な才能が必要
高いVO2maxやマラソンのスピードがあれば有利な場面はありますが、それだけでウルトラの結果が決まるわけではありません。長時間のレースでは、ペース戦略、補給、装備選び、トラブル対応、精神的な粘りなど、複数の能力が結果を左右します。
つまり、短い距離で圧倒的に速くなくても、準備と判断によって自分の強みを生かせます。特に初心者は、他の選手のスピードではなく、自分が無理なく維持できる強度を知ることから始めましょう。
身体が糖質や脂質をどうエネルギーに変えるかを理解したい方は、身体を動かす3つのエネルギー供給機構も参考にしてください。
誤解4:自分には制限時間内の完走は無理
ウルトラでは、登りやエイドで歩くことは珍しくありません。ただし、「歩けば誰でも関門に間に合う」という意味ではありません。関門の設定、コースの高低差、路面、天候、休憩時間によって必要なペースは変わります。
挑戦を現実的にするには、目標大会の情報から逆算します。
スタートから各関門までの距離と制限時間を確認する
累積標高と路面を含めて、区間ごとの所要時間を予測する
エイド、着替え、トイレに使う時間も計算に入れる
似た条件の練習で、歩きを含む平均ペースを確認する
トラブルに備えて時間の余裕を持たせる
まず50kmなど比較的短いウルトラから経験を積み、自分に合う距離を探す方法もあります。完走だけを唯一の成功にせず、準備の過程や安全に撤退する判断も経験として捉えましょう。
初めてのウルトラマラソンに向けて準備したいこと
4つの誤解を解いたうえで、初挑戦までに確認したい項目を整理します。
コース:距離、累積標高、路面、関門、エイド、必携装備を確認する
ペース:心拍数や主観的運動強度を使い、序盤のオーバーペースを防ぐ
補給:本番で使う食べ物と飲み物を長時間練習で試す
装備:シューズ、バックパック、ライト、ウェアを本番前に使い込む
ナビゲーション:ルートをウォッチへ同期し、分岐やコースアウト時の操作を練習する
回復:練習量だけでなく、睡眠、食事、休養まで計画する
トレイル大会に向けた練習の組み立て方は、トレイルランニングのトレーニング方法と大会準備もあわせてご覧ください。補給の基本は、運動する人のための食事・栄養ガイドで解説しています。
SUUNTOでウルトラの準備を可視化する
長時間のGPS記録とオフラインマップに対応するSuunto Vertical 2
ウルトラに向けた準備では、1回の長い練習だけでなく、数週間のトレーニング負荷、回復、累積標高を継続して見ることが重要です。Suuntoアプリでは、アクティビティの距離、時間、心拍数、上昇・下降などを振り返り、自分が積み上げてきた内容を確認できます。
Suunto Vertical 2は、長時間のGPS記録、オフラインマップ、ルートナビゲーションに対応し、ウルトラトレイルのトレーニングから本番まで活用できます。事前にルートを同期し、ナビゲーション画面、バッテリーモード、補給や装備の運用を練習で確認しておきましょう。
UTMBの特徴や楽しみ方については、UTMBとは?距離・魅力と日本で楽しむ方法も参考にしてください。
まとめ:ウルトラは、準備を積み重ねる競技
ウルトラマラソンは簡単な競技ではありません。しかし、膨大な練習時間、山に住む環境、特別な才能がなければ挑戦できないわけでもありません。自分の生活に合う練習を継続し、大会の条件に合わせて足りない要素を補うことで、スタートラインは現実的な目標になります。
まずは出場したい大会を一つ選び、距離、累積標高、関門、必要装備を確認してみましょう。具体的な条件が分かれば、漠然とした「自分には無理」を、取り組める準備へ変えられます。
次の長距離チャレンジを記録しよう
長時間バッテリー、オフラインマップ、ルートナビゲーションに対応するSUUNTOスポーツウォッチをチェックしてください。
SUUNTOスポーツウォッチを見る

10 tips to take amazing underwater photos
Basking Shark, UK. © Alex Mustard
Alex Mustard has been taking underwater photos since he was nine years old and began diving when he was 13. He’s the author of Underwater Photography Masterclass, which distils his know-how on this challenging form of photography.
“It’s the diversity of diving I love,” Alex says. “One week I might be aiming my lens at a great white, and the following week I am just as excited to be framing up sea slugs back home. Then it’s on to shooting in caverns, with cathedral-like light beams spilling in through gaps in the ceiling. And next, diving deep inside a wreck, searching for secrets nobody has noticed before. It’s all those things that I love.”Kittiwake Shipwreck, Cayman Islands. © Alex Mustard
First things first
The most important first step is to make sure you are as comfortable and as competent in the water as possible before you take a camera diving. Cameras take a lot of your attention underwater and you may not pay enough attention to your buddy, to your dive computer and remaining air pressure. If you're an experienced diver you will be used to paying attention to all those things. By being a better diver you get better pictures.
Get a feeling for it
Buoyancy and manoeuvrability are two of the biggest challenges to diving. Taking a camera down totally changes these two things. It’s good to know beforehand how this is going to feel. I always suggest people take an empty camera housing down as a good way to get used to it. Wrap a diving weight in bubble wrap or in a cloth and stuff it inside the underwater housing so it sinks. Then experiment with it in the shallows or in a pool.Kelp Forest, USA. © Alex Mustard
The camera isn’t so important
The camera is one of the least important parts of an underwater photography set up. It’s actually the lenses and the underwater flashguns that make far more of a difference to your photos than the camera. An expensive camera that’s not being adapted properly to underwater photography will always take poorer pictures than a very simple camera that has the right accessories. Invest in the accessories rather than the camera.
The lenses that counts
We use two types of lenses almost all the time. One is a close focusing macro lens for taking close ups from within touching distance and the other is an ultra wide-angle lens that focuses very close. Typically we use fish eye lenses a lot because they give us the widest possible view from as close as possible.Jellyfish Lake, Palau. © Alex Mustard
Lights, camera …
Almost every underwater photo is taken with a flash. We use flashguns on short, adjustable arms on either side of the camera to light up a subject. Water as you go deeper absorbs all the colour so if you don’t use a flash you’ll end up with blue or green pictures. Flashguns take time and skill to get used to. That’s really where the art of underwater photography lies.
Up close and personal
Almost every underwater photo is taken from within touching distance of the subject. This means you need to be able to maneuverer around a subject and in a way that doesn’t scare it away. If you’re thrashing about or racing around, you’re only ever going to see the tails of marine life. If you’re calm and at one with the environment you will get all the great encounters and that’s what gives you the good pictures.World War II Motorbike On Wreck, Egypt. © Alex Mustard
Plan ahead of the dive
If you go and speak to whomever is organising a dive ahead of time, they will tell you what you’ll see and where. There’s a huge amount of local knowledge you can benefit from just by asking people a few questions. Sometimes an advertisement will say it’s a great shark dive, but in reality they don’t come within five meters. But the coral scenery might be nice so you set up for that.
One dive, one lens
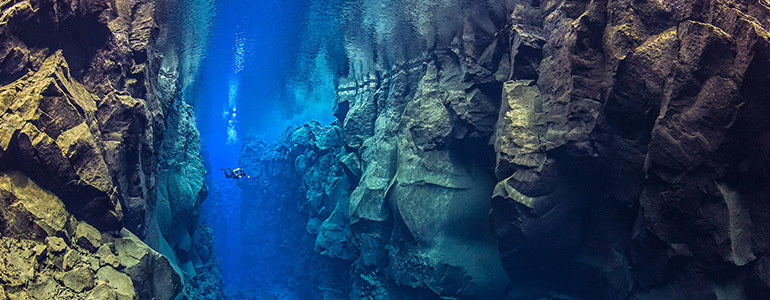
The only way to change your camera lens is to come up to the surface, change it and then go back down and that’s not very convenient. Usually it’s one lens for one dive. One of the big steps you make as an underwater photographer is when you realise the best photos come by realising the strengths and weaknesses of the particular lens your diving with and focusing your attention on the subjects that suit it.Diving Between The Continents, Iceland. © Alex Mustard
Don’t be rude
Underwater most marine life doesn't fear man. However you need to get within touching distance of it. Most wildlife doesn’t like heavy eye contact so try not to stare. Most wildlife doesn’t like you approaching fast so take your time to approach a subject. Don’t just race in as fast as you can because that’s bound to scare things away. If you see a subject slowly swimming along, swim parallel to it, and slowly close the gap.
Dive with a photographer
Diving with another photographer is a really good way to dive. You’ve got twice as many eyes. If you’re shooting scenery you can pose for each other. After the dive you have a friend who will be interested to see your pictures and talk about photography.
For more incredible images by Alex Mustard, like his Facebook page.
Lead image: © Alex Mustard
The most bicycle-friendly countries in the world are …
In this third part of our series* about them, nomadic globe-pedalling cyclists Pierre Bouchard and Janick Lemieux tell us which countries were the most bicycle friendly!© nomadesxnomades.com
After cycling the equivalent distance of four times around the planet, Canadians Pierre Bouchard and Janick Lemieux are in a unique position to say which countries are the most bicycle-friendly.
They’ve cycled across Asia, around the Pacific Rim of Fire, down and across Europe, through Africa, all around North America, even through tiny Pacific Islands – about 60 countries in total.
Click for part one and part two of the series!
© nomadesxnomades.com
Mostly their nomadic journeys have been enjoyable, with few negative experiences. They did, however, get held up at gunpoint by a bandit in Mexico. Crossing from Tibet to Nepal, they were blocked in a narrow gorge by a 15 km avalanche. Roasting in 45° C in Sudan also proved threatening!
It’s important to pay attention to potential safety issues before and during the journey, Pierre says.Which people in the world were the most friendly and helpful?
For a long time, Russians topped our list of the most hospitable people until we set wheels in the archipelago of Vanuatu. More recently, Jordanians went regularly out of their way to support us, meet our needs and accommodate us.
© nomadesxnomades.com
Which places were the most bicycle-friendly?
Japan: it's go to be be international bike touring’s best kept secret!Western USA’s Pacific Coast Highway: incredible cycling infrastructure, from exclusive and cheap campsites to a simple and clever flashing light safety system warning motorists upon entering a tunnel there is a cyclist inside – this should be standard everywhere!Rwanda: with its low traffic roads lined by wide shoulders and filled with legions of cyclists, most of them carrying huge loads!Norway: for its exquisite road network and very friendly “Allemansrett” law that allows travellers to camp for free virtually anywhere. Besides respecting private properties and observing the leave-no-trace code of ethics, this bill stipulates that campsites have to be at least 150 m from any inhabited building and that two consecutive nights is the maximum time allowed. It opens quite a realm of possibilities!This map shows the NOMADS² cycling odyssey. © nomadesxnomades.com
What have been challenging places to ride through?
Based on the first 20 months of our most recent expedition, the NOMADS² cycling odyssey:Europe’s Schengen zone: only 90 days per six months to explore that zone? Come on!Egypt: security and police escorts.Sudan: In July – sooooooooo hot! 45°C and sometimes even hotter in the shade!Ethiopia: hostility towards visitors travelling slower than 10km/h. Every time we would climb – and there are some of the world's most beautiful mountain ranges there – locals, especially children, would follow us for a few kilometres, consistently begging and throwing stones at us for not giving. We were even ambushed a few times. This has also been widely reported by other “slow travellers” – we're still puzzled!© nomadesxnomades.com
Tell us about cycle touring in Africa?
Cycling in Africa has been a great adventure, exactly as one expects this continent to be. The roads have been better than anticipated as Chinese road building companies have been frantically paving Africa’s roads for more than 10 years. Of course, if one wants to leave the pavement, the continent offers tracks big and small. Away from Cairo and Nairobi, most roads have been surprisingly quiet with most users being on foot or bicycle. On top of breath-taking landscapes, busy rural life, age-old traditions and surreal animals, Africa is clean and peaceful, smiles and greetings never held back.
*This concludes our three part series on the Pierre and Janick. In part one and part two they explain their efforts to learn about nomadic peoples and what it takes to cycle all over the world!


WORLD CHAMPION’S 10 TIPS FOR ORIENTEERING
What equipment is needed to start orienteering?
A map, a compass and sturdy shoes are the basic requirements.
What’s the scale of an orienteering map usually?
Maps are of scales 1:10000 or 1:15000, larger scales in urban events. That means that on the regular 1:10000 map 1 cm in the map depicts 100 m in the terrain.
What advice can you give on the map symbols?
Maps are drawn with same symbols worldwide and the colors on the map roughly resemble those you see in real life in front of you. Blue stands for water, white for normal forest, green for thick forest, black mostly for built objects and yellow depicts open areas. However, brown representing elevation contours is the most important color for navigation.
How is an orienteering course presented on a map?
Start from the purple triangle and follow the connecting lines to the numbered control circles. When you have reached the double circle you can stop running – you have reached the finish!
How to hold a map?
Fold the map so that you can point your thumb to your last known position. Make sure you can see the whole distance towards your next control.
How to orient a map?
Always keep the map oriented according to your direction of travel. This way you'll see the upcoming objects in the terrain as you move along your thumb on the map as you go.
How to decide the best route to the next control point?
Pick a route where you'll come across clear objects along the way all the way until the next control. It usually pays off to have a good plan and pick a route to suite ones navigational skills. Shortest is not always the safest way to find the control quickly...
How to get the direction to the next control with a map and a compass?
Place the compass' direction of travel line parallel to the control connecting line on your map. In the image above the line connects the start (marked with a triangle) with the first control (marked with a circle).
Rotate the compass capsule so that the red orienting lines are aligned with the map meridians and pointing north.
Keep the map horizontal while you turn yourself so that the compass north arrow and the map meridians pointing to the north line up. Now the line of travel points towards your next control!
How to keep your direction?
After getting the correct direction using the compass you should look up into the terrain and pick a distinguishable feature far ahead to aim for. Repeat glimpse at your compass often to make sure the map's meridians and your compass north arrow line up – and pick new features in the terrain to aim for.
How do you know you are at the right control?
Control description define the exact location of the control (e.g. on the northeast side of the southernmost boulder in the control circle). Code numbers found in the control descriptions reassure you're at the correct control.
Bonus: How to run fast in the forest?
Keeping your gaze constantly about 20 m in front of you making micro-routechoices through the terrain will help you smoothly glide across boulder fields and swamps alike. Orienteers develop a seventh sense to run fast through all kinds of environments while reading the map only through extensive training, so get out there!
Learn more about Suunto compasses
Meet the orienteer who runs a 2h 18m marathon
Find your local orienteering organization through the International Orienteering Federation


