




SUUNTOブログ


トライアスロンのトランジション攻略|T1・T2の準備と初心者向け練習方法
トライアスロンでは、スイム、バイク、ランの速さだけでなく、種目を切り替える「トランジション」もレース時間に含まれます。初めての大会では、ウェットスーツが脱げない、バイクの場所を見失う、ランニングシューズへの履き替えで慌てる、といったことも起こりがちです。
トランジションを速くするために必要なのは、複雑なテクニックよりも、必要な物を絞り、置き場所と動作の順番を決めて、繰り返し練習することです。
この記事では、スイムからバイクへ移るT1、バイクからランへ移るT2の基本、トランジションエリアの準備、初心者が避けたい失敗、Suuntoウォッチでレースを記録するポイントを解説します。
目次
トライアスロンのトランジションとは?
レース前に確認すること
トランジションエリアの準備
T1|スイムからバイクへの切り替え
T2|バイクからランへの切り替え
トランジションの練習方法
初心者によくある失敗
持ち物チェックリスト
Suuntoウォッチでトライアスロンを記録する
よくある質問
まとめ
大会ごとの競技規則を必ず確認してください。ヘルメット、ゼッケン、乗車・降車ライン、トランジションエリアへの持ち込みなどのルールは大会や競技団体によって異なります。本記事は一般的な準備例であり、参加大会の公式案内が優先されます。
トライアスロンのトランジションとは?
トランジションとは、1つの種目を終えて次の種目へ切り替える区間です。一般的に、次の2つを区別します。
T1:スイムからバイクへの切り替え
T2:バイクからランへの切り替え
トランジション中も計測は続きます。競技時間を短縮する要素ではありますが、初心者が最初に目指したいのは、速さよりも「忘れ物をせず、安全な順番で、落ち着いて次の種目へ進むこと」です。
トライアスロンの距離、3種目の特徴、初心者が準備したい基本装備は「トライアスロンとは?距離・種目・初心者が知っておきたい基本」で解説しています。
Suunto公式:Triathlon transition tips with the Caveman
レース前に確認すること
競技説明とローカルルールを読む
受付時間、トランジションエリアの開閉時間、バイクラックの割り当て、荷物の置き方、ウェットスーツの規定などを確認します。前日の競技説明会やオンラインブリーフィングがある場合は必ず参加・視聴しましょう。
入口・出口と乗降車ラインを歩いて確認する
トランジションエリアへ入ったら、自分のバイク位置だけでなく、スイムから入る入口、バイク出口、バイクから戻る入口、ラン出口を確認します。
バイクの乗車・降車が許可される位置はラインで決められています。どこまでバイクを押して走るのかを事前に把握しておくと、焦りやルール違反を防ぎやすくなります。
バイクラックまでの目印を覚える
レース中のトランジションエリアは、同じようなバイクと荷物が並びます。ラックの列番号、入口から数えて何列目か、周辺の固定された目印を覚えます。他の選手のタオルや荷物は移動する可能性があるため、目印にしないようにしましょう。
トランジションエリアの準備
使う順番に並べると、考える時間と動作を減らせます。大会の規定で使用できる範囲内に、必要最小限の物だけを配置します。
T1で使う物
バイク
ヘルメット
サングラス
バイクシューズまたは競技用シューズ
レースナンバーベルト
必要な補給とボトル
T2で使う物
ランニングシューズ
ソックス
キャップまたはバイザー
必要な補給
ヘルメットはストラップを外した状態で置き、向きを決めておきます。サングラスをヘルメットの中へ入れるなど、装着順に重ねると迷いにくくなります。
シューズは左右をそろえ、必要ならソックスの口を広げておきます。ただし、置ける物や配置方法には大会規定があるため、広い範囲を占有しないようにしてください。
T1|スイムからバイクへの切り替え
T1では、水から上がった直後の呼吸と平衡感覚を整えながら、ウェットスーツを脱ぎ、バイク装備へ切り替えます。
1.水から上がったら落ち着いて進む
浅瀬で急に立つとふらつくことがあります。足が底へ安定して着くことを確認し、周囲の選手や路面に注意して進みます。呼吸が乱れている場合は、走る速度を落として整えましょう。
2.移動しながらウェットスーツの上半身を脱ぐ
許可されている場合は、トランジションへ向かいながらゴーグルとキャップを外し、ウェットスーツのファスナーを開けて肩から腰まで下げます。視界を確保し、他の選手の進路を妨げないようにします。
3.自分の場所でウェットスーツを完全に脱ぐ
バイクラックへ到着したら、片脚ずつ落ち着いて抜きます。ウェットスーツ、ゴーグル、キャップは指定された範囲またはバッグへ収めます。通路へ投げ出さないようにしてください。
4.ヘルメットを先に装着する
バイクをラックから外す前に、ヘルメットをかぶってストラップを確実に締めます。多くの大会で重要な安全ルールですが、具体的な規定は参加大会で確認してください。
5.バイクを押して乗車ラインへ進む
トランジションエリア内ではバイクに乗らず、ハンドルを持って押して進みます。乗車ラインを越え、安全を確認してから乗車します。
T2|バイクからランへの切り替え
T2はT1より動作が少ない一方、バイク後の脚で走り始めるため、焦ってペースを上げすぎないことが大切です。
1.降車ラインの手前で安全に降りる
ラインへ近づいたら速度を落とし、他の選手との間隔を確保します。降車ラインを越える前に降りるなど、参加大会の指示に従います。
2.バイクを決められた位置へ戻す
バイクをラックへ正しく掛けてから、次の動作へ移ります。ラック方法はサドル掛け、ハンドル掛けなど大会によって異なるため、受付時に確認してください。
3.バイクを戻してからヘルメットを外す
バイクをラックへ戻す前にヘルメットのストラップを外さないようにします。バイクを確実に掛けたことを確認してから、ヘルメットを外します。
4.ランニング装備へ切り替える
バイクシューズを脱いでランニングシューズを履き、必要に応じてキャップや補給を持ちます。レースナンバーの位置に関する規定も確認し、ラン出口へ向かいます。
5.走り出しは少し抑える
バイク後は脚の感覚が普段のランニングと異なります。最初の数分は歩幅を小さくしてリズムを整え、呼吸や心拍数を確認しながら目標ペースへ近づけます。
SUUNTO Japan公式:安田大サーカス団長安田 トライアスロンレース
トランジションの練習方法
動作を一つずつ反復する
最初から全力で通し練習をする必要はありません。ウェットスーツを脱ぐ、ヘルメットとサングラスを装着する、シューズを履き替えるといった動作を個別に練習します。
順番を固定して声に出す
たとえばT1なら「ウェットスーツ、ヘルメット、サングラス、シューズ、ゼッケン、バイク」のように、自分の順番を固定します。練習中に声へ出すと、レース当日も思い出しやすくなります。
ブリック練習を取り入れる
バイクを終えた直後に短くランニングする「ブリック練習」は、T2後の脚の感覚に慣れるために役立ちます。最初はバイク後に10〜15分程度、低めの強度で走るところから始めます。
本番と同じ装備で試す
新しいウェットスーツ、シューズ、補給方法を大会当日に初めて使うのは避けます。濡れた足でソックスを履く、屋外でバイクをラックへ掛けるなど、本番に近い条件で動作を確認してください。
速さよりミスのない動きを計測する
練習ではトランジション時間を計りつつ、ヘルメットの締め忘れや装備の置き忘れがなかったかを記録します。動作が安定してから、少しずつ時間を短縮します。
初心者によくある失敗
よくある失敗対策
自分のバイクを見失う列番号と入口からの動線を歩いて覚える
荷物が多く、必要な物を探す持ち物を絞り、使用順に並べる
ヘルメットを締める前にバイクを外す「ヘルメットを締めてからバイク」を反復する
乗車・降車ラインを間違えるレース前にラインと進行方向を確認する
T2直後に速く走りすぎる最初は歩幅を小さくし、呼吸とリズムを整える
ウォッチ操作に集中しすぎる安全な場所で切り替え、進路と周囲を優先する
持ち物チェックリスト
大会によって必要な物は異なります。以下を出発前の基本チェックとして使い、公式リストを追加してください。
スイム
大会指定または許可されたスイムキャップ
ゴーグルと予備ゴーグル
ウェットスーツ
タイミングチップ
バイク
整備済みのバイク
規定に合ったヘルメット
バイクシューズ
サングラス
ボトルと補給
パンク修理用品
指定されたバイク用ナンバー
ラン
ランニングシューズ
ソックス
レースナンバーベルト
キャップまたはバイザー
必要な補給
共通
トライアスロンウェア
スポーツウォッチと充電ケーブル
日焼け止め
タオル
大会受付に必要な書類や身分証
Suuntoウォッチでトライアスロンを記録する
対応するSuuntoウォッチのトライアスロンモードでは、スイム、T1、バイク、T2、ランという一連の流れをまとめて記録できます。種目の切り替え時にウォッチを操作すると、後から各パートとトランジション時間を振り返れます。
操作方法はモデルやソフトウェアによって異なります。レース当日に初めて使わず、ブリック練習や模擬トランジションで、ボタン操作、画面の見方、誤操作した場合の戻し方を確認してください。
Suunto Race 2は、大きなAMOLEDディスプレイで複数種目のデータを確認し、トレーニングからレースまで記録したい人の選択肢です。コンパクトなサイズを重視する場合は、Suunto Race Sも候補になります。
トライアスロン向けウォッチの選び方は「トライアスロン用ウォッチの選び方|スイム・バイク・ランを1台で記録するには」をご覧ください。
記録後に3種目のデータをどう振り返るかは「トライアスロンのトレーニングデータ活用術|スイム・バイク・ランを振り返る」で解説しています。
よくある質問
トランジション時間もレースタイムに含まれますか?
一般的には含まれます。計測区間の分け方や結果表示は大会によって異なるため、参加大会の案内を確認してください。
トランジションではソックスを履くべきですか?
距離、シューズ、足の状態、慣れによって判断が変わります。初心者は、数秒の短縮より靴擦れや不快感を防ぐことを優先し、本番前の練習で濡れた足でも問題なく履けるか確認しましょう。
バイクシューズをペダルへ付けたままにしてもよいですか?
大会規定で認められている場合でも、走りながらシューズへ足を入れる動作には技術と練習が必要です。初心者はトランジションエリアで安全に履いてから、バイクを押して進む方法が確実です。
トランジション練習はどのくらい行えばよいですか?
レース前の数週間に、短時間でも繰り返し行います。1回の長い練習より、装備を並べてT1・T2の動作を数回反復するほうが順番を覚えやすくなります。
ウォッチの種目切り替えを忘れたらどうしますか?
まず進路と安全を優先し、操作のために急に立ち止まらないでください。記録の修正可否はモデルやアプリの仕様によって異なります。事前練習で操作を身体に覚えさせることが最も確実です。
まとめ|順番を固定し、落ち着いて切り替えよう
トライアスロンのトランジションは、T1のスイムからバイク、T2のバイクからランという2つの切り替えです。初心者は速さより、正しい順番で安全に装備を切り替えることを優先しましょう。
入口と出口、乗降車ライン、自分のバイク位置を事前に確認し、使う物だけを順番に配置します。ウェットスーツを脱ぐ、ヘルメットを締める、シューズを履き替えるといった動作を繰り返せば、当日の迷いを減らせます。
3種目とトランジションを一つの記録に
Suuntoウォッチでスイム、バイク、ランの流れを記録し、次のレースへ活かしましょう。
Suuntoスポーツウォッチを見る

HOW TO USE AMBIT3’S RECOVERY FEATURES
To help you balance your training Suunto Ambit3 has two recovery indicators: recovery time and recovery status. Read on and learn how to take advantage of these features.
RECOVERY TIME
Recovery time is an estimate of how long your body needs to recuperate after training. The time is based on the duration and intensity of the session, as well as the overall fatigue, accumulating even at lower intensities. Recovery time accumulates from one session to the next, if you train again before the time has expired. A graph of your recovery time is displayed as one of the screens in the time mode. When entering the logbook, the recovery time in hours is displayed on the screen.
There is one important point to remember: the time is an estimate that is based on activities you have done with your Ambit3. It doesn’t have information about other aspects of life. Did you sleep enough? Do you have flu? Was your meal nutritious and helpful for your recovery?
To get an accurate indication of your actual recovery state, we recommend using one of the two recovery tests.
REVOVERY STATUS
Recovery status indicates the amount of stress on your autonomic nervous system. The less stress you have, the more recovered you are. Knowing your state of recovery helps you optimize your training and avoid over training or injury.
You can check your recovery status with a quick recovery test or sleep recovery test, powered by Firstbeat. The tests require a Bluetooth-compatible heart rate sensor that measures heart rate variability (R-R interval), such as Suunto Smart Sensor.
Your recovery status is indicated with 0-100% result scale.
Result & Explanation
81-100 Fully recovered. OK to train up to very hard intensity.51-80 Recovered. OK to train up to hard intensity.21–50 Recovering. Train easy.0-20 Not recovered. Rest to recover.
The more serious you are with training and the more tests you do, the more important details are, also in the test results. For a top-level athlete a difference of five points in recovery status may be meaningful where as an active runner will be happy with the four point scale presented above.
When entering the logbook, recovery is displayed as your estimated recovery time; if a recovery test is done within the past 24 h and after your previous move, the display will show the result of the last test. This assuming the recovery has been calibrated (see next chapter).
CALIBRATING THE TESTS
When you first start using Ambit3’s recovery tests the watch needs to be calibrated in order to provide accurate, personal results. The calibration tests define what 'fully recovered' means for your body. With each calibration test, your watch adjusts the results scale of the test to match your unique heart rate variability.
You need to perform three calibration tests for both sleep recovery and quick recovery tests. The calibration tests do not need to be done in sequence, but they need to be at least 12 hours apart. These need to be done when you have no accumulated recovery time. Ideally, you also feel fully recovered and are not ill or stressed during these calibration tests.
During the calibration period, you may get results that are higher or lower than expected. These results are indicated in the watch as your estimated recovery status until the calibration is completed. Once you have completed the calibration, the latest result is displayed when you enter the logbook instead of recovery time.
SLEEP RECOVERY TEST
The sleep recovery test, powered by Firstbeat, provides a reliable indicator of your recovery status after a night's sleep.
To perform a sleep recovery test:
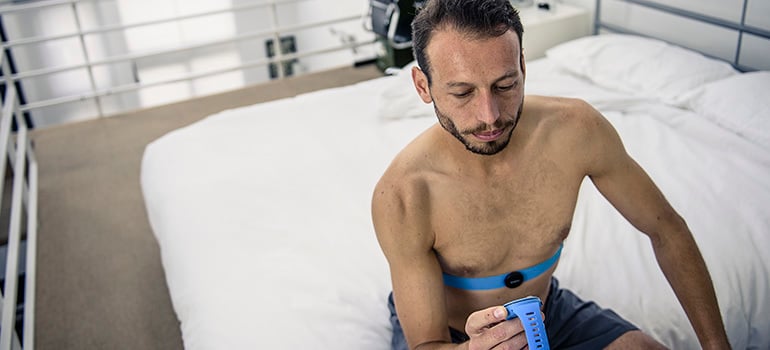
Put on your heart rate belt and ensure the electrodes are moist.
Press [Start Stop], scroll to RECOVERY with [Start Stop], and select with [Next].
Scroll to SLEEP TEST and select with [Next].
If you want to cancel the test, press [Back Lap].
When you are ready to get up in the morning, end the test by pressing [Start Stop] or [Next].
The sleep recovery test requires at least two hours of good heart rate data to produce results. The test does not take into account the length of the night meaning you can get similar results after a six-hour sleep and an eight-hour sleep.
If you use your Ambit3’s alarm function, set the alarm first and then start the test. And in the morning stop both your alarm and your sleep recovery test.
During the test you will see the time and SLEEP TEST on the bottom row of the screen.
And last but not least: don’t worry if you have to get up in the middle of the night. This doesn’t make your test unreliable. The test selects the best two-hour period of your sleep and analyzes that.
QUICK RECOVERY TEST
The quick recovery test, powered by Firstbeat, is alternative way to measure your recovery status. The sleep recovery test is a more accurate method to measure your recovery status. But for some individuals, wearing a heart rate sensor throughout the night may not be feasible.
The quick recovery test only takes a few minutes. For best results, you should lie down, stay relaxed, and not move around during the test. We recommend performing the test in the morning after waking up. This helps ensure you get comparable results day to day.
To perform a quick recovery test:
Put on your heart rate belt and ensure the electrodes are moist.
Lie down and relax in a quiet environment free from disturbances.
Press [Start Stop], scroll to RECOVERY with [Start Stop], and select with [Next].
Scroll to Quick test and select with [Next].
Wait for the test to complete.
When the test is complete, scroll through the results with [Next] and [Back Lap].
TROUBLE SHOOTING THE RECOVERY TESTS
There are basically two reason for the tests to fail:
Bad skin contact or low HR belt battery will generate bad data and the test will fail.
If you are too stressed for the test, like right after a training session, the test is likely to fail.
The results of the tests do not impact your estimated recovery time.
Read more about the feature in Firstbeat’s scientific white papers:
Recovery Analysis for Athletic Training Based on Heart Rate Variability
Stress and Recovery Analysis Method Based on 24-hour Heart Rate Variability
Read more Tutorial Tuesday articles at tutorialtuesday
Get support for your Suunto product and find user manuals at support


Face to Face with Conrad Stoltz, #SuuntoAdventure Video Series Episode 5
In the fifth episode of #SuuntoAdventure Video Series four time XTERRA world champion Conrad Stoltz talks about going fast, suffering and over 25 years of competing in triathlon.
Face to Face with Conrad Stoltz, #SuuntoAdventure Video Series Episode 5
Watch also the other episodes in the series:
Face to Face with Emelie Forsberg – #SuuntoAdventure Video Series, Episode 1
Face to Face with Greg Hill – #SuuntoAdventure Video Series, Episode 2
Face to Face with Kilian Jornet – #SuuntoAdventure Video Series, Episode 3
Face to Face with William Trubridge – #SuuntoAdventure Video Series, Episode 4


AERO WHEELS WILL MAKE YOU FASTER
High profile aero wheels used to be regarded something that were mostly used in time trials and triathlons. But in recent years aerodynamics and aero wheels have taken off in road cycling as well. Decrease in aerodynamic drag and increase in speed are a welcome addition to any cyclist.
Aerodynamic drag is the main form of resistance working against a cyclist. The benefits of being more aerodynamic are most obvious for fast riders but it helps in slower paced riding too as more time will be spent in the wind.
The most effective way to decrease your drag is to optimize your riding position on the bike. A reduced frontal area will increase the speed – and save you energy.
On the equipment side one of the most important ways to improve aerodynamics is to use high-performance aero wheels. Wheels play a key role in aerodynamics since the front wheel is pushing through the air first. Its shape is complex.
The most crucial part of the aero wheels is the height of the rim as well as its width and overall shape. The profile of the rim smoothes the air coming around the tyre and rim. Basically the higher the profile, the less drag the wheels produce. For this reason full disk wheels are the most aerodynamic – and the fastest. However, disk wheels are more difficult to use in cross winds.
The rim height and profile are not the only components affecting the aerodynamics of a wheel. A wheel is an entity where every component from rims to spokes, hubs and tyres have their own role and effect on performance.
The overall rim-tyre shape improves the riding characteristics of high profile wheels in windy conditions. When both together are forming a perfect airfoil shape (NACA profile), side wind resistance is reduced and stability improved. This makes 60 mm tall rims pretty easy to ride in much more conditions than one would think.
A great example of this is Mavic’s integrated wheel-tyre systems. They smoothe airflow around the tyre and wheel, and improve streamlined airflow at every yaw angle.
Mavic Cosmic CXR 60’s unique CX01 technology unifies the rim and tyre together, saves time and watts in every condition and provides high stability in crosswind. Their 60 mm wind tunnel optimized rim profile with extra-light carbon rims fitted with Yksion CXR tyres enable a very dynamic ride.
Action images: © Loris Von Siebenthal / Mavic

BENEFITS FOR USING TRAININGPEAKS WITH YOUR SUUNTO
Suunto became compatible with TrainingPeaks this spring. We got in touch with Canadian ultra runner Rodney Buike to learn more about the service.
Rodney Buike started his athletic career as an alpine ski racer and a mountain biker but has since evolved into an endurance athlete covering longer and longer distances. First he competed in duathlons and triathlons, but has recently started to run ultras, too.
Buike has been using TrainingPeaks as his main tracking application since 2011.
“I initially started with the free version of TrainingPeaks but soon switched to TrainingPeaks Premium for some of the added capabilities,” says Buike.
“For me the best feature is the Performance Management Chart. It gives me a real ability to manage my fitness and fatigue levels over the course of my racing season.”
TrainingPeaks’ Performance Management Chart (PMC) tracks chronic training load (CTL based on activities older than 15 days) and acute training load (ATL based on the last 14 days of activity). These numbers are based on the athlete’s thresholds which allows TrainingPeaks to calculate the intensity (IF) and Training Stress Score (TSS). This is then used to calculate Training Stress Balance (TSB). All this data can be used to monitor progress and ensure a smooth steady build up and then taper to main race or races.
Here’s Buike’s own PMC starting with the beginning of training for his first 50K race.
Rodney Buike’s 180-day Performance Management Chart
“The first vertical red line is the peak of training with the longest run before tapering began for the race (the next vertical red line). Then you can see the recovery period and the final vertical red line indicating when training began again,” Buike explains.
“There are a few important things you can see in this graph: First off you can see a long slow steady build with the gradual increase in the CTL (the blue line). There are smaller spikes along the line, which individually identify the key long runs followed by short recovery periods – but an overall steady climb. The TSB (orange line) moves into the positive as I recover and taper for the race while the ATL drops as training load is decreased.”
Over the course of time the Performance Management Chart can help you plan your taper and recovery to ensure you are doing just enough to maintain fitness while recovering properly to ensure your best performance on race day.
SET YOUR ZONES FIRST
While this all sounds very complex there are a few very basic things that all athletes can take advantage of immediately.
“The first thing I recommend is to set your zones. If you are using HR based training you can set different zones for all activities. For specific activities you can also define additional zones. I highly suggest runners to set their pace zones, which can be done using the results of a recent 10KM running race. Cyclists, who have a power meter, can input their functional threshold power (FTP) and use that to build power zones.”
In addition to the Performance Management Chart, Buike highlights the premium version’s advanced charts that you can use to drill deeper into the data (power analysis, scatter graphs, etc.). He also finds the planning tools very useful.
“With the premium version you have the ability to plan out your upcoming week, month or longer and have that sync with your calendar in Outlook, Gmail, Apple iCalendar or any calendar tool that supports ICS files. When you upload activities they will automatically populate the related activity in your TrainingPeaks calendar,” says Buike.
So how does your own calendar look for the coming weeks?
“I have decided to move into the ultra running world and completed my first 50 km and 80 km races recently. In May I have a 130km race coming up.”


TUTORIAL TUESDAY: WHERE AM I? FINDING YOUR LOCATION WITH AN AMBIT
Figuring out where you are is fairly simple when you have a map, the visibility is good and you can identify a few landmarks. But when the going gets rough, the weather is against you and the sun sets, the task isn’t so simple any more. In this tutorial you will learn how your Ambit can help you to find your location.
The basics are simple: you can find your current position with a few clicks of the Ambit.
Choose: Navigation – Location – Current
To make sure you get the satellite fix as quickly as possible, remember to sync your Ambit regularly and keep it up to date.
Once you have found the GPS signal you will get your current location in geographic coordinates. The most common coordinate system in GPS devices is WGS84, which is also used by default in Suunto GPS watches.
Use the same coordinate system on your watch and map
If you need to give your exact location to someone in a rescue situation, WGS84 works. But when you start using a map and defining your location on it, you will need to make sure your GPS watch and the map use the same coordinate system. (To change your Ambit’s coordinate system go to General – Formats – Position format.)
Latitude/longitude is the coordinate system used in marine navigation and is common on topographical outdoor maps. Latitude lines run horizontally. The zero latitude is the Equator. Longitudes run vertically and the zero longitude runs through Greenwich, England. The latitude is normally the first number expressed in lat/long coordinate (for example 60°16'19" N 24°58’23’’ E).
WGS84, which uses latitudes/longitudes, is actually more than a coordinate system: it also includes a model of the globe that enables the use of GPS altimeters.
UTM is a grid coordinate system that is used on many outdoor maps. It divides the map into a perpendicular grid in which each of the squares are the same size anywhere on the map. This means the coordinate system is tied directly to a distance in meters.
This Norwegian map has both WGS84 (black) and UTM (blue) coordinates.
The black numbers on the sides of the map are degrees latitude; the numbers on the top and bottom of the map are degrees longitude. To determine your location on the map, draw a west to east line through the corresponding latitude and a south to north line through the corresponding longitude. The intersection of the two lines indicates your position.
The blue numbers are the northings and eastings of the UTM coordinate system. You can use them like the lat/log when finding your location on the map.
You can get support for your Suunto product at support


