




SUUNTOブログ


5 invaluable staged trail race training tips
“Commit to the training before you commit to the race” – Trail runner, Rene Unser.
Image: Carrie Karsgaard (Feature image: Nathan Karsgaard)
Canadian Rene Unser, who will race the Gore-Tex Trans Alpine Run for the sixth time this year, is a trained coach with 13 years experience. She has also put together the official training plans for the epic Alpine race. So if anyone can give some helpful training tips it’s Rene, here’s what she had to say:
Commit to training
“Commit to the training before you commit to the race,” says Rene. She knows how big a time commitment a long distance race can be. A training schedule is also key, she adds: “To be successful it’s important to build up slowly, and train consistently. Find a training schedule that works for you and really dial that down.”
Mimic the race terrain
Do you know whether you’ll be running on hills or flat? Find out says Rene: “Mimic the terrain you will find during the race as much as you can! This can be hard for people who don’t live near the mountains, but it’s worth travelling to get there when you can."
Image: Schneider outdoor vision
Test your equipment
“Test your equipment and spend time running with your bag packed as it would be during different stages,” says Rene. All races are different, with some equipment being mandatory, she adds: “Learn how to use poles efficiently if they are permitted in your race, and if you choose to use them.”
Get your nutrition spot on
Of course fuelling before and after a race can make a huge difference, and Rene works with what she’s given in any particular race. She says: “I train with Hammer Nutrition Perpetuem with water and Hammer Gels. Before a race I start to practice with the food I’ll get at the aid stations. For TAR this is salami, cheese and cake. I am able to supplement with what’s provided if I have my staples. I aim for 120 to 150 calories an hour during a race.”
Take it easy
“A lot of people will cram a lot of races into a season, and it’s natural to want to do this,” says Rene. But try not to, she adds: “They want to squeeze in a 50k race as that’s what one stage in the race might be like. I caution all my athletes training for races like TAR not to have too many late season races, as it uses up valuable training time, by the time you factor in your taper and recovery.
Follow Rene on her website, Facebook, instragram and personal website.

How yoga can make you a better mountain runner
Italian yoga teacher and mountain runner Tite Togni tells us why the two are a perfect match.
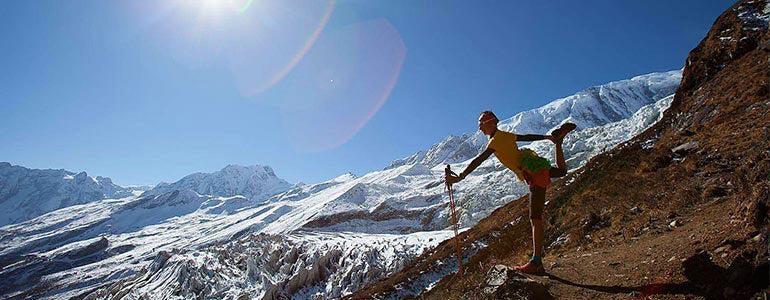
Image (and feature image) Richard Bull, Trail Running Nepal
To be a successful mountain runner the body and mind must be working in harmony before, during and after a race. Pioneering mountain runner and experienced Iyengar yoga teacher, Tite Togni, has known for a long time what most runners are now finding out – yoga is a perfect addition to any training schedule. We had a chat with Tite to find out why yoga is so great for runners, here’s what she had to say.
Tell us a little about yourself
I am an Italian Iyanger yoga certified teacher. In the past I was a professional figure skater, so sport has always been part of my life. I stopped pro-sports for two decades when I had kids and a family life. I got back into running when I had more time and I found the more I trained and raced, the more I went to the yoga mat. Training could not give me balance – the balance in life, mind and body. Being stressed in competitions became ok, as long as I got back to the mat. I decided this was something I could give to other sports people.
And yoga, how did you get into that?
I started yoga in 1989, in Los Angeles while studying at university, because I had some back pain. It was like anyone’s first experience of yoga – I felt the relief in my whole back. In sports your core is your abs, at the front, but in yoga the core is your spine. That was my first enlightenment, and it has never stopped!
You’ve been a bit of a pioneer in linking yoga and running?
Twenty years ago I tried to communicate basic yoga to runners, but runners were the last people that thought they needed yoga. Times have changed a lot. Lots of athletes are finding it necessary to practice yoga during cross training on a regular basis.
What benefits can yoga bring to runners?
What they gain is health for the mind and body. The muscles, tendons, ligaments and flexibility are better of course, but the mind is equally important. With yoga practice the mind is always focused. Learning to be present not just during the race, but every day so you’re able to make that decision on whether today is ok to run, or not. This is important for injury prevention.
Image by Stefano Marta, Mandala Trail
What type of yoga should runners do?
Before running you want to warm up the body and mind, get maximum oxygen delivery. Everyone has heard of the Sun Salutation. That opens up all parts of the body, every cell wakes up! After running you don’t need that. When running you really use the body, so most spaces are full and tight, joints get stiff and oxygen doesn’t flow. Use restorative practises, the spine and sitting poses that open up the chest and hips and lengthen the body.
What about injury prevention and recovery?
The best use of yoga to prevent injury is the ability to be present. Most injuries don’t come from over use but from not listening to the body in stressful moments, the moment before the injury occurs. Many injuries are due to misalignment in the spine and the right or left parts of the body. The use of props can help get into a pose even when injured.
Is there a danger with static stretching for runners, as opposed to dynamic stretching?
My guru, BKS Iyengar, would always say: “breath is king of the mind – the measure for everything is breath.” Static stretching can be dangerous if you don’t breathe. You can hold any pose if you keep breathing, today three breaths, tomorrow 10 - that is progression. Dynamic stretching can be dangerous, as can anything - sitting on the couch can be dangerous! If you don’t let the breath flow and feel every moment and every movement, if there is to be flow you must have no obstacles.
Is it best to have a teacher, like you had?
It is important to start practising with direct guidance. Now there are more online courses and with many sports people being so busy it’s easy to just practice online. But that can be misleading. The millennial success of yoga has been in direct transmission of experience, 'parampara' which means from teacher to student, in continuous feedback, to progressively gain self awareness and then you can continue alone too.
Find out more about Tite on instagram, Facebook and Twitter.


GPSウォッチのデータ活用方法|距離・ペース・心拍数をトレーニング改善につなげる
GPSウォッチで距離、時間、ペースを確認して、「今日は速かった」「今月はたくさん走った」で終わっていませんか。記録した数字は、それだけでも達成感を与えてくれます。しかし、トレーニングを改善するには、数字を身体にどんな負荷がかかったかという視点につなげることが重要です。
特にトレイルランニングでは、同じペースでも登り、下り、路面、標高によって負荷が変わります。本記事では、GPSウォッチの基本データからトレーニングの意味を読み取り、次の練習へ生かす方法を解説します。
距離やペースの先にある「身体への負荷」を読み取ると、記録を次のトレーニングへ生かせます。写真:zooom.at/bergermarkus.com
目次
記録と分析は何が違う?
まず確認したい基本データ
心拍数から運動強度を読み取る
トレイルではペースだけを比べない
登りと下りの負荷を分けて考える
トレーニング負荷と回復を見る
データを生かす振り返り手順
目的に合うSUUNTOウォッチ
まとめ
GPSウォッチの「記録」と「分析」は何が違う?
原文に登場するウルトラランニングコーチ、ジェイソン・クープは、多くのランナーがウォッチから得られる情報を十分に活用していないと指摘しています。
距離、時間、ペース、上昇量、心拍数は「何が起きたか」を示す記録です。そこから、運動がどれくらいきつかったか、どの能力に刺激が入ったか、回復にどの程度時間が必要かを考えることで、初めてトレーニングの判断材料になります。
一つの数字だけで良し悪しを決めない。ペース、心拍数、高低差、主観的なきつさ、体調を組み合わせて見ることで、その日のトレーニングをより正確に理解できます。
まず確認したい5つの基本データ
データ
分かること
見るときの注意
時間・距離
運動量の基本
急激な増加が続いていないか確認する
ペース
移動速度とペース配分
坂、路面、風、停止時間の影響を受ける
心拍数
身体内部の運動強度
暑さ、疲労、睡眠、計測状態でも変化する
上昇・下降
コースの垂直方向の負荷
距離だけでは表れない負荷として見る
主観的運動強度
本人が感じたきつさ
数値と感覚のずれも大切な情報になる
心拍数から「同じペースでも違う負荷」を読み取る
ペースは身体の外側で起きた結果、心拍数は身体がどれだけ働いたかを見る手掛かりです。例えば同じ5kmを同じペースで走っても、暑い日、疲労がある日、登りが多いコースでは心拍数が高くなることがあります。
心拍ゾーンを使うと、低強度の持久走、高強度のインターバルなど、トレーニングの目的に合った強度だったかを振り返りやすくなります。ただし、手首心拍は装着状態や寒さ、腕の動きなどの影響を受ける場合があります。高い精度が必要なトレーニングでは、対応する胸部心拍センサーも選択肢です。
糖質や脂質など、運動強度によって使われるエネルギーがどう変化するかは、身体を動かす3つのエネルギー供給機構で解説しています。
トレイルランニングではペースだけを比べない
舗装路のランニングでは、同じコースや平坦な路面ならペースを比較しやすい一方、トレイルでは路面、斜度、標高、天候によって速度が大きく変わります。そのため、1kmあたりのペースが遅いだけで「調子が悪かった」と判断すると、実際の負荷を見誤ります。
登りでは速度が落ちても、心肺への負荷は高くなることがあります。写真:zooom.at/bergermarkus.com
トレイルの振り返りでは、次の組み合わせで見てみましょう。
時間と距離に加えて、累積上昇・下降を確認する
登り区間の心拍数と主観的なきつさを見る
同じコース、似た天候、近い装備条件で比較する
ペースが遅くても、予定した低強度を維持できたか確認する
登りと下りの負荷を分けて考える
クープは、登りや平坦区間で生じる心肺への負荷と、下りで大きくなりやすい筋骨格系への負荷を分けて考えることを提案しています。
登りでは心拍数や呼吸の変化から有酸素能力への刺激を捉えやすくなります。一方、下りは心拍数が低くても、着地衝撃やブレーキ動作によって脚に大きな負担がかかる場合があります。翌日の大腿部の筋肉痛や動きにくさも含めて記録すると、下りへの適応を判断しやすくなります。
登りのペースが改善しているかだけでなく、同じ程度の下降量を走った後の筋肉痛や回復時間が変化しているかも確認しましょう。
1回の記録から、トレーニング負荷と回復へ
一つのアクティビティを分析したら、次は数週間の流れで見ます。Suuntoアプリでは、トレーニングストレススコア(TSS)などを使って、運動時間と強度を組み合わせた負荷を確認できます。
TSSは異なる種類のトレーニングを共通の尺度で振り返るための目安ですが、疲労や故障を完全に予測する数字ではありません。睡眠、体調、筋肉痛、仕事や生活上のストレスも一緒に考えます。詳しい見方は、SuuntoアプリのTSSとは?トレーニング負荷の見方をご覧ください。
データを次の練習へ生かす5分間の振り返り
目的を確認:今日は低強度、テンポ走、登りの強化など、何を狙ったか
基本データを見る:時間、距離、ペース、心拍数、上昇・下降を確認
感覚を追加:きつさ、脚の状態、補給、天候を短くメモ
目的との差を見る:予定より強すぎなかったか、必要な刺激が入ったか
次の行動を決める:予定どおり進める、負荷を下げる、回復日を増やす
毎回すべての項目を細かく分析する必要はありません。目的に関係する2〜3項目を選び、同じ方法で継続して比較するほうが変化を捉えやすくなります。
目的に合うSUUNTOウォッチで記録する
長時間のGPS記録、オフラインマップ、トレーニング分析に対応するSuunto Vertical 2
Suunto Run:軽量で、日々のランニングやインターバルトレーニングを記録したい人に
Suunto Race 2:レースや体系的なトレーニングに取り組み、見やすい画面でデータを確認したい人に
Suunto Vertical 2:登山や長距離トレイルで、長時間記録とオフラインマップを重視する人に
モデル名の違いより大切なのは、目的に必要なデータを継続して記録し、Suuntoアプリで同じ視点から振り返ることです。
まとめ:数字を集めるだけでなく、次の判断につなげよう
GPSウォッチのデータは、速かったか遅かったかを判定するだけのものではありません。距離、ペース、心拍数、上昇・下降、主観的なきつさを組み合わせることで、身体にどんな負荷がかかり、次に何をすべきかを考えられます。
まずは次のアクティビティで、「目的」「心拍数」「主観的なきつさ」の3つを振り返ってみましょう。シンプルな習慣を続けることが、記録をトレーニングの改善へ変える第一歩です。
記録を、次のトレーニングへ
心拍数、トレーニング負荷、上昇・下降などを記録できるSUUNTOスポーツウォッチをチェックしてください。
SUUNTOスポーツウォッチを見る

How to use Suunto AIM-6 Thumb Compass
Mårten Boström says that the process of developing a new compass was an interesting one. “I have realized how much I as an elite orienteer can give insight to the product development team into how the product is actually used,” Boström says.
The team came up with an innovative design that supports three methods of direction finding. You can easily switch between methods, even during the same event, to match the challenges of your current terrain or the distance to the next control point.
With the AIM compasses it is possible to find and follow the direction in different ways. Which methods do you use and when?
On short legs I simply place the compass on the control leg and turn my body facing the next control to align the map meridians and needle north.
After I have picked a distinguishable object in the terrain to aim for I check which color/symbol -combination the north arrow is pointing to and aim for that same visual combination on every glimpse while proceeding towards the next control.
If I only need a course direction towards a big object (e.g. a lake) I might just use a whole sector in a similar manner.
On long legs I turn the compass capsule so I can see the north arrow fit in the orienting indicator – thus I don't need to keep the compass on top of the map on the rest of the leg.
In all of these I'm of course AIMing into the correct direction where the red arrow on the far end of the compass plate is.
The new Suunto AIM-6 can be used with a magnifying lens. When do you use that?
A loupe (or magnifying lens) is starting to be a popular accessory even for orienteers with good eyesight. There are more and more details on the maps nowadays and the loupe really helps.
Place the loupe in front of the thumb compass so that you can see the corner of the compass baseplate but mainly magnifying the map.
READ MORE
Learn more about the new AIM-6 and AIM-30 compasses
World champion’s 10 tips for orienteering
Meet the orienteer who runs a 2h 18m marathon


DEVELOPING A NEW ORIENTEERING COMPASS IS A TEAM EFFORT
Mårten, when did you start working on this project?
I have been involved in the development of Suunto's new orienteering compass line from the beginning of the year.
Product development is exciting as I have realized how much I as an elite orienteer can give insight to the product development team into how the product is actually used.
Mårten Boström worked closely with Suunto's compass business line manager Henrik Palin and designer Heikki Naulapää.
What did you want to change or improve?
As the compass is an orienteer's most precise aiding tool in navigating it's been an interesting task to refine the current compass to become an even better friend when out in the woods.
I wanted to redesign the needle in order to achieve a better contrast on to the map, make the needle much more stable while keeping it fast and take away some markings on the baseplate.
The graphics on the baseplate and the compass capsule were designed based on Mårten’s feedback.
Since the use of the compass needs to be swift I wanted to add color and symbol codes on the edge of the bezel so that there's no need to rotate the compass capsule. Using the colors and symbols one can simply memorize where the arrow is aiming and advance rapidly.
Our goal was to make the colors and symbols on the AIM distinguishable but easily memorable.
What are the key characteristics of a great compass?
A great compass should be easy to use and have a fast & stable needle.
How do you actually test a compass?
The compass is best tested in actual orienteering conditions out in the forest where temperatures vary from -10°C to +35°C and twigs hit your face while you are trying to navigate through unknown terrain over hills and through marshes!
Learn more about the new AIM-6 Thumb Compass
Learn more about the new AIM-30 Compass


