


Suunto Blog

This relay run shows we are stronger together
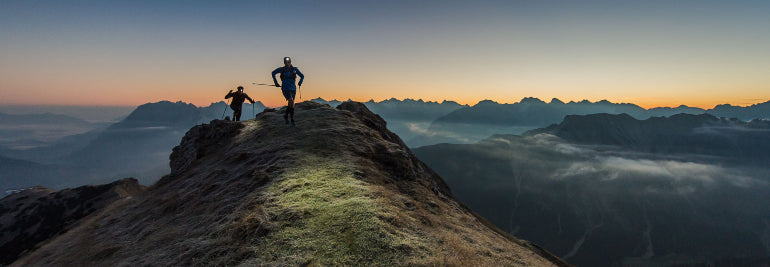
© Nicolas Holtzmeyer
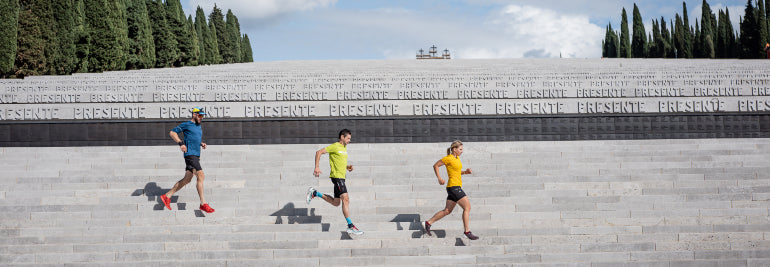
Ten athletes from Germany, Austria and Italy took turns to run the historic 850 km frontline where Italian and Austrian troops fought during the First World War.
They have completed the epic adventure run that aimed to observe Italy’s annexation of South Tyrol 100 years ago and to also celebrate how far Europe has come since the hostilities and wars of the 20th century.
Teams of two took turns to run, carrying a baton with a Suunto 9 attached, while the rest of the athletes visited the historic sites of the former frontline and talked to local people about the history.
The 850 km run, with 55,000 m of elevation gain, began in Grado, an Italian seaside town, and finished in Stelvio Pass in northern Italy.
AlpsFrontTrail initiators Philipp Reiter and Harald Wisthaler shared updates about the team’s progress and experiences. Check out short videos from each of the seven days running below!
Day one
Day two
Day three
Day four
Day five
Day six
Day seven
Day eight
Review the adventure on Instagram or at AlpsFrontTrail!
Lead images: © Philipp Reiter

Kilian Jornet starts initiative to protect mountain ecosystems
© Kilian Jornet Foundation
Suunto ambassador and mountain athlete Kilian Jornet has spent all of his life exploring, training and racing in some of the world’s most beautiful mountain landscapes. He started out life in a mountain hut in the Pyrenees, spent his youth training there, and then went on to set FKT records on many of the great summits of the world. Up in the mountains, far away from the madding crowds, is where he feels most at home.
Which is why now he wants to give back to the incredible environments that have sustained him. Climate change, pollution, habitat and biodiversity loss, are all degrading mountain and alpine ecosystems. Over the decades of racing and performing, Kilian has witnessed this firsthand.
“I’ve been climbing mountains and crossing glaciers my whole life, and I have observed how the effects of climate change have been devastating,” Kilian says. “We all have a role in reversing this tendency and ensuring that the next generations are able to not only play in the mountains, but are able to live on a healthy planet.”
© Matti Bernitz
Inspired to try to be part of the change, Kilian has founded the Kilian Jornet Foundation, which aims to preserve mountain environments through research, direct action and education. “I have been taught since I was a kid about the need to protect the environment, and I have done as much as I can with my own hands,” Kilian says. “Now, I want to take a step further and help projects, organizations and individuals that dedicate themselves to preserving the planet. The planet needs all the help we can give it.”
The first project the Kilian Jornet Foundation will support is the study and investigation of one of the most visible victims of climate change: the retreat of glaciers. Studying this is key to developing projects to conserve these ice masses that hold between 60 and 80% of the planet's freshwater. To do this, the Foundation is partnering with the World Glacier Mountaineering Service (WGMS) of the University of Zurich in Switzerland. For more than 125 years, this program has been gathering standardized observations of glacial change, and their fluctuations.
The funds collected will go to different initiatives promoted by the World Glacier Mountaineering Service, from measuring devices and equipment for researchers to education programs for schools, among other things.
“The Kilian Jornet Foundation is born to reach goals that individually we’re not able to achieve, to share knowledge and skills for the common goal of preserving the mountain environment and fight against what endangers it,” says Pau Ylla, director of the Foundation. “Climate and other changes need to be addressed comprehensively and it is essential to gather data and raise awareness of the importance of small actions for the change of the global system affecting mountains.”
Lead images: © Kilian Jornet Foundation
Read more articles
Run wild for nature!
Six ways to plan a route for your next adventure
Start your path to mountain navigation mastery here

Run wild for nature!
Anyone who spends time in the great outdoors ends up revering nature and wanting to protect it. And it needs our protection more than ever with study after study showing the planet’s ecosystems and wild animal population are in steep decline because of human activity. We must move to stop this now.
You can be part of the change by becoming one of the million runners that Adidas Runtastic and its partners are calling on to lace up and run for the one million species currently threatened with extinction. To add your voice, sign up for the Run Wild Challenge on the adidas Running app, pick one of three animals to compete with, and get moving!
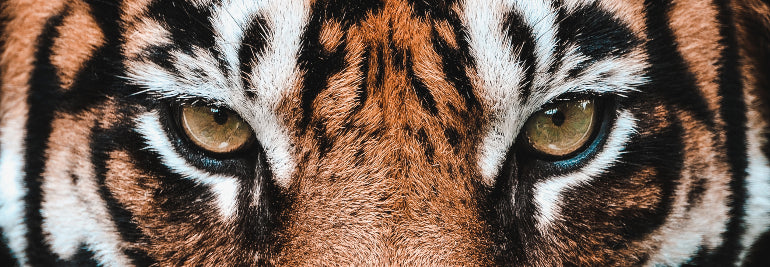
The Run Wild Challenge aims to inspire and educate runners by sharing knowledge and stories about three particular animals: Adjany the elephant, Tendrel Zangmo the tiger, or Pamoja the pangolin. When you sign up for the challenge on the adidas Running app, you’ll follow one of these three threatened animals through their habitat as you try to keep up with the kilometers they travel daily. As you do, you’ll learn more about their ecosystems, the foundations and people working to protect them, and more ways you can get involved to support them.
In partnership with the United Nations Environment Programme and Internet of Elephants, adidas Runtastic’s Run Wild Challenge will prove that athletes and outdoor adventure types are calling for new global efforts to protect the natural world and endangered species. They will take the results of the Run Wild Challenge to the UN General Assembly Biodiversity Summit this September.
To connect your Suunto app account with adidas Running, open Suunto app and tap “Profile”. Then click on “Connect to other services”. Select adidas Running and enter your adidas Running login details to connect the two apps.
Hop across to the Run Wild Challenge on adidas Running app and add your voice now!
Learn about Suunto Compatible partners

Six ways to plan a route for your next adventure
An essential part of outdoor adventure is planning. The better you are at it, the smoother, safer and more relaxed your trips.
Of course, there are many aspects to planning, from understanding the topography and distances, through to knowing your group and managing rest breaks. However, knowing your route is key. When that’s sorted everything else is more likely to flow.
Whether you want to start from scratch, use an existing route or something in between, here are six different ways to create a route for your Suunto watch to guide your next adventure.
Suunto app’s route planning capabilities are very versatile. Depending on the situation you can use the most suitable option – even on the go as all these work on your mobile.
Planning a route from scratch is just one of the many route planning options on Suunto app.
Plan a route from scratch
Just opening the map and starting to draw your own route is probably the first route planning method that comes to people’s minds. Just mark the starting point and key points along the way to draw the desired route to your destination.
Tip: To help the route planning process you can choose whether you want to follow “any road or path”, “all road types”, “all road types avoiding hills”, “paved roads” or “free drawing”. Using the most suitable option will make planning more efficient.
Plan using heatmaps
Suunto Heatmaps show the tracks frequently used by Suunto community all over the globe, based on millions of activities. Turn the heatmaps on and choose the desired activity type. Suunto heatmaps are sport specific. This allows you to differentiate between activities, for example, running and trail running. Heatmaps can be on while planning routes. This enables you to see where the popular trails are.
Tip: Suunto app also has “My Tracks”, a new feature showing where you have been during the last week, month or a year. Compare your own tracks with the general heat to spot areas and trails you haven’t yet been to.
Suunto app recommends popular routes for your location.
Use popular routes on Suunto app
When browsing Suunto app’s map view, you can swipe up a menu of route recommendations: the app automatically generates popular routes for the location you have selected. Simply select an activity type, see what others have been doing and select one you like.
Tip: If you want to see more route options, zoom out or change the location for your search and tap ‘Search here’.
Use an existing activity
Would you like to do that awesome run from last year again? Or has your friend been to an interesting trail? You can use existing activities to create routes. All you need to do is tap the three dots on top right of the activity screen and select ‘Save route’. The route then opens in Suunto app’s route planner so you can name the route and sync it to your Suunto watch.
Tip: If you want to find your old activities more easily,, add a trail name, location etc in the description field. You can then search for them in your Diary on Suunto app and create routes for navigation.
You can sync routes to Suunto app from Suunto compatible route services, like Wikiloc, and get access to their planning tools and route libraries.
Sync from a partner service
Suunto app is compatible with several route planning services, like komoot, Fatmap, Wikiloc, Twonav Land, Openrunner and2bulu (in China). Connect your Suunto app account with the partner service to get routes created there to be synced with your Suunto app – and your watch. You can find thousands and thousands of routes in the partner services and also use their tools, like route libraries, desktop apps and big screen solutions. (Learn more about Suunto's partners.)
Tip: Some of our route service partners are included in Suunto Value Pack. Learn more about it here.
Import a GPX file
Have you spotted an interesting route in the media or perhaps a race organizer has offered you the race route as a GPX file? To get that route on your watch, save it in a location you can access on your phone and open it using Suunto app. (Learn how to import a GPX file on Suunto app for iOS or Android.)
Tip: You can also share or save your own routes as GPX files using Suunto app: Go to the list of your routes and click the sharing button. Then select whether you want to share the route or save the GPX file.

4 ways to navigate like a pro with a Suunto 7
We’ve all been there: you head out for a run, and it feels really good and turns into an exploratory run and before you know it you either have no idea where you are or you need to find a shortcut back because you’re running late.
No need to fumble with your phone, the Suunto 7 has your back. Read on for its four ways to find your way. All these navigation aids can be utilized during any activity type with GPS.
Suunto 7 has detailed terrain maps available for offline use.
Breadcrumbs
Like the breadcrumbs left by Hansel and Gretel, the Suunto 7 always draws the path you have travelled on a terrain map. This feature allows you to follow your tracks back to your starting point. And you don’t need to slavishly follow the exact same route back; if you like you can take a shortcut and merge back with the breadcrumb route later.
Terrain maps
To aid with this on-the-go navigation the Suunto 7 also shows you detailed terrain maps that are automatically downloaded to your watch for offline use. Suunto 7 downloads and updates local offline maps with heatmaps automatically when your watch is charging and connected to Wifi.
The downloaded map area is based on your last known location and varies from 35 km × 35 km to 50 km × 50 km (from 22 mi × 22 mi to 31 mi × 31 mi), depending on where you are located. You can also create custom offline maps for your travels and adventures away from home.
Learn more about offline maps
The more a route glows on a Heatmap, the more popular it is.
Heatmaps
Another option is to use activity-specific Heatmaps on your Suunto 7. Heatmaps are simply maps showing the most popular routes of the Suunto community. That’s really useful when you are deciding on route options or exploring a new area.
Learn how to change map style during exercise.
Create routes on Suunto app and select which ones you want to use on your Suunto 7.
Preplanned routes
Suunto 7 offers offline route navigation with detailed outdoor maps. The routes can be synced to your Suunto 7 via Bluetooth from Suunto app. You can create a route from scratch or use an existing route. Simply select which routes you want to have available on your watch on Suunto app and sync. When your Suunto 7 is charging and connected to Wifi, an offline outdoor map is downloaded for each route to your watch automatically.
You can either start navigating with a preplanned route at the beginning of a workout or later during the activity. The selected route is visible in the map view of your Suunto 7. Zoom in and out with the top and bottom buttons, or tap to see an overview of the route and get notifications if you go off path.
Learn more about Route navigation with Suunto 7
READ MORELearn six ways to create routes for your Suunto

Follow this historic alpine run celebrating unity
Setting off on 06 October, 2020, ten trail runners will traverse 850 km and 55,000 m of vertical gain in the European Alps to mark the centenary of Italy’s annexation of South Tyrol and celebrate how far Europe has come since the wars of the 20th century.
The AlpsFrontTrail was initiated by Suunto trail runner and filmmaker Philipp Reiter and South Tyrollean photographer Harald Wisthaler. The adventure run aims to celebrate Europe’s unity and freedom, and to observe the historical consequences of division and rigid nationalism.
The Italian frontline during the First World War.
It all began earlier in 2020 when Philipp and seven other runners ran the 1400 km border that separated east and west Germany before its reunification in 1990. A German himself, Philipp says the project moved him and put his freedom in a different light.
“We had such a great team, had a lot of history lessons and I personally gained a different view on freedom,” Philipp says. “Freedom is never given, you always have to fight for it! After a skimo trip to South Tyrol, I visited all the old military bunkers there and got curious about the history behind them.”
Back home he read about the history of the front, one thing led to another, and the AlpsFrontTrail project was born.
Studying and planning the epic route has taken weeks. © wisthaler.com
Philipp believes this adventure run is particularly timely because the unity and peace that much of Europe has enjoyed since the end of the Second World War is being threatened by rising populism. The open borders and freedom of movement could be lost. He points to the closing of borders during the 2015 refugee crisis – including between Italy and Austria – and again more recently with the arrival of the COVID-19 pandemic.
“Watching the news nowadays you have the feeling that despite us living in a globalized world, the understanding of our ‘togetherness’ is really falling apart,” Philipp says. “Everyone is just in it for himself and greed is growing more and more.
“It’s very cool that as athletes we can show how sport can connect people and bring them together,” Philipp continues. “Athletes have a big reach, a strong voice in our communities and are mostly seen as honest. We have some power to make people think and give them a different perspective than many politicians usually do.”
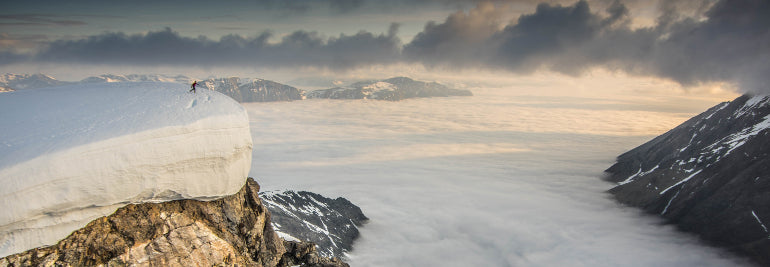
It's hard to imagine troops fought in terrain this rugged. © Philipp Reiter
Running in teams of two, the runners will start in the Mediterranean city of Grado, Italy and then progress up into the Alps, following the Italian front in the First World War, and finishing at Stelvio Pass in northern Italy.
“It’s going to be around 120 km everyday though the heart of the Alps, with big climbs, technical terrain, maybe some snow on the ground and less daylight with the arrival of autumn,” Philipp says. “Plus, while most of us know one another, being in a campervan for more than one day can also get quite a challenging. It’s going to be hard in many ways."
Despite the hardships the project will involve, Philipp says the team aims to support one another and learn as much about the history as they can.
“We have different nationalities, different characters, different backgrounds, but we share one goal!”
Lead images: © Philipp Reiter
Follow AlpFrontTrail on Suunto Instagram and at alpfronttrail.com on October 6–14
Read more articles
Your path to mountain navigation mastery starts here
Welcome to the season of the FKT
No races? Conquer your own Everest


