


Suunto Blog

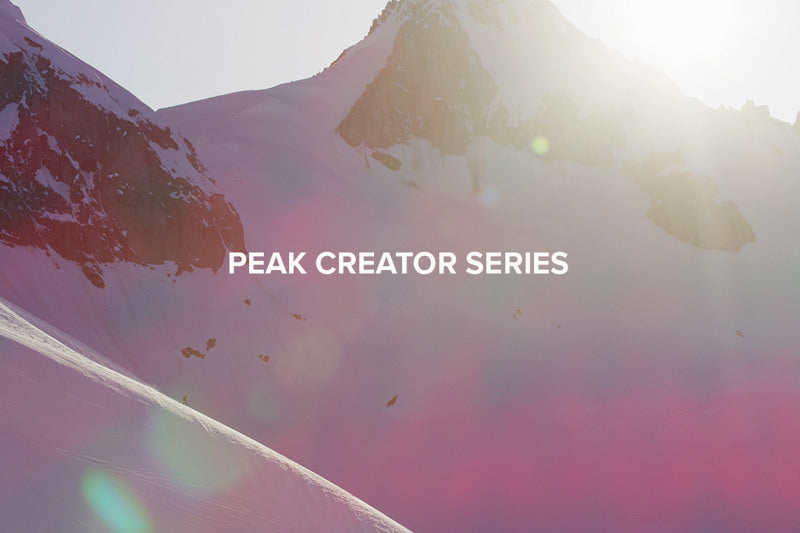
Peak Creator Series –The Photographer
Originally a graphic designer, once Angela Percival got a taste of outdoor adventure photography there was no going back - she decided to focus on creation.
This is the second in our Peak Creator film series, which celebrates creative people inspired by the great outdoors. We talk to four creators and find out what inspires their creative work.
Now Arc’teryx’s senior outdoor photographer, she had to work hard to break into a profession dominated by men and now her work speaks for itself.
“What inspires me creatively is just being outside, period,” Angela says. “Being in the mountains, yes, being in the alpine even more, but I just need to be outside.”
Click play below and watch Angela share her creative inspiration.

Suunto celebrates peak creators
Since forever, the great outdoors and its misty forests, silhouetted mountain ranges, and craggy peaks have inspired creatives of all ilk, whether poet, painter, musician or photographer. The awe nature strikes in us gets the creative energy flowing. The resulting work has, in some cases, inspired the masses and shapes how we see and protect the natural world.
At Suunto we believe this is worth celebrating. So we initiated our Peak Creator film series, in which we met four creators - a trail builder, a photographer, an architect and an artist - and found out how the natural world inspires what they do. We’ll publish a short film about each of them in the coming weeks.
Meet photographer Angela Percival, architect Ryley Thiessen, artist Jessa Gilbert and trailbuilder Dan Raymond in the Peak Creator Series.
The first film up, the trailbuilder sees his work more as uncovering what’s already there; next up, the photographer admits she’d rather be out shooting than indoors editing; then the architect explains how his mountain resorts bring people closer to nature; finally, we meet the artist who packs her painting kit and heads out for epic free rides.
Stay tuned for each film as it drops. And get your own creative juices flowing!
Watch Peak Creator Series episode 1 – The Trailbuilder
Watch Peak Creator Series episode 2 – The Photographer
Watch Peak Creator Series episode 3 – The Architect
Watch Peak Creator Series episode 4 – The Artist
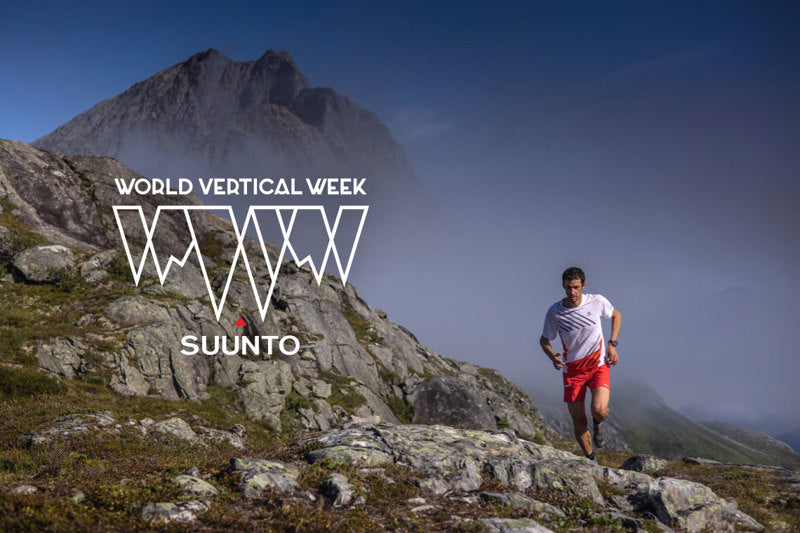

World Vertical Week 2021 summer edition raises the stakes
Wow. 70,000 participants in seven days. That’s how many people chased vertical meters with us in the first summer-fall edition of World Vertical Week. The Suunto community’s outdoor summer sports enthusiasts raised the stakes in more ways, proving they can hold their own with the vertical appetite of the winter outdoor sports tribe any day. The ball is now in your court winter tribe!
Read on to see the results of the national and sport-based rivalries and see who came out on top!
The reign continues
Austria deserves an applause. It’s the country with the highest average climb per activity, 465 m, a little higher than its winter result, when it also achieved first place. The alpine nation has held first place in this category for five of the last six editions. It only lost its crown in 2019, falling to fifth place. What’s more, it finishes in the top five of six more categories. Well done Austria!
Punching above its weight
Slovenia, a tiny mountainous nation of 2.1 million people, clearly has a serious appetite for pushing uphill. Aside from Austria, it’s the only other nation to feature in the top five of seven categories. Respect!
The three amigos
Spain comes in first for the total ascent per country, followed by Italy and France. These three are always battling for pole position in this category. Spain has come first in this statistic for two editions straight now.
Huge individual performances
Perhaps one of the biggest surprises from this edition of the World Vertical Week was the massive individual performances. Whereas during the previous winter edition there was only nine individuals who surpassed 10,000 m of vertical gain over the week, this time there have been 59 people to do this - that’s a 500% increase!
Also a big increase was the number of individual activities that involved more than 3,500 m of vertical ascent. There were only 89 of these in the previous winter edition, and 218 this summer edition. Impressive!
Trail running rules
It seems like trail running is the popular, go to summer sport and that trail runners like the challenge of a climb. Of all the climbs that involved 1000 m, trail running made up 34% of them. And that percentage only increased for activities with over 2000 m of ascent; trail running made up 47% of these.
The biggest climbs
They say mountaineering is 75% perspiration and 25% inspiration because it’s the outdoor sport that involves epic, often gruelling vertical ascents. That’s why it comes in first place for the highest average vertical ascents per activity type, with trail running coming a distant second.
Alpine nations live to climb
Italy, Austria and Switzerland all enjoy incredible alpine landscapes so no wonder mountaineering is so popular among them. Respectively, they take first, second and third for the highest average meters in the mountaineering activity type by nation.
Go Japan
We know Japan is a mountainous nation with an incredible trail and hut network. So it’s not a surprise to discover trail running is hugely popular there. Japan came out on top for the highest average vertical meters per activity for trail running: 806 m. Is Japan the next big trail running destination?
Top 5 nations in different activity types
Mountaineering
Italy 962m
Austria 891m
Switzerland 891m
Germany 881m
France 820m
Trail running
Japan 806m
Italy 703m
Austria 667m
Slovenia 645m
Switzerland 617m
Mountain biking
Austria 705m
Switzerland 632m
Italy 597m
Slovenia 576m
Spain 462m
Trekking & hiking
Slovakia 550,0m
Austria 549,7m
Italy 526m
Switzerland 502m
Slovenia 405m
Cycling
Italy 426m
Portugal 415m
Slovenia 379m
Spain 370m
Austria 348m
Running
Ecuador 212m
Slovenia 189m
Switzerland 160m
Norway 152m
Ireland 139m

Turning ideas into action
Tenji (middle), Kilian Jornet and David Göttler met while training in the Khumbu Icefall. © Tenji Sherpa
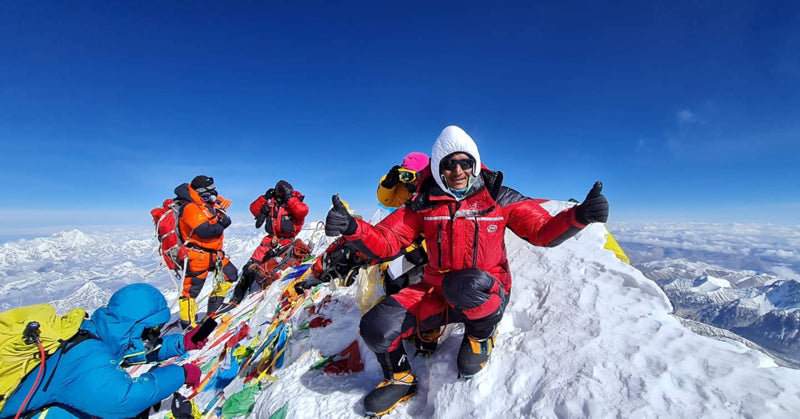
Suunto athlete Tenji Sherpa recently returned home to Lukla in Nepal after a difficult start to the climbing season at Everest Basecamp.The COVID-19 Indian variant was running rampant there. “Teams were stuck to their own sections at camp, different from past years where I could interact with friends working with other companies,” Tenji says. “It’s certainly a devastating situation that I hope soon begins to settle so autumn climbing can go ahead safely.”
Unfinished business
It’s not only more guiding that Tenji, 29, is looking forward to; he has his sights set on some ambitious personal climbs. Tenji is part of a growing number of Nepalese sherpas who are breaking out of the mould of traditional Sherpa work and showing the world they can climb just as well, if not better, than many of their Western counterparts.
At the top of the list of goals, Tenji has unfinished business on Lhotse (8516 m), the fourth highest peak in the world. In May, 2018, in the memory of his friend and inspiration the late Ueli Steck, Tenji attempted to complete the same daring traverse trip the “Swiss Machine” met his tragic demise on in 2017. “Inspired by his strength and support, I sought to climb Everest without supplemental oxygen and traverse to the summit of Lhotse,” Tenji says. “Unfortunately, the weather became too risky to finish Lhotse.”
This photo was taken while filming the Everest VR movie. © Jon Griffith
Humble beginnings
Tenji was born and raised in a small village called Gudel in Solokhumbu district of Nepal. Life was simple, he had a three hour commute to school each day, at a time when sandals were considered a luxury and running shoes were unheard of. As a boy he watched as his brothers and other villagers set off to the mountains to work as porters and guides.
Village elders mentored Tenji to do the same and by 2007 he was working as a porter to pay to go to college in Kathmandu. “Moving to Kathmandu was a huge change from life in the shadows of Everest,” Tenji says. “I knew I belonged back in the mountains. As such, I started formal mountain training in 2012 while continuing to work as a porter in the high season.”
Tenji gained his International Mountain Guide Qualification in early 2019.
Tenji with the late Ueli Steck on Jungfrau in Switzerland in 2015. © Tenji Sherpa
Meeting the Swiss Machine
His work as a porter is how, in 2012, Tenji crossed paths with Ueli Steck, who had made a name for himself for his lightning fast solo ascents of some of the world’s most challenging mountains, culminating in his legendary solo climb of Annapurna’s (8091 m) south face. On the night of the climb, Tenji had a dream of Ueli standing at the summit. The dream turned out right.
“From our initial meeting at Everest Basecamp, Ueli and I had a connection that sparked a great combination for climbing together,” Tenji says. “Learning from him when we climbed Everest together in 2012 was inspiring and confidence building, leading to our ascent of the renowned north face of Cholatse (6501 m). Teaming with Ueli on that technical ascent, I became the first and still the only Nepali to climb the mountain.”
Tenji says Ueli became something of an informal teacher to him. He respected Tenji’s ability at altitude, his work ethic and drive to challenge himself. And Tenji was inspired by the Swiss Machine’s alpine climbing style – fast, light, and without oxygen. “Ueli taught me that if I have an idea, it’s up to me to put it into action.”
In 2012, Tenji summited Everest without supplemental oxygen.
Tenji climbing Manaslu (8163 m) in winter 2020. © Tenji Sherpa
Guiding at the top
Now doing his own private guiding and working with a Swiss company, Tenji has summited Everest seven times and Manaslu (8163 m), and many 7000 m Himalayan giants. He’s pumped to take on new personal climbing projects, but has to sit tight until the pandemic is under control. The technicality of Cholatse’s north face continues to hold special interest for him.
When the pandemic first exploded Tenji was travelling abroad to meet climbers considering coming to Nepal. He got stuck in the U.K for five months before finding a way back to Lukla. He says the pandemic hasn’t been kind to Nepal’s guiding industry.
“Essentially more than a year out of guiding made for some challenging times,” Tenji says. “But despite the pandemic, the spring season this year has brought even more international climbers than any other year given that so many lost their climbs last year and that the Tibetan side is closed to foreign climbers.”
After years of climbing at the roof of the world, Tenji is perhaps better equipped than many to handle the unpredictability of living through the first global pandemic in more than a century. After all, what has alpinism taught him about life? “That it can change very quickly.”
Lead images:
© Tenji Sherpa
© Jon Griffith

Follow the adversity of Red Bull X-Alps live
Paul climbs Titlis in Switzerland during Red Bull X-Alps 2019. © Harald Tauderer / Red Bull Content Pool
Paul Guschlbauer could kick himself. A few months back, he was skiing on his local mountain when bad weather hit and he found himself in a whiteout. “In the middle of it I suddenly skied over a little cliff,” he says. “I didn’t realise what happened. I fell down the five to seven metre-high cliff and hit ice and my foot broke.”
That was three months ago, and has meant Paul lost two months of crucial training time in the build up to his seventh straight time competing in the world’s premiere hiking and alpine paragliding race. He has placed third in the last three editions, but this time can’t be sure how he will perform. “I feel I have good equipment, a good crew, I have a lot of experience with this race, but what I cannot know right now is how my foot will react, say, for example, after three days of walking 50 km,” he says. “I’ve had no time or chance to test it.”
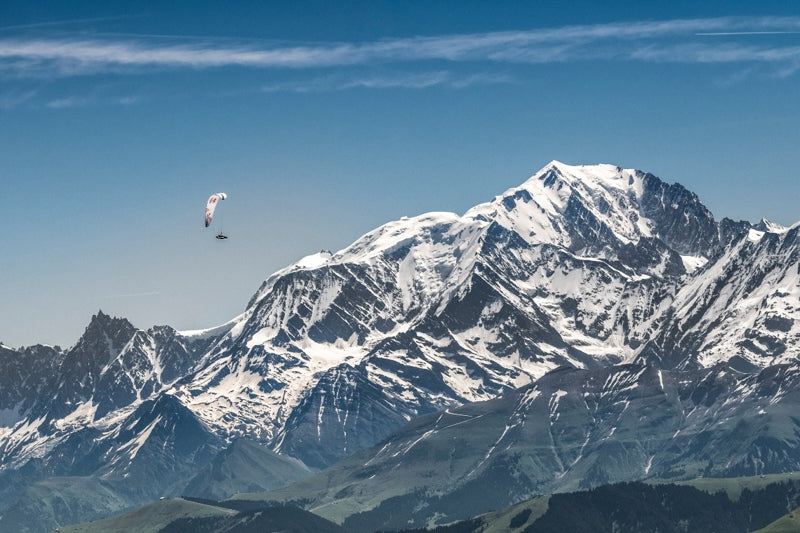
Mont Blanc looms large
Red Bull X-Alps starts in Salzburg, crosses the Alps by foot or paraglider, and has, until this edition of the race, ended on the Mediterranean Sea in Monaco. But the race organizers – after looking for ways to make the 10th edition of the race tougher – have implemented what Paul says is the biggest change in race history; instead of making their way from alpine peaks to the Mediterranean Sea, the 33 competitors will complete a loop, starting in Salzburg, to Mont Blanc, which they must circumnavigate anti clockwise, before returning east to ultimately finish on the waters of Zell am See, Austria.
“At Red Bull X-Alps you can never say one stage or another will be the most challenging,” Paul says. “It all depends on the weather. Of course looking at it now, and assuming great weather, the Mont Blanc circumnavigation, to turn around and go back to the goal, is definitely the most difficult alpine and mountaineering wise. That will be a challenging part. I hope I can get there.”
If the athletes hit bad weather at Mont Blanc, and it’s not flyable, it’s going to be a huge challenge. Follow the journey and the adversity live here!
Paul soaring next to Mont Blanc in 2019. © zooom productions / Red Bull Content Pool
Suunto has their backs
Suunto is a race sponsor and the athletes will be using Suunto 9 Baro Titanium Red Bull X-Alps Limited Edition watches to guide their journey across the Alps and back. With a battery life of up to 170 hours, the sports watch tested to the extreme is designed exactly for this kind of epic adventure.
“The most important feature, besides telling me the time and the sunrise and sunset times, which is really important, is definitely navigation in combination with the Suunto app,” Paul says. “It’s super easy to get all the tracks on the watch and then navigate with it. That’s the most time saving point overall.”
We are only producing 1238 of the Suunto 9 Baro Titanium Red Bull X-Alps Limited Edition watches. One for every kilometer of the race. Get yours here!
New hike and fly watch feature
A new SuuntoPlus feature designed for paragliders will also support Paul and the rest of the athletes on their journey. The Red Bull X-Alps SuuntoPlus feature is a handy tool to keep track of vertical speed, similar to what a paragliding variometer provides. It helps the hike and fly community to see, feel and hear how fast they are climbing.
“The new watch feature is pretty cool,” Paul says. “It’s like a back up that you always have with you for if you didn't bring your variometer, or any other flying device. You can't use it instead of a real flying device, but on a hike and fly, if you forgot your equipment, it's great to have it.”
Follow the race live!
This 10th edition of the race is likely to be the most action-filled yet. Millions of people across the world tune in to watch the progress of their favorite athletes live on the state-of-the-art Red Bull X-Alps live tracking tool. It shows you where the athletes are on the map, and keeps you up to speed with breaking news from the field.
Find out about the athletes here, choose your horse, buy some popcorn so come race day on June 20 you’re ready to settle in and follow the action!
Lead images:
© zooom productions / Red Bull Content Pool
©wisthaler.com
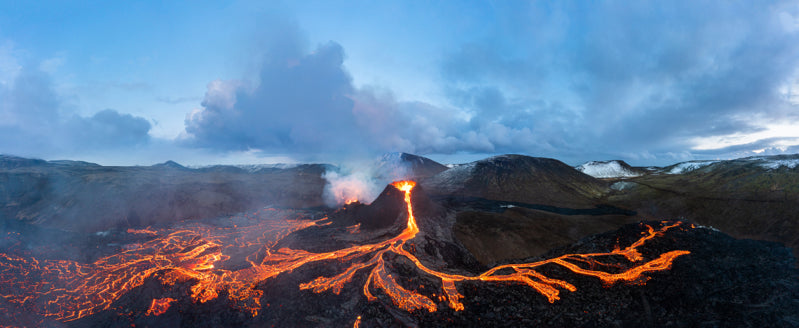

Peak experiences are here and now
American photographer and artist Chris Burkard travels the world documenting amazing people, places and events. Recently he was visiting Iceland, a country he adores, to go on a bikepacking adventure. But life had other plans. A volcano erupted, and Chris knew it was a once in a lifetime opportunity to capture this incredible force of nature. It didn’t disappoint.
Press play to watch the power of nature!
What he witnessed blew his mind and got him reflecting on peak experiences, those almost altered states of consciousness characterised by euphoria and wonder. “I was just so honored to experience it,” he says.
We caught up with Chris and asked him about the experience and what he’s learned about peak experiences through his years of travelling the world and witnessing incredible things.
Do you often travel to Iceland?
I do! In fact I have been there 43 times. In some ways it's an obsession and I think what draws me there the most is the landscape as it’s so visceral and ever changing. But honestly, it's the people that keep me coming back and that keep me engaged and interested.
How did you feel standing so close to a live volcano?
Oddly enough I truly felt at home. At peace.. Like it's something I have been doing for thousands of years. In many ways it felt incredibly calming.
You mention peak experiences in your Instagram post – I imagine your work has brought you many – do these happen by chance or are there things, in your experience, we can do to invite them to occur?
I think that a “peak” experience is the byproduct of the time you put in. You realize at a certain point that to truly experience the height of something you need to slow down, be patient and really recognize when a moment is special. Sometimes a peak moment won't slap you in the face or excite you right away. You realize it later. It sort of dawns on you. I like to give myself the time and patience to recognize these moments. Rarely, when I do recognize them in “real time” it can feel really special.
What does a peak experience feel like to you?
It's a moment when your mind and heart and body are all in sync, it’s the certainty of knowing that there is no other place on Earth that I should be right now.
Do your peak experiences only occur in epic situations like your visit to the volcano, or, say, while surfing a perfect wave, or can they also occur in everyday life?
Everyday life. With my kids, at my property. On my bike commute. It's just the knowledge that a moment is special, will rarely be repeated, and you sort of get a glimpse of the future. And realize I need to cherish this.
You talk about the importance of giving yourself the space to experience before shooting – how do you personally approach this?
Honestly in some ways it kind of sounds like voodoo, but I truly feel like the way to really experience a place is to make an offering. An offering of time and interest and engagement. Not hiding from its many moods and feelings. Its storms and high winds. That is how you find a connection. You have to go through those things to really feel a place. I firmly believe that if you invest that time into a place and put in that effort, you are rewarded.
All images: © Chris Burkard


