


Suunto Blog

Talking training with sub-8h triathlete Patrik Nilsson
From how to balance his training load to his favourite post-workout meal, Swedish triathlete and Suunto athlete Patrik Nilsson shares his approach to training.
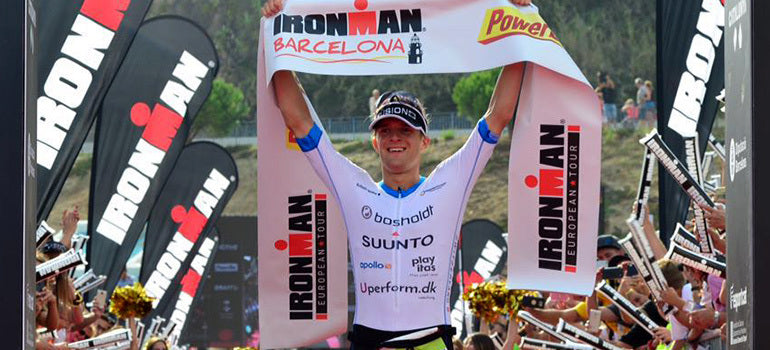
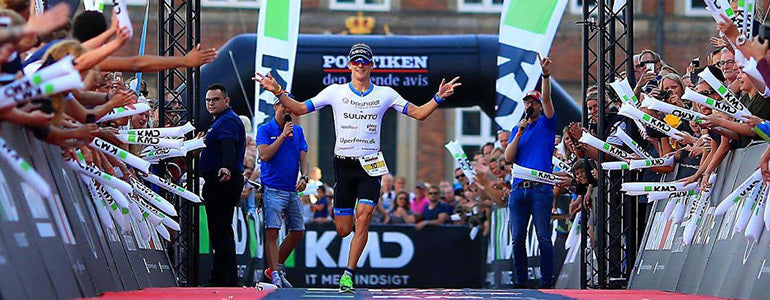
At this year’s KMD Copenhagen Ironman, winning 25-year-old professional triathlete Patrik Nilsson achieved the seventh fastest time in the history of Ironman: 07h49m18s. This smashed his best personal time by 20 minutes.
Last weekend Patrik was at it again and crossed the line in Ironman Barcelona in another amazing time of 07h55m28s. We caught up with Patrik just before Barcelona and quizzed him on his approach to training.
You must have felt amazing at the Copenhagen race?
When we reached the mid way point of the bike ride, I started to think about what time I could achieve. I thought for a moment I had been counting wrong or something. I realised if I kept up the pace I could go under eight hours. But then it was even faster! Under 7h50m is amazing. Way faster than I thought possible!
You’re working with a new coach, right?
Yes, and she’s also my girlfriend. Teresa noticed a lot of things in my training and in my mentality that wasn’t as it should be. To do well in races, you need to have fun. You need to really enjoy it, to say, “I really want to win this”, and that’s what I didn't have before.
Has your training changed?
I’ve been focusing more on long runs and long bike rides to develop endurance and to push my threshold higher. I’ve been trying to work on my fat percentage to get my weight down and at the same time keep my muscles strong. As I say, one of the biggest changes was around my attitude – to have fun and really enjoy it.
How much are you training?
I’m training a lot! On a hard training week, usually between 30 to 35 hours. At the moment I’m doing a lot of riding, around 15 to 20 hours a week, and about 100 km of running and the rest swimming and core work.
How do you manage your training load?
I have a close connection with my coach, which is easy when the coach is your girlfriend! It makes it really easy for her understand how I'm feeling. We use Training Peaks, which makes it easy to see how tired I am, the training stress load and how I’m developing over time.
How long do you usually taper for?
Tapering is usually for one or one and a half weeks. The day before a race, I do one and a half hours of training. Two days before is just an easy jog or a swim. Three or four days before I do a hard three-hour bike ride.
©KMD Ironman Copenhagen
Do you follow any particular nutrition plan?
I drink a lot of chocolate milk. Since I’m training a lot, I need the carbohydrates. Chocolate milk makes it easy to get a little more energy. After a hard session I can drink between three to six litres of it. Apart from that, I try to eat healthy. I’m writing down everything I’m eating so I can see how much I’ve got through in a day.
What’s your usual recovery plan?
In the week following an Ironman I don’t do any running. I know that it’s easy for me to injure my calf if I do. During the week after the race I do an hour or two of easy riding or easy swimming each day. Then one week after the race, it’s back to serious training. I need that week off to recover mentally as well.
Images © Carles Iturbe
Read more
PATRIK NILSSON TRAINS FOR THE LOVE OF IT

Suunto Destination Runs – Next Stop London!
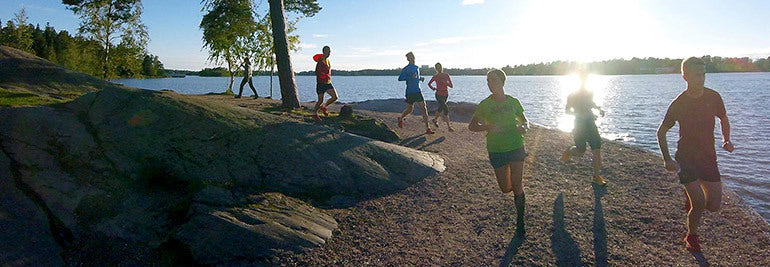
At the end of last month, on beautiful late-summer evening in Helsinki we hosted a group of runners to enjoy one of our favourite routes in our hometown. It was our first “Destination Run” and we loved it, and loved meeting all the runners who joined us!
Members of the Suunto team – engineers, marketing folks, local runners (some just back from UTMB), and even those who happened to be traveling in the city from overseas (NYC) joined us for some invigorating seaside miles and we shared our passion for running, together.
The runners were split in two pace groups to keep the going comfortable for everyone.
After the 8 km route, the group soaked up the final, stunning moments of the day, and chatted about running, training, upcoming races and product. It was a great evening and we were thrilled to see so many join!
You can find the route we ran as well as our other Helsinki go-to routes here
Next stop: London
We are continuing our Destination Runs in London on Thursday, September 29th at 7pm local time. The Run will be in Hyde Park and will start near Lancaster Gate beside the Italian fountains. You can sync the route we’ll be running to your Suunto Ambit3, Traverse or Spartan.
More details will be shared on the Destination Run's Facebook Event in days to come, so if you are in London, traveling or otherwise, we hope you’ll join us for an invigorating 8 km run!
Did you know that you can earn Finnair Plus points by running this summer? 10 million points are available. Learn more at finnair.com/beactive
Find must-run routes in Barcelona, Helsinki, London, New York City, Paris and Stockholm & stay tuned for more!
Images ©Teemu Maikkola
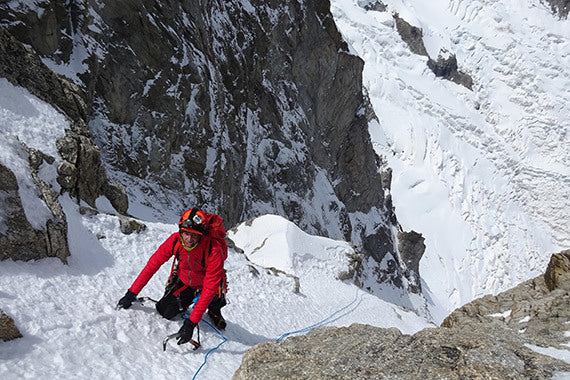

Kilian's Everest Dream Lives On
Kilian Jornet is returning from Mt. Everest without having been able to make a final attempt at the summit. Poor weather conditions during the final stage of the expedition forced him to abandon his climb of the world’s highest mountain via it's North Face. Though it was a difficult decision for Kilian and his team, he is as passionate as ever to continue to seek adventure through his Summits of My Life project.
“During the first few weeks we were acclimatising well and the conditions were good. However, when we were getting ready to prepare the attempt the weather began to change. There were some heavy snow storms and a large accumulation of snow. As a result, although we were in good physical shape, there was a high risk of avalanches and in the absence of good safety conditions it was impossible to climb,” Kilian explained.
In spite of not being able to complete the challenge, Jornet was happy with the experience. “There’s a sense of frustration because we’re well acclimatised and we feel good but it would have exposed us to too much risk. Nevertheless, we’re happy because it’s been a very positive experience in which we’ve learnt a lot. Being alone on Everest is incredible as there was no one else there. Now we’ll go home to recover and plan the future. I think that if we come back there are some things we would change but it’s been a great experience and a good lesson for next time.”
So, having spent three weeks at base camp on the North Face of Everest (6,000m) acclimatising and preparing for the challenge of climbing the world’s highest mountain, Jornet and the Summits of My Life team postponed the the Everest challenge until a later date.
With this challenge, Kilian Jornet intended to complete the Summits of My Life project in which since 2012 he has broken records for the ascent and descent of mountains around the world.
READ MORE
KILIAN JORNET’S GAME PLAN FOR SPEED ASCENT OF EVEREST
THIS IS HOW KILIAN PREPARES FOR EVEREST
Main Everest image: © Daniel Prudek/Shutterstock.com
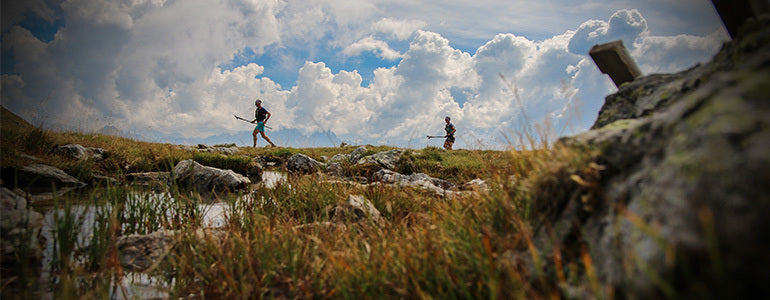

7 pictures that will make you sign up for the epic Alps stage race
The GORE-TEX Transalpine Run across the Alps demands just as much mental toughness as endurance. For those who have what it takes, an unforgettable adventure awaits.
Suunto-supported trail runner Philipp Reiter has competed in and photographed the GORE-TEX Transalpine Run four times, including the 2016 edition that finished in September. He and teammate Iker Karrera won the 2012 edition.
The seven-stage, 247.2 km race was the 12th edition and followed a new route. It included 14,862 m of vertical ascent, rocky trail and a glacier crossing. All participants must compete in a two-person team.
Due to injury Philipp couldn’t compete this year, but he was there to photograph its beauty and intensity. He tells us all about it below.
Stage one: Garmisch-Partenkirchen, Germany to Lermoos, Austria
Distance: 36.7 kmVertical ascent: 2088 mVertical ascent: 1791 mHighest point: 1634 m
Experiencing the cultures of the Alps is part of the fun. © Philipp Reiter
I’ve seen the same thing every year; some of the top teams start too fast and push too hard and bomb out because one team member becomes exhausted. It’s important to remember there are six more days after the mountain run on the first day. It’s best to hold back.
Stage two: Lermoos, Austria to Imst, Austria
Distance: 33.8 kmVertical ascent: 2009 mVertical descent: 2237 mHighest point: 1742 m
© Philipp Reiter
A lot of teams from north Germany, the Netherlands and Denmark compete. Maybe they’re good runners, but they underestimate the terrain – the rocky trail and the ascent. They don’t move fast enough to meet the cut off times of each stage. It’s more like a speed hiking race than a running race. You have to train your muscles to climb day after day.
Stage three: Imst, Austria to Mandarfen-Pitztal, Austria
Distance: 47.9 kmVertical ascent: 3037 mVertical descent: 2144 mHighest point: 2292 m
© Philipp Reiter[To properly prepare] you have to get your body used to doing endurance workouts many days in a row. Usually people work so they only have the weekend. But you need to try to do long sessions six or seven days in a row. Your body has to know what that feels like.
Stage four: Mandarfen-Pitztal, Austria to Sölden, Austria
Distance: 25.7 kmVertical ascent: 1887 mVertical descent: 2214 mHighest point: 2982 m
This year's race included a glacier crossing. © Philipp Reiter
[My mental strategy] is to cut the course into smaller pieces and objectives. For example, I focus on going from food station to food station or from stretch to stretch, climb to climb. Getting to that next location becomes the only goal.
Stage five: Sölden, Austria to St. Leonhard in Passeier, Italy
Distance: 33.3 kmVertical ascent: 1453 mVertical descent: 2111 mHighest point: 2492 m
© Philipp Reiter
Everyone goes through ups and downs. If you and your race partner get along well then he or she motivates you and the other way around. Usually one is up and the other is down and you can help to pull each other along. If you work together you can equalise the weaknesses of each other.
Stage six: St. Leonhard in Passeier, Italy to Sarnthein, Italy
Distance: 33.6 kmVertical ascent: 2440 mVertical descent: 2153 mHighest point: 2683 m
© Philipp Reiter
This year a lot of people struggled during stage six. The mood was at a really low level, with a lot of tired faces. One team took a taxi and went home.
Stage seven: Sarnthein, Italy to Brixen, Italy
Distance: 36.4 kmVertical ascent: 1934 mVertical descent: 2348 mHighest point: 2440 m
© Philipp Reiter
I enjoy this race because for the seven days you live in your own little world, with hardly any influence or contact with the outside world. You can switch off and focus on this one simple undertaking.

Training for the love of it
Suunto athlete Patrik Nilsson was a long distance runner, but it didn’t satisfy his desire to train. Then triathlon found him, and now he’s one of the fastest in Ironman history. © KMD IRONMAN DenmarkAt this year’s KMD Copenhagen Ironman, 25-year-old professional triathlete Patrik Nilsson had his mind set on one thing – having fun – but he achieved much more. He came first, smashed his own best time by 20 minutes and got the seventh fastest time in the history of Ironman: 07h49m18s. “It was the perfect day,” he says. “In Denmark it’s so open, and flat, and close to the sea so there’s always wind, but that day there was no wind. When we did the swim it was all flat, no waves at all. The conditions and course were perfect for a really fast day.” Only one year ago, Patrik wasn’t in such good form. Personal difficulties with his then coach were adversely affecting his training and outlook. It all came to a crunch at Ironman Cozumel 2015. He was in first position, with only 10km of the run remaining. But he was hating it so he quit and walked home. “To do well in races, you need to have fun,” he says. “That’s why I couldn’t run those last 10km; when it starts to get tough, you need to feel that it’s fun, and that’s what I felt again in Copenhagen.” © KMD IRONMAN DenmarkFrom Stockholm, Sweden, Patrik has lived to train since he was a kid. At school, he competed at a high level in long distance running, but it didn’t quench his thirst for training. He did his first triathlon in his last year at high school and finally found a worthy outlet for his energies. “With triathlon, there’s always something you can train,” he says. “If you can’t develop your running, maybe you can work on the swim or the bike. There are so many aspects. That’s what inspired me.” Patrik is currently training for Ironman Barcelona 2016. If he performs well, he’ll qualify for the Kona world championships in 2017. He’s working with a new coach, who also happens to be his girlfriend. “It’s good to have a close connection with my coach, which is easy when the coach is your girlfriend,” he says. “It makes it really easy for her to understand how I’m feeling. “There have been a lot of small things we’ve been trying to work on. One of the biggest was around my mentality – to make sure I’m having fun and really enjoying it. It’s worked out perfectly.” While he enjoys pushing his limits with racing, Patrik doesn’t overdo it. Training is what he loves and that’s the focus for most of the year. “For me, it’s better to have one, two or three months of really good training and then do one race and go really hard,” he says. “The most important thing is to have fun. “In Copenhagen I really felt it was fun, I really enjoyed standing on the beach next to the guys and saying, ‘I’m really going to beat you, I’m going to kick your ass and this is going to be fun’. That gives triathlon something more than just the expectation you should win.”
Stay tuned for part two of series about Patrik!
MAIN IMAGE: © KMD IRONMAN Denmark

Luka Lindi? takes on Gasherbrum IV
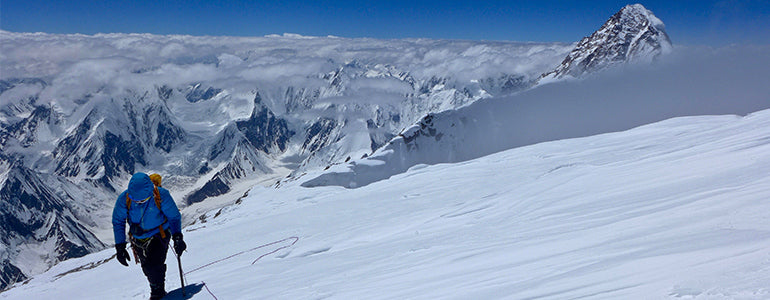
Mountaineer Luka Lindič has been climbing one of the toughest peaks on the planet – Gasherbrum IV in Pakistan.
Climbing Gasherbrum IV © Luka Lindic
He and Aleš Česen made it to the North Summit, around 20metres below the 7932-meter-high main summit, after battling fierce weather that made reaching the summit impossible. Of course the guys are pleased with how far they reached on this treacherous route, in difficult conditions.
They originally planned to take a new route, via the North West face but that was completely impossible in bad weather. Before tackling the G4 they scaled Broad Peak, making them the only team to successfully summit that mountain this season.
This climb was used to acclimatise, and got the guys in the right frame of mind mentally for the big route, Luka says: “Some people might think using a climb like Broad Peak to acclimatise might take away a lot of fitness, but I think if you plan to climb a route like we did on G4 then it shouldn’t be a problem. If it makes you tired, then you are not prepared enough! It took away a bit for sure, but we benefited lots more than we lost. A climb like that is also important from a mental point of view, as a final check.”
Luka Lindič and Aleš Česen © Luka Lindic
The weather in the area meant the Alpine style of climbing the pair used gave them an advantage over other teams climbing differently. Luka says: “The other teams were climbing in a classically Himalayan style and spent lots of time and energy preparing. Now, it seems this is how it will be in Pakistan. The weather is not stable and you get a window of maybe two days. If you climb Alpine style like we did you are flexible and it’s easier to get up and go when there is a good weather window. With Himalayan climbing that’s a lot more difficult to try. That was our advantage this time.”
Feeling strong after Broad Peak they started on G4, dubious they’d make it far in bad conditions. However, they managed to climb through the weather and pushed on until they made the North Summit.
The guys tried to wait for bad weather to pass © Ales Cesen
Luka says: “It was pretty bitter sweet. On one side you know you will not climb G4 but you know inside you did the maximum you could. It was a cool experience after struggling all day to reach the North summit we had sun for a few minutes, we could even see the summit for a few minutes. We had pushed hard already and decided the summit wasn’t possible, but were happy with what we did.”
The guys had to rappel back down to avoid being swept away by avalanches. Now back from the trip he can contemplate the attempt, and he knows he’ll go back. He’s got some technical climbing planned in the meantime, he says: “I will go climbing in China for one month in September then my plan Is to spend some longer time in the Alps. I’ve been on expeditions this year so I feel like I have missed some technical training in the Alps and I want to get back to the level of climbing I want to be at, as doing expeditions you lose a bit of that.”
Main image ©Luka Lindic


