


Suunto Blog

Data crunch: sports in 2020
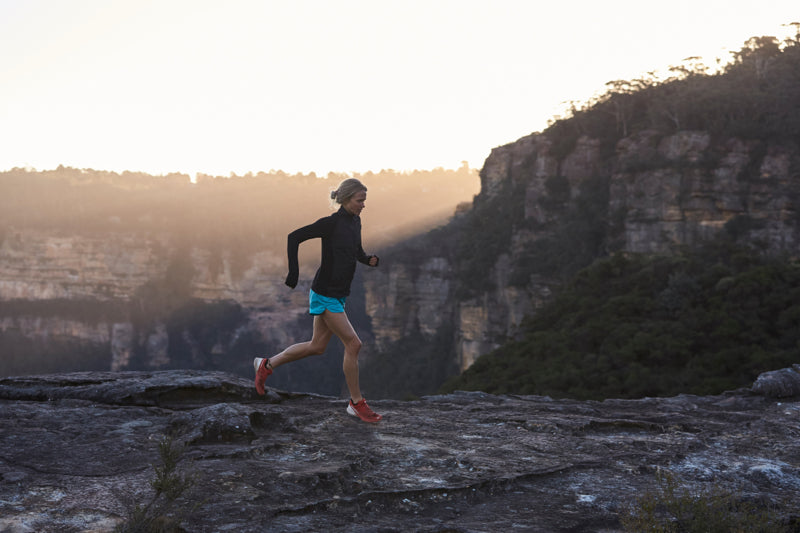
South African ultra runner Ryan Sandes was right on the money when asked about races being cancelled in 2020: “Sure, it’s a little disappointing,” he said. “But at the end of the day it’s just a race. I’ve still got my health, I’ve still got my family. When you look at it more holistically like that it gives you peace of mind and you become a better athlete, a better human, you’re more relaxed. For running ultras you need this, you need to be calm and in a good headspace.”
Whatever your sport, having a positive, calm headspace is optimal. It hasn’t always been easy maintaining that this year. But the reverse is also true; training, pursuing the sports we love, helped to keep us on an even keel. Each reinforces the other.
The data we’ve collected and crunched from 2020 user activity shows staying active, finding ways to train, and even taking the opportunity to rest more, have been key in helping us ride out this crazy year. We’ve found ways to keep ourselves pumped. Let us walk you through the data.
Spain on top
The first wave of COVID-19 hit Spain hard. The lockdowns were strict, sudden and shocking. But that didn’t stop Spaniards from continuing to train and find ways to challenge themselves. Our data shows Suunto’s users in Spain clocked the highest total minutes per user, averaging 5,965 minutes on average.
Spanish Suunto athlete Joaquin Perez also looked out for community initiatives to help his community cope. Back in April he told us: “A good source of inspiration and motivation for the community are the multiple solidarity initiatives that exist, for example in Spain last Saturday there was an initiative to raise funds for COVID-19 research where more than 7,300 athletes ran in their homes and raised almost €83,000,” he says.
Click to read more about how Suunto athletes adapted to life in lockdown.
Go France!
Respect to Suunto users in France for having the highest total ascent numbers! They also had the highest total meters for all workouts combined in both running and cycling.
And, just like in 2019, the French had the highest "adventure running ratio": our French community ran 15 times more on the trails than on the treadmill!
We stayed upbeat
Even with tough times the average mood our users selected after each workout was "very good". This is slightly higher than the year before in spring 2019. By the time autumn arrived in the northern hemisphere it was about the same as 2019.
Check out our article about making your best workout playlist ever, and give your mood a boost on your next workout!
The most active countries were …
Take your hats off to Finland, South Africa, Sweden, Russian and Poland for having the most active Suunto users. It’s interesting South Africa is the only country in the southern hemisphere to make the list. It also went into lockdown early.
These places caught more Zs
Finland, New Zealand, Netherlands, Estonia, Belgium came out on tops for getting the most sleep. Respect to Finland for having the most active users and also the users that got the most sleep. The Finns were also the only ones sleeping more than seven hours a night on average. Impressive!
Learn how sleep can make you a better athlete!
You sport freaks mix it up
In 2020, the average number of different activity types per user was 4,2. This means an average Suunto user enjoys more than four different sports, with running the most popular.
On average, our users tracked 66.5 total workouts of any given type during 2020.
Click for 12 ways to change up your training over winter
Walking booms
When things get tough, conventional wisdom says to take a nice, long walk. Somehow Suunto users must have got the memo because there was a massive 70% increase in that activity among our users. What does this tell us? It could be that because so many of us were doing home office we found more time to take walks. Maybe with family at home, too, we took more walks together. Whatever the reasons, it can only be a good thing.
Read our articles on walking:
How to walk your way to good health
How to improve your walking technique
How to walk mindfully and its benefits
Other increases
Hiking amongst our users also had a big increase, by 37%. Mountain biking increased by nearly 20%. Unsurprisingly, there was a big increase in indoor cycling.
Swimming drops off
With pools closed, swimming dropped off with our users. Even with vaccinations available, this trend will probably continue into 2021. Our solution? We recommend you triathletes and swimmers pivot to open and cold water swimming. Read our articles on how to do them safely.
10 reasons to enjoy open water swimming with Suunto
What you need to know about cold water swimming
Diving booms!
Put your fins together for the divers! Landlocked lockdowns didn’t stop our community of explorers from venturing underwater with an average of 15.5 m depth for divers and 6 m for freedivers.
In a year of backyard adventures when divers explored what treasures their local sites have to offer, August was the busiest month on record.
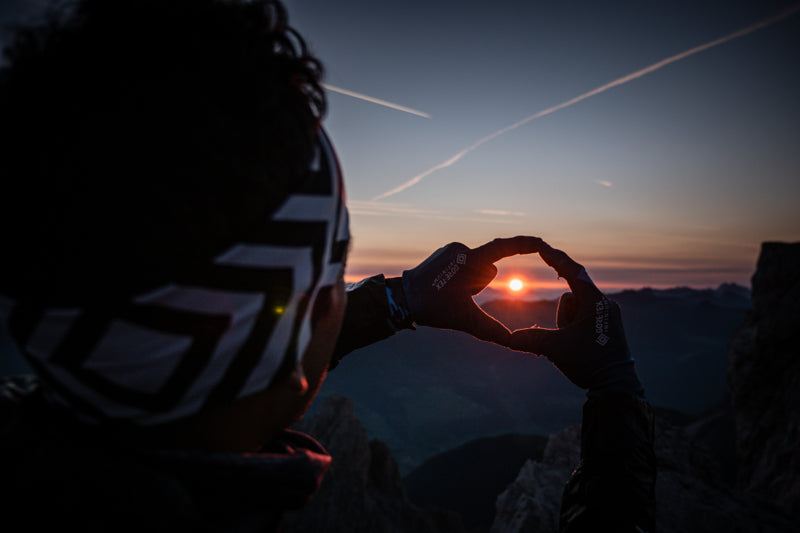
Lead image: © Philipp Reiter
Read more articles
10 must-read Suunto articles from 2020
7 tips for running in the rain
14 tips for backcountry skiing this winter

Sustain your Ability
Suunto athlete Lucy Bartholomew has published a book of her favourite recipes. Called Sustain your Ability, available in print and as an ebook, the plant based cookbook is loaded with delicious meals and treats designed to keep active people fuelled and thriving.
“These are all recipes I’ve used to pursue my athletic pursuits from the age of 15 when I started, says Lucy, now 24. “I made the book for people who are trying to sustain an active lifestyle. I was going to call it ‘sustain’ which means to nourish, to thrive, to continue to live, and ‘sustainability’ is the ability to do that for yourself. So it’s for people who want to live a consistently sustainable life. This isn’t a book with some sort of dietary fad – like ‘follow this diet for one month and you'll reach peak fitness’ – it’s for those who are passionately dedicated to being active in the outdoors.”
Now available for download, the book was three years in the making. A self described foodie, Lucy initially posted her favourite recipes on her blog and shared them via social media. Then the COVID-19 pandemic hit and the Melbourne based runner suddenly found herself in lockdown, and prohibited from travelling more than five kilometers from her home.
“I was thinking I’ve got to have a goal during this time otherwise I will lose motivation,” Lucy says. “COVID gave me time at home with a kitchen, it gave me time because I wasn’t training as much which also gave me a lot of energy. It was a nice distraction. It kept my dad and I very full.”
While all the recipes are plant based or vegan, Lucy says they are easily adaptable for people who eat dairy products or meat. “The recipes have been inspired by my travels,” she says. “After Western States in 2018 I went to Mexico where I learned about the culture and the way they make things. Then I went to Nepal and that’s where the dal recipes came from. The meals these places produce are made with ingredients that aren’t super rare or expensive, they normally consist of rice and beans.
“They are all meals I enjoy before, during and after runs,” Lucy continues. “It really shows how after nine years in the sport and the fact I still love it is because I’m able to be sustainable in the way I approach it, just like the way I eat.”
Read more articles
9 bits of positivity from a crazy year
10 must-read Suunto articles from 2020
7 tips for running in the rain

9 bits of positivity from a crazy year
It’s been one heck of a year, to put it politely. The COVID-19 pandemic shook the world and pulled the carpet out from under our feet. All our plans, goals, normal daily routines were thrown to the wind before we could get our pants on. It’s taken us a while to get our balance back.
This is especially so for athletes who, like musicians and performers, no longer had events to train for and travel to. The race calendar was suddenly empty. Yet, somehow training had to go on. We’ve all had to pivot and find ways to stay inspired.
Suunto’s ambassadors all found ways to stay stoked this year, and continued to inspire others along the way. We caught up with some of them and asked what they’ve learned, and got nine timeless, and positive lessons all of us could do with.
Be like water
South African ultra runner Ryan Sandes had big plans for 2020, and they all went out the window. “It’s been really important to be fluid with life in general and with your training,” he says. “When I say fluid, I mean to be adaptive and move with the situation. It’s important to just make the best out of the current situation and find creative ways to mix up your training.”
Ryan mixed it up by running a 100 miler in and around his home in Cape Town during lockdown in April. The total course length was 110 m, and he did it about 1463 times. The total elevation gain totalled 6000 m. His neighbours thought he was crazy, and stayed up during the night to support him. Hit play on the video above to watch his mammoth home run!
Lucy Bartholomew published a plant-based cook book this year.
Focus on what you can control
This tip has been a big learning for Australian ultra runner Lucy Bartholomew this year. In July, a strict lockdown was imposed in Melbourne. Residents were only allowed out of their homes to exercise and to purchase essentials for no more than an hour a day, and could go no further than five kilometers from their homes. “It taught me to focus on the things I can control, like my effort and attitude and not overly stress and worry about what I can’t control,” she says.
Instead of stressing, she focused on cooking delicious food and creating and publishing a cookbook, called Sustain your Ability. “I think the act of cooking and nourishing our body has been highlighted over this period as we have had more time at home so it’s really cool to connect with people around that.”
Emelie Forsberg listens to her body, and knows when to push, and when to rest. © Kilian Jornet
Accept where you are at
It’s not surprising many of us lost motivation this year, especially early on. “I went through a struggle with motivation and then got it back and it was such joy!” mountain athlete Emelie Forsberg says. “Also becoming pregnant with our second child, I couldn't train because I was just too tired. So that has also been a mental challenge – trying to climb out of the hole of tiredness was interesting.”
The takeaway is it’s important not to judge yourself if your motivation is low. It’s natural for it to wax and wane, especially in a year like this. Rather than give yourself a hard time, observe it, and accept that’s where you are at now. You might just need to give yourself time to rest, recover, adapt and find new goals. It will come back.
Small goals make a difference
When everything we normally look forward to has been cancelled, it’s natural to feel rudderless for a while. That’s why it’s so important to find new goals to get a sense of direction and achievement.
“I set small goals every day, even as simple as ‘do a load of washing’ and saw that as a success and as an achievement,” Lucy says. “Sometimes we don’t give ourselves credit for just waking up and getting out of bed every day – that takes guts!”
The highlight of 2020 for Courtney was attempting an FKT on the 805 km Colorado Trail.
Run for the love of it
For US ultra runner Courtney Dauwalter, who thrives on racing, her daily goal was simply to get on the trails near her home everyday.
“I learned that I love training and running no matter if I have a race or not,” she says. “I loved getting out the door every day to explore our local trails even though I had no idea what I was preparing for.”
Greg Hill got his own garden going, and supported his neighbours to do the same. © Greg Hill
Care for your community
With lockdowns happening across the world, and our usual social circles are disrupted, many of us have rediscovered the importance of local, even micro local, communities. For skimo legend Greg Hill, supporting his local community gave him and his neighbours a new sense of purpose.
“I recognized the importance of community and how we really need to work together to weather this storm,” Greg says. “As an athlete with a voice, I used my voice to empower other ideas. I pivoted and started figuring out how to inspire people in other ways. We started a committee aimed at making Revelstoke more food secure. I brought in 100 trucks worth of soil to fill people’s gardens so we grow more food locally. It gave myself and others purpose while we were contained on our properties.”
Investing in strength pays dividends long term. © Graeme Murray / Red Bull Content Pool
Build strength
Ryan Sandes and Lucy Bartholomew both spent much more time on strength and mobility training this year, and they say they feel better for it. Lucy also focused on recovering from an injury she ignored in 2019.
“Usually training takes me two to three hours and it was almost refreshing to accept that this is what it is and to instead limit it to an hour of power (remember Melbourne residents were permitted out of their home for only an hour a day),” Lucy says. “I think it made me more efficient and then I spent more time in my home gym doing more strength work and yoga, which has been so much fun and really rewarding.”
Family, good health, tasty food, fresh air – Emelie is grateful for the little things. © Kilian Jornet
Be grateful for what you have
Stuck indoors, and bombarded with bad news about the pandemic, it’s easy to overlook the positive. But for Emelie Forsberg this year has brought home to her how important it is to focus on all the wonderful things we have.
“I think this pandemic has made us appreciate the small things in life that we sometimes take for granted, and that we value even more now, like being with family and staying healthy,” she says.
Savour every hug
Remember back in 2019 when people were hugging and high fiving all over the place? Ah, such fond memories. All of our Suunto ambassadors are longing to reconnect to their sport communities when the worst of the pandemic is behind us.
“I will never take another hug from granted!” Lucy says.
Lead image: © Philipp Reiter
Read more articles
14 tips for backcountry skiing this winter
10 must-read Suunto articles from 2020
8 tools for tracking the weather with Suunto

Getting started with our partner ecosystem
Training isn't easy on anybody. The purpose of our ecosystem is to enrich your experience and relieve a part of that "training load.” We have partnered up with leading product & service providers in the sports and wellbeing industry and a few other companies to make sure you get the best pre, during and post-workout expertise.
In the following tutorial, we will take you through the following topics:
How does our partner ecosystem work?
Who are our partners & what are the apps/platforms for?
What is the Value Pack & how do I gain access to the apps?
How does the Suunto partner ecosystem work?
Understanding how our partnerships work is the first step to a better training experience together with your Suunto device. The ecosystem comprises various tools, products and apps:
Suunto compatible 3rd party partner apps and services.
SuuntoPlus features in your Suunto 5 & 9 and downloadable apps via Wear OS by Google on your Suunto 7.
Compatible partner devices (i.e., sensors) and commercial offers from our partners via the Suunto Value Pack.
Assuming you have not used our services before, and you have just received your watch (Suunto 3, 5, 7 and 9) or you are just now reading about the partners, here is what you need to know to get started:
1. Your watch will connect to the Suunto app, which is the connector between what your watch records, or what you need your watch to show, and the platforms that might provide that information (be it a training plan, a route, temperature information, etc.).
This means that you can use your Suunto app or our partners’ online platforms/apps to analyze the information your watch recorded or to get the needed information for your training to your watch.
Create an account with the Suunto app, pair your watch and start exploring. We’ve gathered here all the information to get you started with the Suunto app. All of our partners and their apps are available in the Suunto app, under the Partner services tab of your Profile.
2. For our Suunto 5 or 9, we are continually improving the watch’s software by adding SuuntoPlus features to it. They are specific 3rd party information your watch will be able to record if you select any of the options in the watch’s dropdown menu before pressing the Start button. The data is displayed in the Suunto app and the respective partner apps after syncing your workout. Here is how you get started.
There are also various apps that you can use with your Suunto 7. For example, you can keep track of the local weather forecast with the help of Myradar directly on your watch.
3. You can use your watch with different sensors such as cycling power sensors, smart trainers, running sensors and heart rate belts. Use critical information to better plan your workouts or understand what your body is going through when training.
Who are our partners & what are the apps/platforms for?
In the past years, we have created fruitful connections with essential training and wellbeing service providers. You can check here a list with the current partners and a direct link to the Getting to know and started pages explaining how to get the app into use and what it will help you with.
In case you have already created an account for the Suunto app, you can go to the Partner services tab of your Profile and filter all the apps that show up into categories. Just tap on the type you’re interested in.
The Suunto compatible apps and services have a wide variety of tools. Get to work with your coach using TrainingPeaks or Today's Plan, prepare your routes using Wikiloc or Openrunner, view your hikes or rides with Relive or Adventurelog and virtually race your buddies with Ironman Virtual Club or UTMB.
You might notice that some of the services have a distinctive sign next to their logo. These apps are included in the Value Pack you automatically receive when you purchase a Suunto watch. We will talk more about it in the next chapter.
What is the Value Pack & how do I gain access to the apps?
The Suunto Value Pack is a collection of benefits offered by our partners. It comes with all the new Suunto watches and the deals vary from premium trials to free training plans and discounts.
We all want a free trial period for our subscriptions, a time in which we will be convinced (or not) by the value of the offered services. What the Value Pack does is:
It gives you the chance to try the best services out there (free of charge).
It provides you with discounts, free trials and special deals created by our partners for Suunto owners.
It helps you get started in the world of sports with everything you need, from coaches and training plans to routing services, nutrition tips and more.
After you’ve created your Suunto app account and paired your watch, an email will be on its way explaining to you how to redeem the Value Pack. The Valuepack is offered only for new products, so you will not receive the Valuepack email with the offers if you have a second-hand product.
You can choose any of the available partner services and start a free trial. The deals vary depending on the services offered and you can choose to redeem any of them. You will be provided with “redeem” links and codes and have two months from the date of purchase of your device to activate the Pack. Otherwise, the offer will expire according to our Terms & conditions. After the trial period has expired, you can decide which apps you wish to continue using and check their offers for premium memberships. Regardless if you choose to continue with a premium membership or not, you are still able to use the basic features provided by the partner together with your watch via the Suunto app.
Note: for any issues or questions that might arise, you can find help via our own and partners’ support pages. The Valuepack will change over time, so keep checking the valuepack page for the latest offers.
Lead image by Philipp Reiter


Skimo legend Greg Hill shows his trainer some love
Suunto ambassador and record breaking ski mountaineer Greg Hill has achieved some incredible things; skiing two million vertical feet (609, 600 m) in a single year, climbing and skiing over 190 mountains, his inspiring Electric Adventures challenge in which he has so far climbed 100 summits without using any fossil fuel. On top of this, add to the list being an awesome dad, and a voice for climate change action.
Yet, behind every elite athlete, is at least one trainer who helps to keep the fire burning and things progressing in the right direction. This is true for Greg who has had the same highly sophisticated trainer for the last 21 years. When the COVID-19 pandemic hit, Greg had the time to sit down and reflect on this relationship.
Thanks to my trainer
By Greg Hill
As Covid hit, we all sat back and reflected on our lives. What I reflected on most was my relationships and their importance. Of course, there were family and loved ones which are the most important. Yet, there were also others whose importance in my life became obvious. Relationships with co-workers, neighbours and, now that I think about it, a long-lasting relationship with my personal trainer.
I should introduce myself. I am Greg Hill, a super passionate backcountry skier. This passion has driven me to find first descents, push endurance records and explore places like no one else. My passion lies in pushing into the unknown; be it the physical or the mental landscape.
I first met my trainer in a parking lot in Whistler in 1999. It was a moment fated by the stars. I knew I needed a trainer, but I never understood how important the relationship was going to be. This began right at the start of my obsession with vertical travel in the mountains. I knew little, but dreamed big. How could I push and evolve my skills without a proper trainer? Most likely I wouldn’t have accomplished any of my goals without this connection.
I had no idea how much this relationship was needed, but we hit it off right away. The moment I was told how fast I was moving upwards, I wanted to excel and push that number higher. With my days being diligently tracked I pushed higher and further for hours. Multiple summits, long, long days, bigger days than I had ever done before. Always the incessant qualifying of my efforts, always the numbers telling me how hard I was working. It was addictive being accountable.
Our relationship developed into one of trust and commitment. I was pushed and driven to higher numbers and heights, always keeping track of my times, urging my vertical speeds faster and faster, always wanting me to go higher and further; 30 vertical feet a minute, come on you can do better, 50 feet a minute, that’s it … hold on… push and push… you've got this!
One of my first goals was to max out how much I could do in a day’s effort. We diligently worked on getting my one hour vertical as fast and high as possible. My trainer coached me to a point where I could glide and slide my way uphill very fast for an hour at a time. He watched me hit personal best after personal best. Always keeping track and letting me know how well I had done. Or poorly depending on the day.
Eventually with this coaching we saw the numbers get higher and higher, 10k, 20k, 30k, 40k in a day. Finally, my biggest vertical day ever, 50 000 feet (15, 240 m) in 23.5 hours. My coach kept those numbers and I was proud. Yet we knew we had more to do … lots more.
For many years we worked at doing 3000 m days as fast as possible, pushing and working my fluidity until it felt normal to go out for four to five hours and log 3000 + meters of uphill travel.
As a team, we worked up to one million feet in a winter, then eighty days over 3000 m in a season. Finally, we decided it was time for my biggest year ever. With my coach at my side at all times, I felt like we could challenge the world.
As scared as I was of the audacity of the task, I knew that together we could make it happen. My drive and the constant progress reports would keep me motivated. The year was going to be all about getting out every day and moving up and down mountains. For 365 days I went to bed with my trainer beside me. Immediately on waking I was told how much vertical I had climbed up to that point. It took exactly 270 days out of 365 to push my numbers over the two million feet (609 km) mark but it was the endless support and drive of my trainer that kept me getting up in the morning.
Greg celebrates back in 2014 after completing his March Madness, skiing 100.000 meters of vertical in a month. His trainer played a key role also in this challenge!
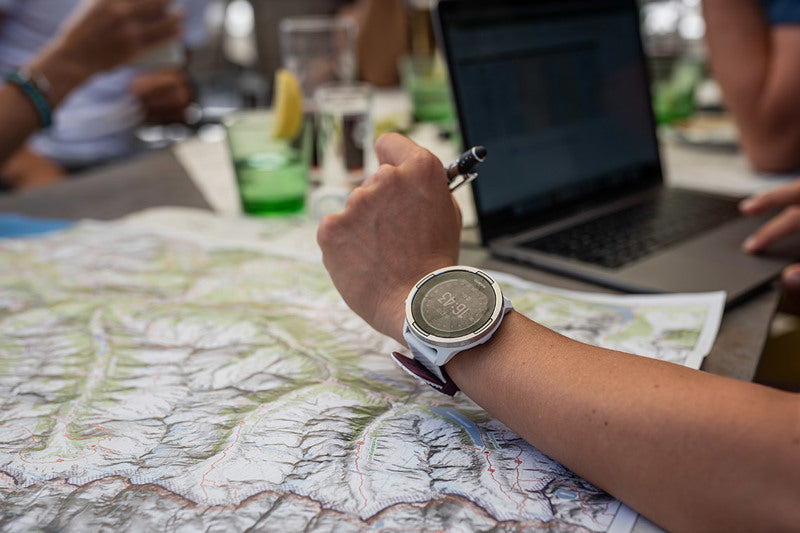
In the last 10 years the information has changed and there is so much more that I get from my trainer: GPS lines that show the adventures with distances, apps that have all my efforts on them. I am even told how much time to relax between training sessions, though I find this one hard to follow!!
These days my trainer captures all my efforts to stay off my “dad bod” and keep pushing my personal limits. High intensity training is key to pushing back against the effects of age. Now I am pushed hard for two minutes, then slow my heart rate down, then back up for two minutes, pushing hard into the 90 % of effort range. My heart rate is watched, recorded and displayed. I know if I am pushing hard enough to lose these love handles.
By now it may be obvious the trainer I met in the parking lot in Whistler was my first altimeter watch. It has been an incredible time, using it for endless hours of quantified fun. I can honestly say that without the constant updates, and the evolution of these watches, I most likely would not have been as obsessed and pushed to excel in my life.
All images: © Bruno Long
Read more articles
14 tips for backcountry skiing this winter
10 must-read Suunto articles from 2020
7 tips for running in the rain


14 tips for backcountry skiing this winter
With many ski resorts closed this winter due to the pandemic, the backcountry is our one and only saviour. It means hard work, more exploration, memorable adventures, and an opportunity to burn off all those Christmas calories. Crucially, it also means more risk.
We caught up with mountain guide, alpinist, photographer and passionate outdoor educator Mark Smiley about where our heads should be at this ski season. The upshot is if we’re going to be spending a lot more time in the backcountry, then we need to be refreshing our skills now so come pow time we can bring our A game, and not wing it.
To help Suunto users skill up for winter, Mark’s offering a $50USD discount on his new Comprehensive Guide to Avalanche Safety course. The offer expires at midnight on December 20.
Read on for Mark’s 14 tips to ensure you have an awesome and safe backcountry ski season.
Get your gear now
It’s been a difficult year. Aside from the human and social cost, Mark points out the pandemic has also disrupted supply chains and product distribution. This could mean there’s isn’t the normal level of gear in stock, so it might run out quickly as snow starts to fall.
“Make sure you have the gear, or go out and buy it now before people make a big run on it,” Marks says.
Know how to use that gear
Next up, make sure you know how to use that gear. “I mean really know,” Mark says. “Consider doing a refresher course to ensure you’re skilled up for the winter.” Be a student of the sport by signing up for one of Mark’s online courses designed to make you a safer, faster, smarter skier.
Remember avalanches play for keeps
Heading out into the backcountry is a serious business. “It can be life and death out there,” Mark says. “Don’t approach it in a cavalier way.” Take it seriously and ensure your head is screwed on. Your loved one’s will thank you for it.
Improve your avalanche skills at a beacon park
Mark strongly advises you and your ski partner to go to a beacon park to improve your search and rescue skills. That way when it’s time to head out into the hills, you’ll truly know what to do in an avalanche emergency and feel more confident. If you don’t have a beacon park nearby, get out in the snow with your friends and play around with your transponder kit.
Realign your expectations
With resorts closed, you’re not going to be gliding down manicured slopes all day. Backcountry skiing is hard work, maybe 75% perspiration, 25% inspiration.
“At the resort you're going to ski down hill like a 1000 times,” Mark says. “Much more than you will backcountry skiing, which is great for keeping the winter weight off!”
Keep that in mind and plan your adventures accordingly.
Pick objectives that match your skill level
Know your skill and experience level, and carefully, maturely, sanely choose tours that match it. Don’t put you or your partner in situations you’re not trained for. If you choose well, you’ll have an awesome time, and will come home with cool video to share.
“And if you’re just starting out, you need to pick non avalanche terrain,” Mark cautions. “There are off piste spots in the backcountry where there will never be an avalanche and you can safely ski in that terrain. Look for gladed slopes with a 25° gradient or less. It can still be a lot of fun to ski those!”
Do your homework
If an area takes your interest, study it thoroughly before heading there to shred. Study the topographical map, read trip and weather reports, contact the local avalanche center and get the what’s what. Find out where the sweet spots are, as well as where the best avoids, and the stay clears are.
“There’s no silver bullet instruction that will allow you to go out and have no risk,” Marks says. “You need to do your homework and never stop learning and educating yourself and keeping in mind that risk is inherent to the activity.”
Find the right partner
Backcountry skiing means heading out with one ski partner at the very least. Choosing the right ski partner for you is important. You want someone who has a similar level of experience, skill and fitness.
“It’s not important how fast or slow you are, but more about matching your abilities with your partners abilities that makes for great partnerships,” Marks says. “Then you can have cool experiences and learn together.”
Look for new lines up
With potentially a lot more people out in the backcountry this ski season, it means the usual skin tracks up will probably become much more well trodden.
“Most slopes will have a standard skin track that has been used in the past most of the time,” Mark says. “If there’s increased traffic, then that skin track might be exposing you to avalanche hazard from above. Be ready and able to take a different track up to avoid that.”
Read our article 7 tips to find a safe track up the mountain.
Watch out for fatigue
Remember the backcountry demands much more of you than skiing at a resort. So factor your fitness and endurance level into how you plan your trips.
“Fatigue is a huge factor because it can blur good decision making,” Mark says. “It can turn it from choosing what’s the best in terms of risk assessment into what’s the easiest. You need to make sure you have the fitness reserves to be willing to put the skins back and correct a potential error. You don’t want to be out with someone who’s much faster than you, forcing you to be in intensity zone four most of the day.”
Read about intensity zones here.
Slide your skis
“The movement of ski touring isn’t an inherent skill,” Marks says. “It’s like learning how to surf or swing a golf club – it takes time. There’s a right and wrong way to do it. And if you do it right, it’s way more enjoyable.”
For example, the action of trudging up the mountain can result in epic blisters if done poorly. When you skin your way up, Mark advises to try to slide your skis along the surface of the snow, rather than lifting them off. Sliding them is more efficient, reducing fatigue.
Grams matter
“Lighter packs equal enjoyable tours,” Mark says. “Carry only what you need and leave the rest at home.”
And even if your jacket is made of alien technology, when you’re out ski touring it won’t breathe fast enough.
“You’re going to get really hot, so take that jacket off, and make it more enjoyable for yourself,” he says. “You don’t want to make yourself all sweaty.” Pack it, and only use it to maintain your body warmth when you take breaks.
Share your observations
Be a backcountry angel, and share any avalanche observations with the local avalanche center. This helps to give the forecast as much relevant data as possible, which contributes to keeping people safe.
“A recent avalanche is the biggest, most important piece of data for forecasting,” Mark says. “You don’t need to know all the technical jargon; If you see an avalanche, try to take a 10 second video of it, note the location, and submit that observation to your local avalanche center when you get home.”
Debrief your trips
There’s always something to learn, always a way to get better. Mark points out two important principles to keep in mind: just because you got home safely doesn’t mean you did things right, and “past performance is no guarantee of future results”. Debriefing after trips is a way to keep yourself honest about the risk you are exposing yourself to, and the quality of your decision making.
“Get into the habit of asking yourselves, ‘did we make good decisions today’?” Mark suggests. “Or did you just get lucky? And if you just got lucky, a subsequent question to ask is, ‘when were we most exposed?’. And ask yourself, if you had Groundhog Day how would you lessen that exposure next time?”
All images: © Mark Smiley
Read more articles
8 avalanche safety checks to tick off before the ski season
Know the ropes – staying safe with crevasse rescue online
7 tips to find a safe track up the mountain


